Configuring Audio Preferences/Settings
First, you'll need to check your audio preferences within Ableton and ensure your input and output devices are set up properly. To do that, take the following steps:
How To Configure Audio Preferences/Settings for Recording in Ableton Live
- Open the Preferences menu with one of the following key commands: Control + , on Windows, or Command + , on Mac. (Note that in some versions of Live, Preferences is referred to as Settings.)
- Click the Audio tab.
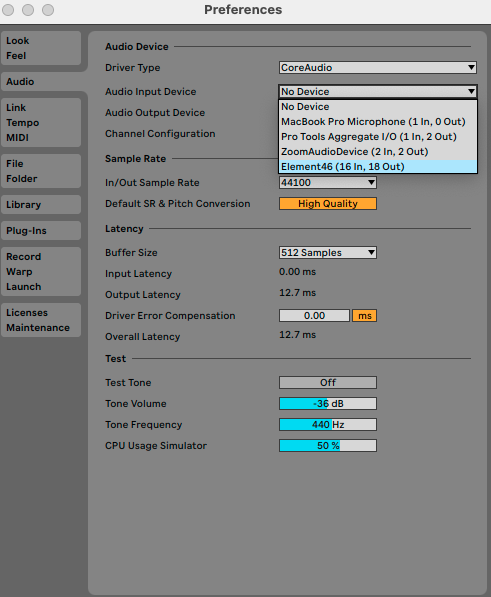
- Set the Audio Output Device by selecting your audio interface from the Audio Output Device dropdown menu. Note that you can also use your built-in speakers (and/or your built-in microphone for input), but for the rest of this article, we'll assume you are using an audio interface.

- Set the Audio Input Device by selecting your audio interface from the Audio Input Device dropdown menu.
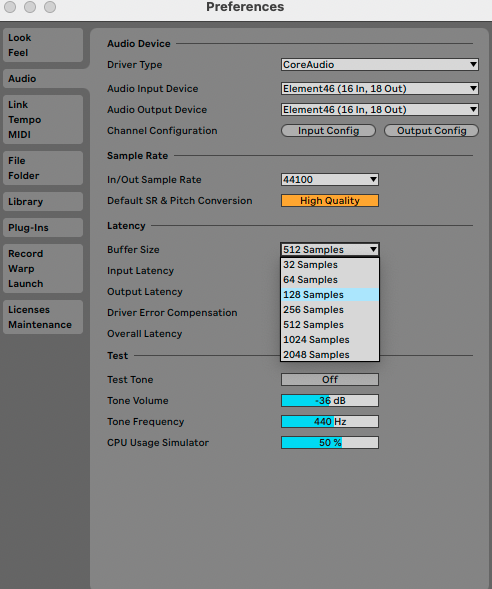
- This is also a good opportunity to check your Buffer Size and change it if necessary. The lower your buffer size, the less latency you will get. It's worth noting that you may experience audio issues, such as distortion or digital noise, if your buffer size is too low. We'd recommend starting at 128 samples and adjusting as needed from there.
A Note about Input and Output Configurations
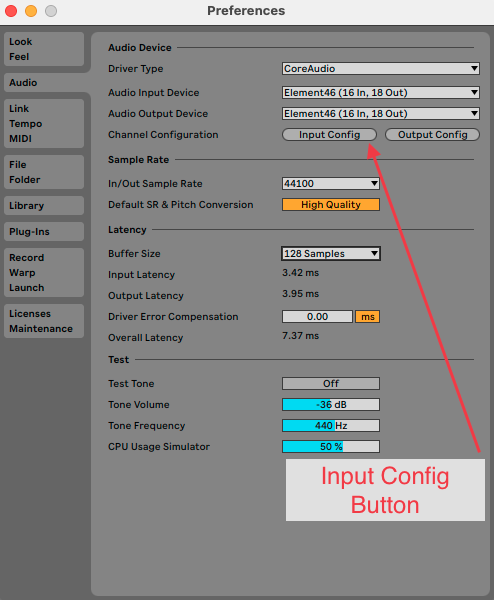
You may have noticed the Input Config and Output Config buttons on the Channel Configuration line of Audio Preferences. If your audio interface has more than two inputs and/or more than two outputs, and you want to use those additional inputs and outputs in Ableton Live, you'll need to enable them. To do that (using input as an example):
- Click the Input Config button.
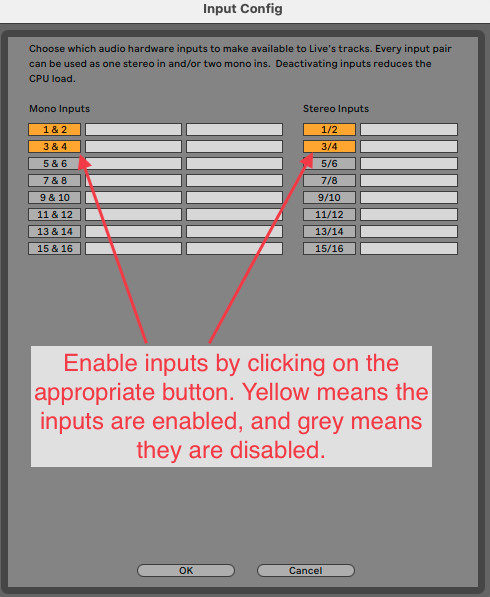
- Enable any additional inputs you'd like to use by clicking on the corresponding number so it turns yellow. Repeat the same steps for the outputs as needed.
Preparing Your Session for Recording
Now that your audio preferences are set, the next step is to ensure you have the right kind of track set up, and your routing is correct on the track. By default, Ableton Live opens in the Session view, which is where we'll start. Also by default, each Ableton Live session opens with two audio tracks and two MIDI tracks already created. To ensure you are ready to record audio on a track, take the following steps:
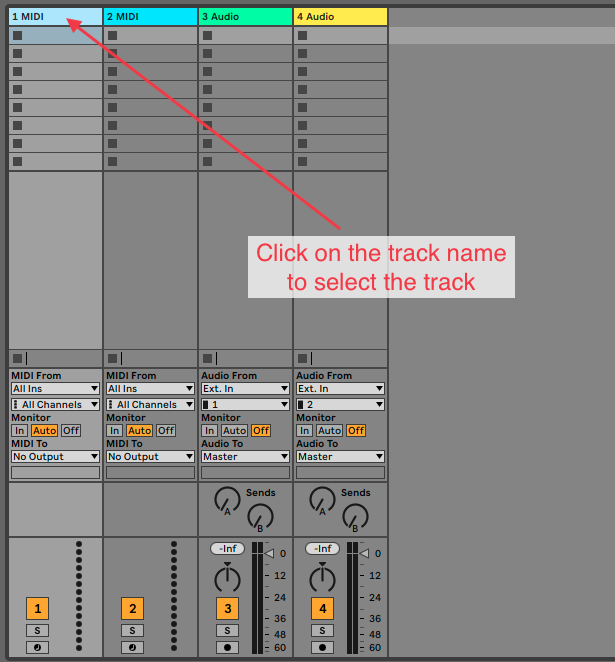
- Let's start by deleting the MIDI tracks, as we won't need them for this tutorial. To delete the first track, select the track by clicking on the title (1 MIDI), then hit your delete key to delete the track. Repeat for the second MIDI track (which will also be called 1 MIDI after you've deleted the first track).
- Next, name the first audio track appropriately. For example, if you plan to record guitar, you may want to call it Guitar. To rename a track, either right-click on the track and choose Rename then type the track name. Alternatively you can select the track, then use the Rename command (command + R on Mac, control + R on PC).
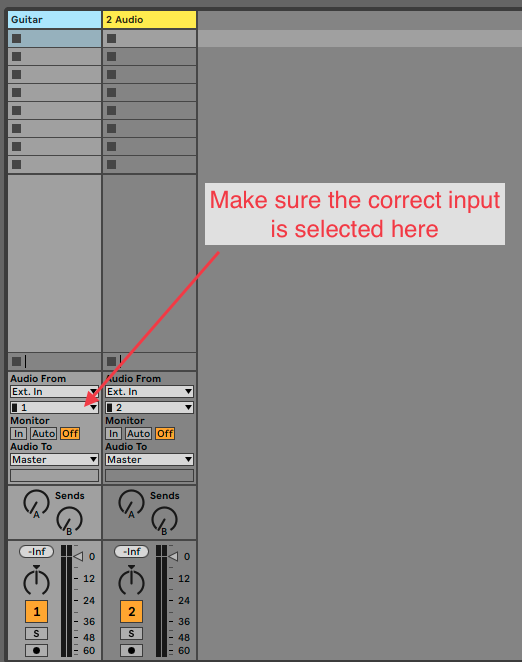
- On your first audio track, ensure the proper input is selected. To do that, select the channel number that your instrument or microphone is connected to in the second dropdown menu under Audio From.
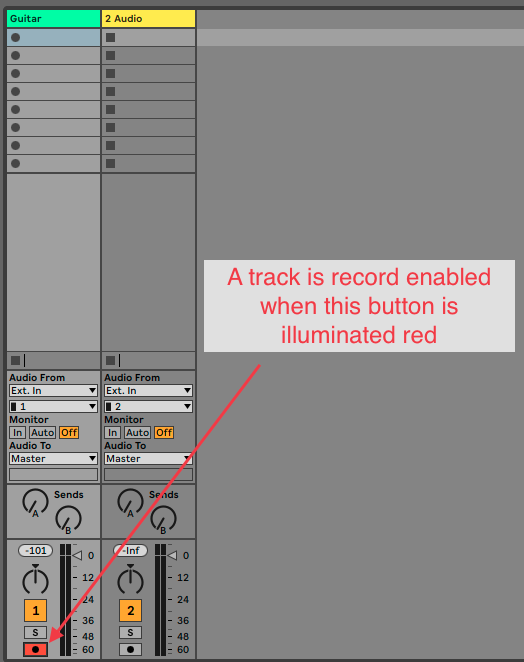
- Make sure the track is record-enabled by clicking the circle icon at the bottom of the track. Once the track is record-enabled, the background of that icon will turn red.
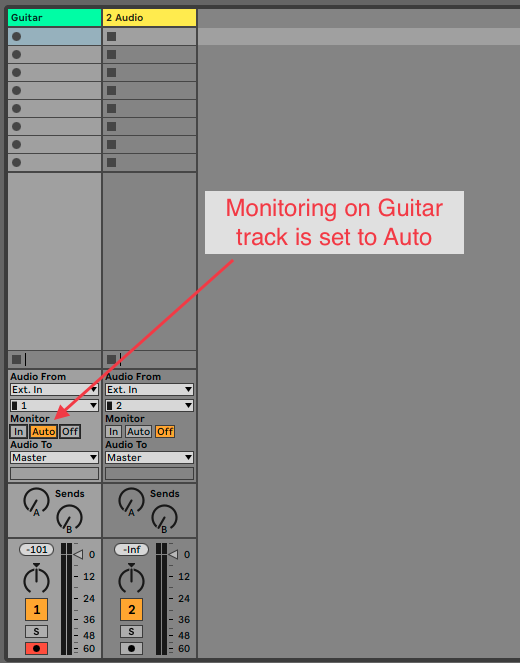
- Make sure Auto is selected in the Monitor section for the track. This will ensure that you hear the input of the track when you are recording, and the output of the track when you are playing back.
- If you are recording guitar and want to use an amp simulator, such as AmpliTube, instantiate that on the first track now. See the collapsed note below for instructions on how to do that.
How to Instantiate a Plug-in
How to Instantiate a Plug-in in Ableton Live
You can instantiate a plug-in on any kind of track (audio, MIDI, return, or master) or grouped tracks in Ableton Live. In the following steps, we'll use AmpliTube 5 as an example, and instantiate it on an audio track.
- Click on the Plug-Ins section of the Ableton Browser.
- Locate the plug-in you want to add to your track (AmpliTube 5 in this example). If you don't see the plug-in you are looking for, see the note about plug-ins below.
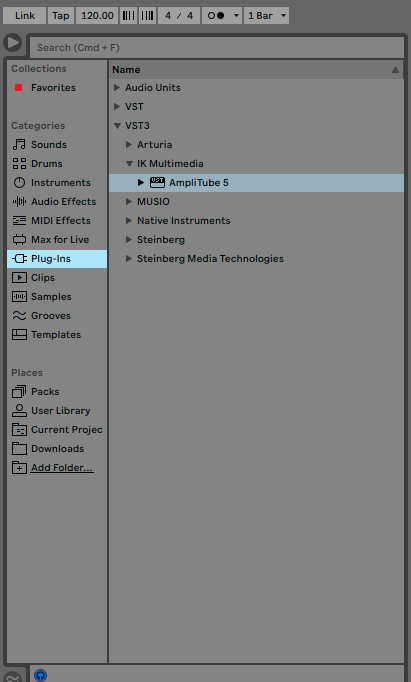
- Either drag and drop the plug-in onto the track, or click the track header once, then double click on the plug-in in the browser.
A Note about Plug-ins
How to Enable Virtual Instruments and Audio Units in Ableton Live
If you aren't seeing all of your installed plug-ins listed in the Plug-Ins section of the Ableton browser, it may be because you don't have all virtual instruments (VSTs) or audio units (AUs) enabled. To ensure you have them all enabled, take the following steps:
- Open the Ableton Preferences menu, and click the Plug-Ins tab
- Ensure the following are set to On:
- Use VST2 Plug-In System Folders
- Use VST3 Plug-In System Folders
- Use Audio Units
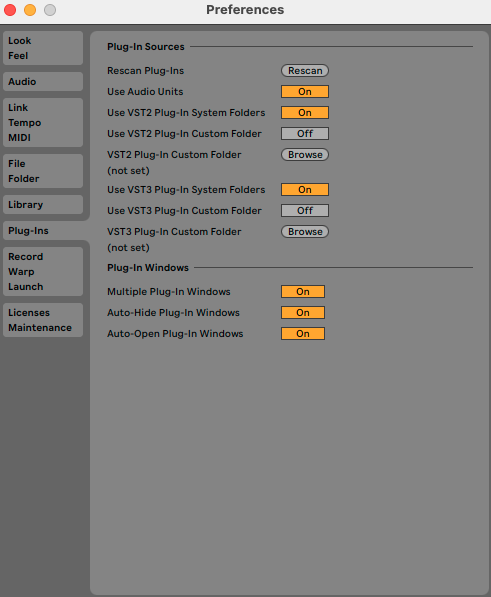
- Click the Rescan button on the Rescan Plug-Ins line
You may also want to enable the VST2 Plug-In Custom Folder and VST3 Plug-In Custom Folder options if you have plug-ins saved in a location other than the default. In that case, click the Browse button to select the appropriate location where those plug-ins are stored, then click the Rescan button again.
A Note about the Default Live Set
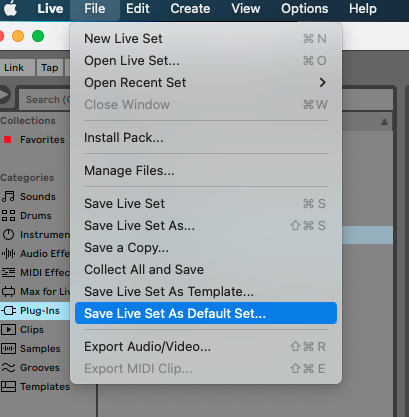
If you think you will be recording many projects using the same configuration, you may wish to save your current set as the default, so each new set you create will look like this one. If you'd like to do that, click the File menu, then choose Save as Default Set.
At this point you may choose to continue working in the Session view, but for the purposes of this tutorial we will switch over to the Arrangement view, which is more similar to what you would see in other DAWs.
To switch the Arrangement view, press the Tab key. As an alternative to using the Tab key, you can switch between views by clicking the icons in the top right corner of the Ableton window. Clicking the icon with three horizontal lines will display the Arrangement view, and clicking the icon with three vertical lines will display the Session view.
Importing a Backing Track
How to Import an Audio File into an Ableton Live Set
- Click the Add Folder button in the Places section of the browser.
- Select the folder where the audio you want to import is stored (not the audio file itself), then click Open. This will add the folder as an option under Places.

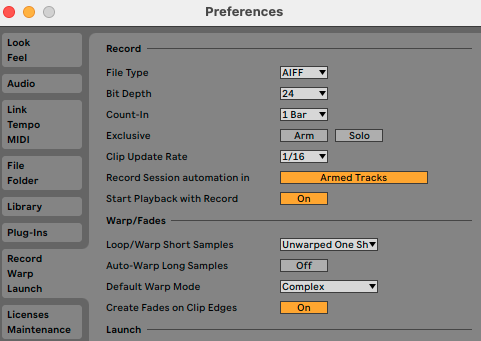
- To ensure you are not altering the original speed of the audio file once you import it, open your Preferences and select the Record Warp Launch tab. Ensure Loop/Warp Short Samples is set to Unwarped One Shot, and Auto-Warp Long Samples is set to Off.
- From the Places section of the Ableton Browser, access the folder where the audio file you wish to import is stored, then drag and drop the file into the timeline area corresponding to an empty audio track. Note that you can also drag the audio file to an empty clip slot on an audio track in Session view.
Recording
Now you are ready to record!
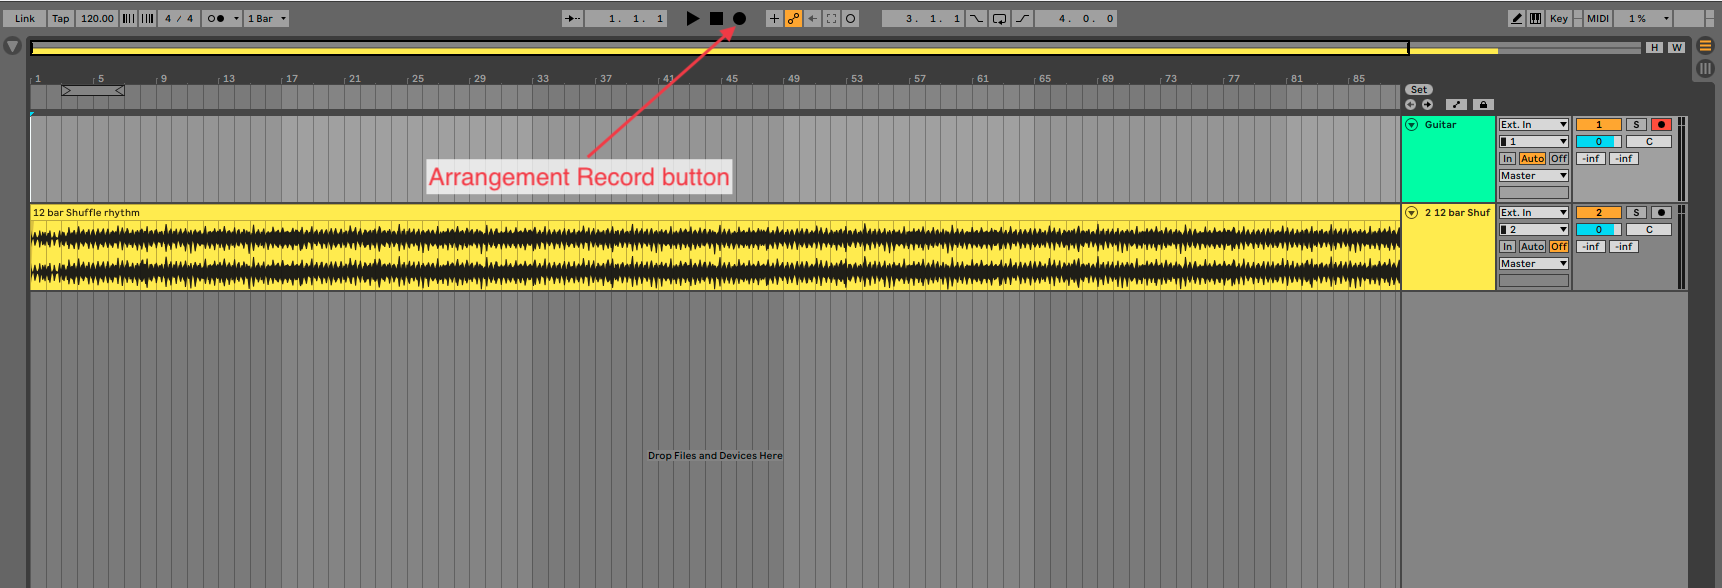
- Click the Arrangement Record button and record your part.
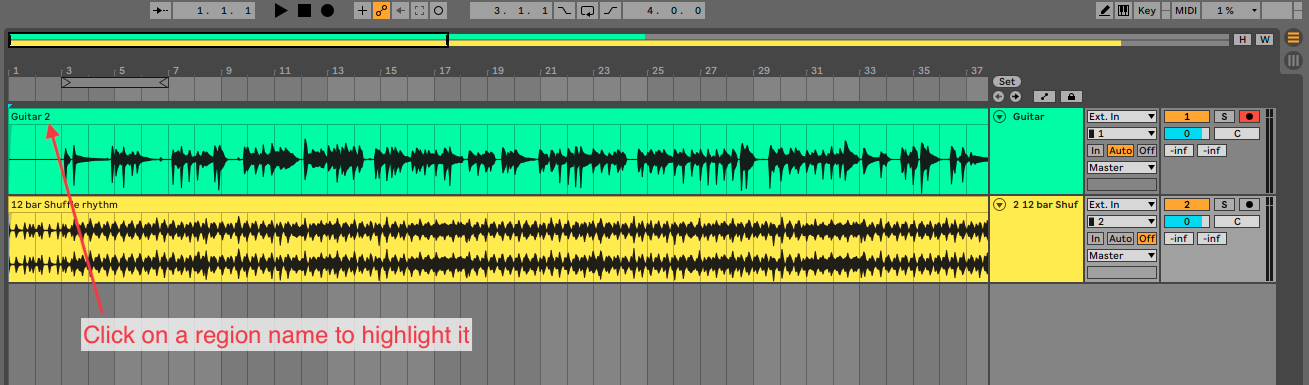
- When you are done, hit the spacebar to stop playback. If you aren't happy with what you recorded, you can delete it by selecting the newly created region, then hitting your delete key.
- You can repeat steps 1 and 2 as many times as needed until you are happy with your recording. Once you are happy with your recording, proceed to the next section of this article.
Exporting Your Recording as an MP3 File
How to Export an MP3 File from Ableton Live
Once you have finished a project in Ableton Live, you may want to export the project as an MP3 file. To do that, take the following steps:
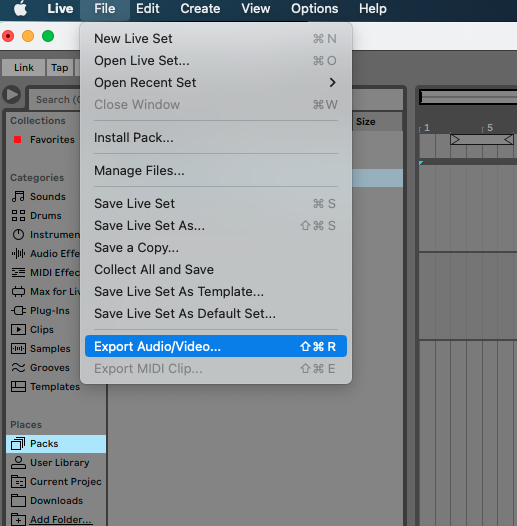
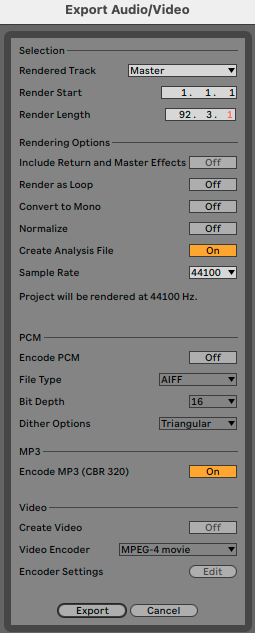
- In the Ableton Live menu, click File, then select Export Audio/Video.
- In the Export Audio/Video window, ensure Encode MP3 is On. If you want to simultaneously export a WAV or AIFF file, you can do so by ensuring Encode PCM is On, and the appropriate file type is selected in the File Type drop-down menu. Otherwise, ensure Encode PCM is Off.
- Click the Export button.
- In the following window, name your file, select a location where it will be saved, and hit Save to finish the process.
- Once the file has finished exporting, you can then find the MP3 file by navigating to the location on your machine where you chose to save the file in Step 4.
