Creating your Logic Pro Project/Audio setup
When you first open Logic Pro, you'll be prompted to either open an existing project, or create a new one. At the same time, you'll be given options for audio input and output. The following steps will go over how to configure your Logic Pro Project.
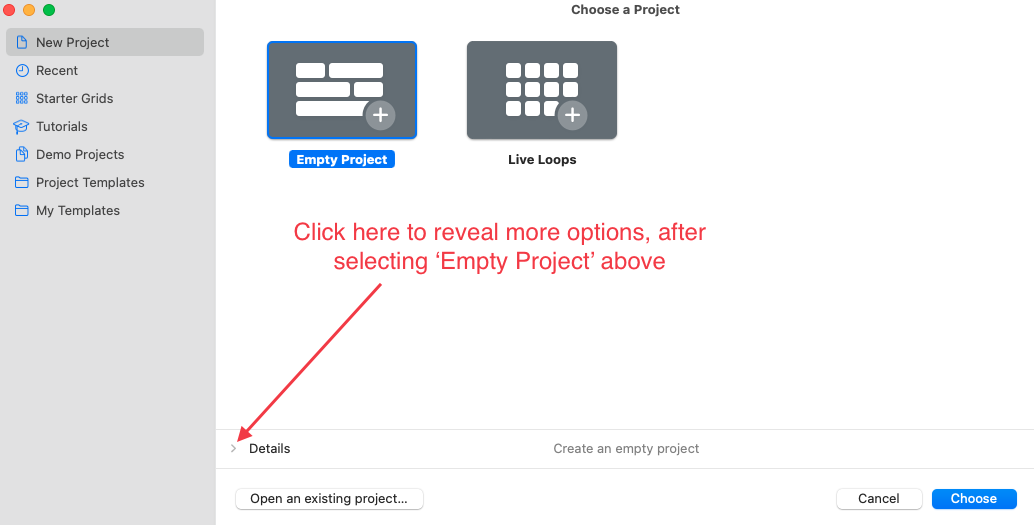
- After opening Logic Pro, if not already selected, select New Project in the left menu, then Empty Project in the main panel.
- Click the > icon next to Details to reveal more options.
- Set the Input Device by selecting your audio interface from the Input Device dropdown menu. Note that you can also use your built-in microphone, but for the rest of this article, we'll assume you are using an audio interface.
- Set the Output Device by selecting your audio interface from the Output Device dropdown menu.
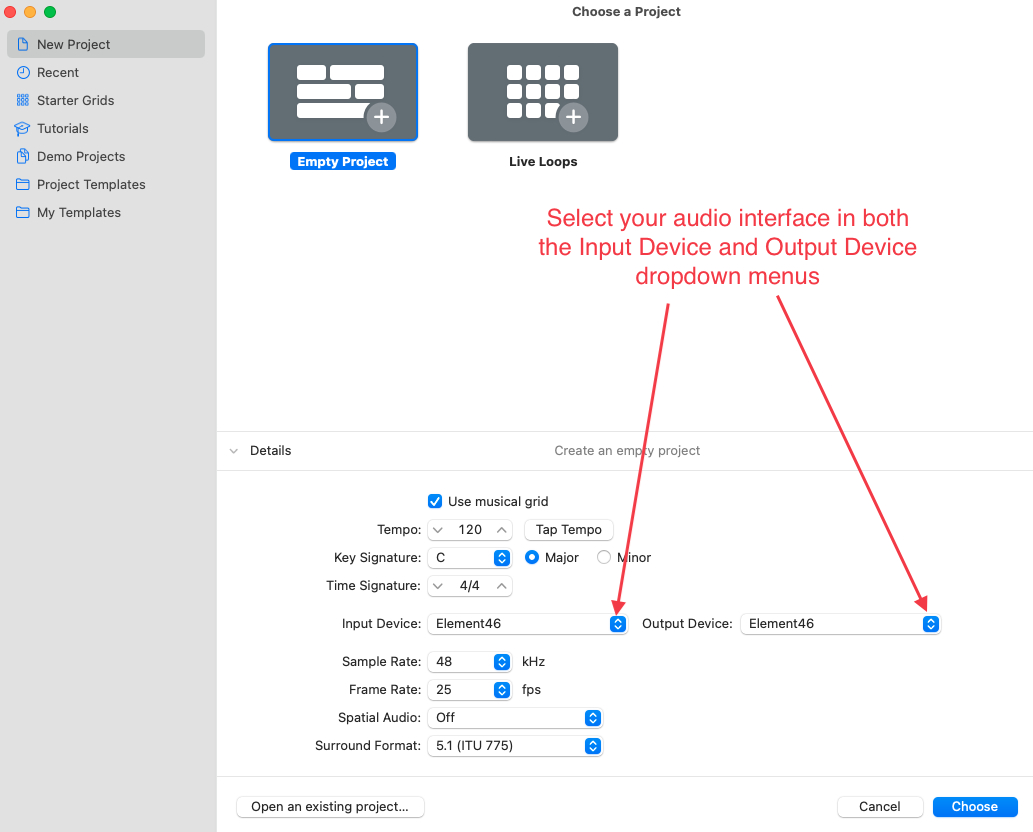
- Click the Choose button to create your project.
Preparing your project for recording
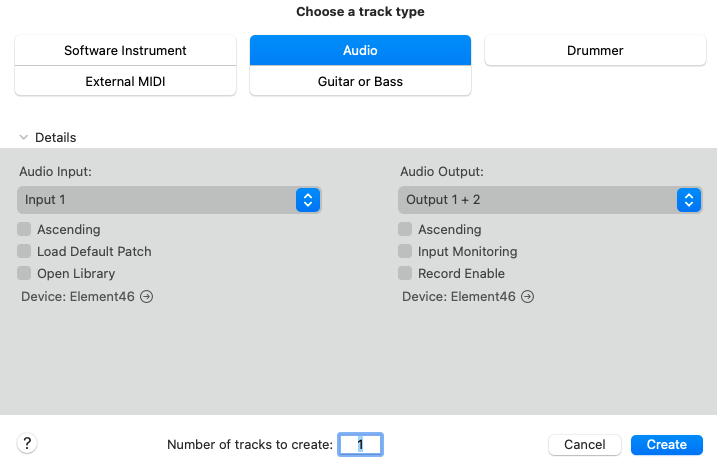
- After clicking Choose, you'll be prompted to create at least one track before continuing. Select Audio as the track type.
- In the Audio Input dropdown, select the input on your audio interface that your instrument or microphone is connected to.
- The Audio Output should default to Output 1+2, but if not, select Output 1+2 (or another set of outputs if that is more appropriate for your situation).
- Click the Create button.
- If you are going to be recording along with a backing track, create another audio track. To do that, click Track > New Audio Track.
- The new track will be record-enabled by default. Click the red R button on the Audio 2 track to disable recording on that track.
- Record enable the Audio 1 track by clicking the red R button on that track. Note, if you are using a microphone in your input chain, it is advised that you monitor with headphones rather than speakers to avoid feedback.
- To rename either track, double click on the track name, enter the new name, then hit the return key. You may want to do this for organizational purposes within your session, and so any regions you record will be named appropriately. For example, if you are recording guitar on the first audio track, you may want to name the track Guitar.
- If you will be recording guitar and want to use an amp simulator plug-in such as AmpliTube, instantiate the plug-in on your first track now. See the collapsed note below for instructions.
A note about instantiating plug-ins
How to Instantiate a Plug-in in Logic Pro
You can instantiate a plug-in on any kind of track (audio, software instrument, aux, or master) or grouped tracks in Logic Pro. In the following steps, we'll use AmpliTube 5 as an example, and instantiate it on an audio track.
- Click on the track name of the track you want to instantiate the plug-in on so the track is displayed in the Left inspector channel strip.
- Click in the Audio FX section of the track in the Left inspector channel strip.
- Select Audio Units, find the plug-in in the appropriate folder, then click either Mono→Stereo (advised if the plug-in utilizes stereo effects) or Mono. For AmpliTube 5, click Audio Units > IK Multimedia > Amplitube 5 > Mono→Stereo.
A note about templates
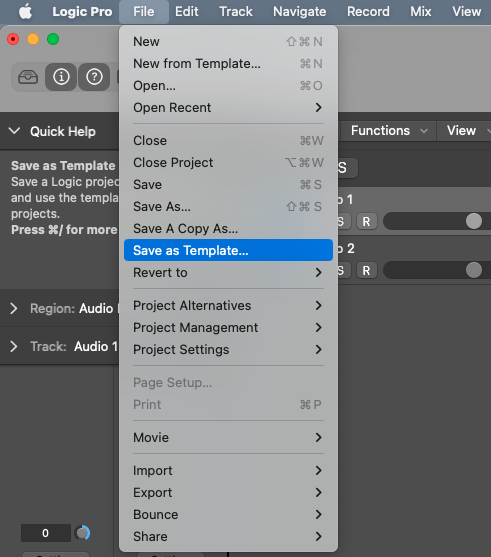
If you think you will be recording many projects using the same configuration, you may wish to save your current project as a template, so you won't need to take the previous steps every time. To save your current project as a template, click File > Save as Template and save the file in the Project Templates folder (which is the default location).
Importing an audio track
If you'll be recording along with a backing track, follow the steps below to import the audio file into your project. Otherwise, skip ahead to the next section.
How to Import an Audio File in Logic Pro
- Select the track where you want to import your audio into by clicking the track name.
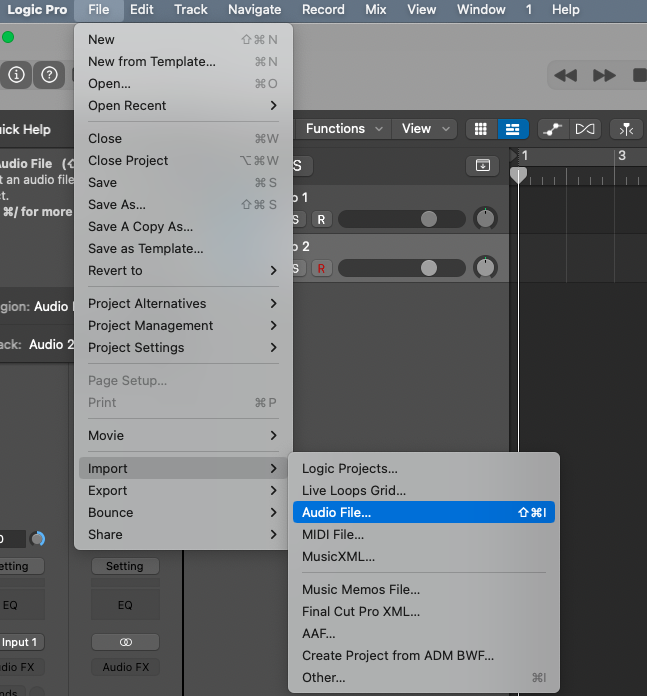
- Click File > Import > Audio File, as shown below.
- Navigate to the file you want to import, click on it to select it, then click Open.
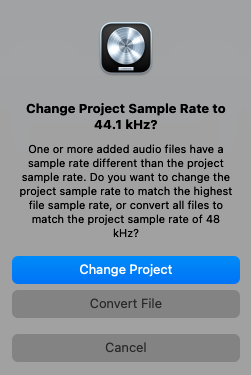
- If you are presented with the prompt in the screenshot below regarding sample rate, click either Change Project or Convert File depending on your preference—either is fine.
Recording
Now you are ready to record! To begin recording, take the following steps:
- To start recording, either click the Record button (which looks like a red circle) in the transport, or press the R key on your keyboard.

- When you are finished recording, either click the Stop button in the transport (which looks like a grey square), or press the spacebar on your keyboard.

- If you aren't happy with your recording you can delete it by pressing the delete key on your keyboard. Then, select either Delete or Keep on the following prompt, depending on your preference. Delete will permanently delete the file, while Keep will remove it from your view, but keep the file in the project folder. Before attempting to record again, return the transport to the beginning by clicking the Go to Beginning button in the transport.

- Repeat steps 1-3 as many times as needed until you are happy with your recording.
Bouncing your recording as an MP3 file
How to Bounce an MP3 File from Logic Pro
Once you have finished a project in Logic Pro, you may want to export (bounce) it as an MP3 file. To do that, take the following steps:
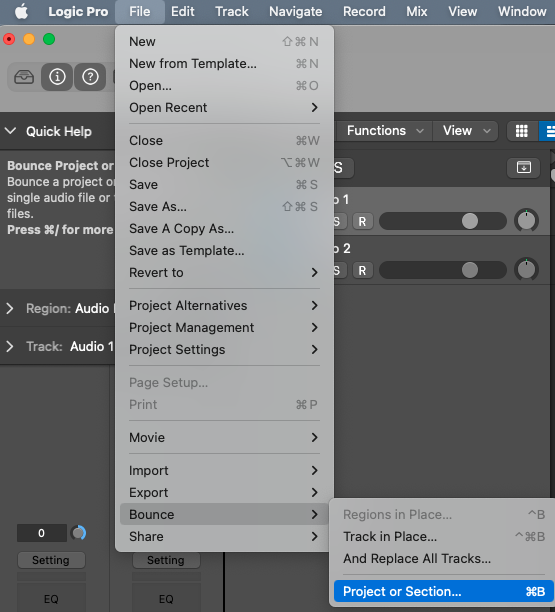
- Click File > Bounce > Project or Section.
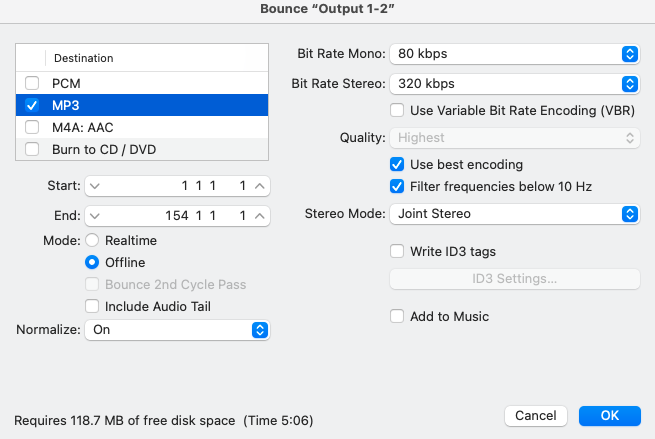
- In the Bounce “Output 1-2” window, uncheck the box next to PCM (unless you also want to bounce a WAV or AIFF file).
- Check the box next to MP3.
- Click on MP3 to reveal the MP3 bounce options.
- While the default Bit Rate Stereo is 160 kbps, it is advised to use the highest possible option (320 kbps). To do that, click the drop-down menu next to Bit Rate Stereo and select 320 kbps.
- Adjust any other settings as you see fit, though the settings in the screenshot below will be acceptable in most circumstances.
Notes about Bounce Settings
- The Start and End values (shown in the screenshot above) will be unique to each project you are bouncing.
- If you have cycling (looping) turned on, your bounce will only include the time period within the yellow cycle region.
- Normalize is set to On by default. With Normalize set to On, Logic will raise the peak level of the audio file by a specified amount—typically to its highest possible digital level without introducing distortion through clipping. This will generally ensure your exported MP3 file is at a comparable loudness to commercial releases. If you are bouncing audio for a course focused on mixing or mastering, you may want to disable normalization.
- Click OK.
- In the following window, name your file, select a location, and click Bounce.
- Once the process is complete, you can navigate to the location you chose in Step 8 to find your MP3 file.
