Once you have finished a project in Logic Pro, you may want to export (bounce) it as an MP3 file. To do that, take the following steps:
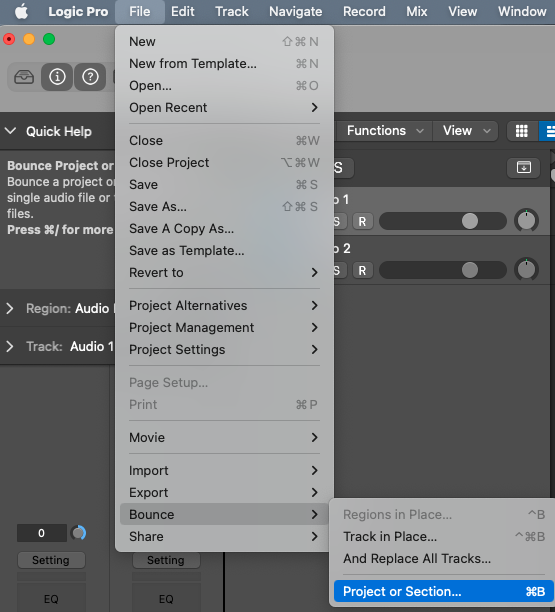
- Click File > Bounce > Project or Section.
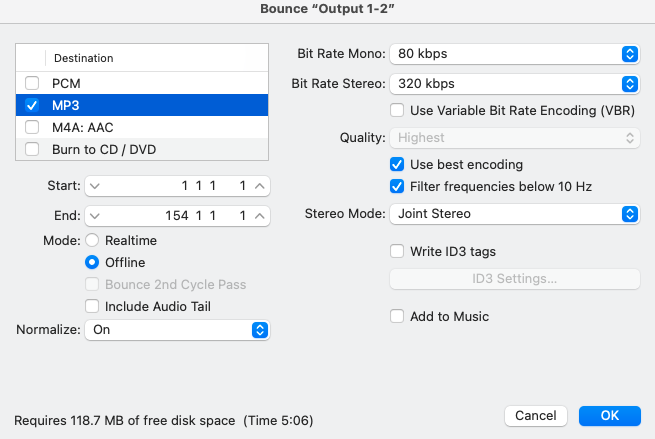
- In the Bounce “Output 1-2” window, uncheck the box next to PCM (unless you also want to bounce a WAV or AIFF file).
- Check the box next to MP3.
- Click on MP3 to reveal the MP3 bounce options.
- While the default Bit Rate Stereo is 160 kbps, it is advised to use the highest possible option (320 kbps). To do that, click the drop-down menu next to Bit Rate Stereo and select 320 kbps.
- Adjust any other settings as you see fit, though the settings in the screenshot below will be acceptable in most circumstances.
Notes about Bounce Settings
- The Start and End values (shown in the screenshot above) will be unique to each project you are bouncing.
- If you have cycling (looping) turned on, your bounce will only include the time period within the yellow cycle region.
- Normalize is set to On by default. With Normalize set to On, Logic will raise the peak level of the audio file by a specified amount—typically to its highest possible digital level without introducing distortion through clipping. This will generally ensure your exported MP3 file is at a comparable loudness to commercial releases. If you are bouncing audio for a course focused on mixing or mastering, you may want to disable normalization.
- Click OK.
- In the following window, name your file, select a location, and click Bounce.
- Once the process is complete, you can navigate to the location you chose in Step 8 to find your MP3 file.


