- Open the Preferences menu with one of the following key commands: Control + , on Windows, or Command + , on Mac. (Note that in some versions of Live, Preferences is referred to as Settings.)
- Click the Audio tab.
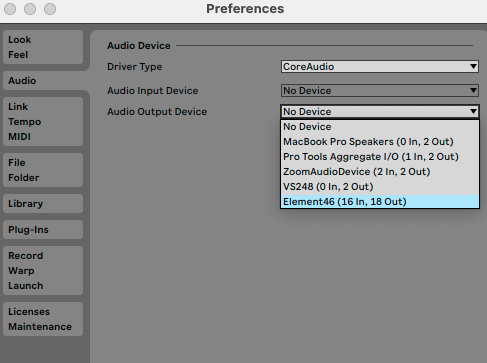
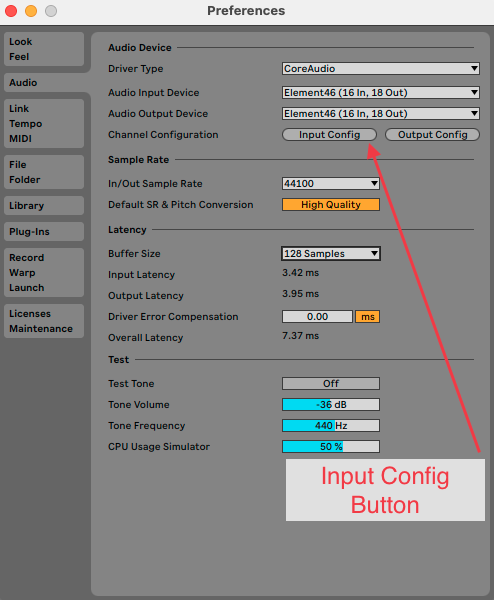
- Set the Audio Output Device by selecting your audio interface from the Audio Output Device dropdown menu. Note that you can also use your built-in speakers (and/or your built-in microphone for input), but for the rest of this article, we'll assume you are using an audio interface.
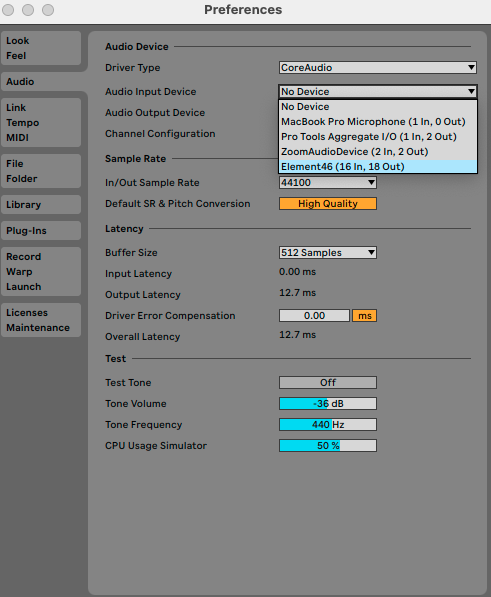
- Set the Audio Input Device by selecting your audio interface from the Audio Input Device dropdown menu.
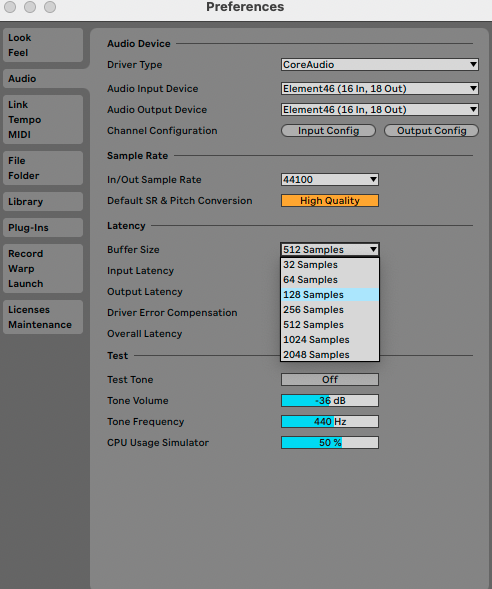
- This is also a good opportunity to check your Buffer Size and change it if necessary. The lower your buffer size, the less latency you will get. It's worth noting that you may experience audio issues, such as distortion or digital noise, if your buffer size is too low. We'd recommend starting at 128 samples and adjusting as needed from there.
A Note about Input and Output Configurations
You may have noticed the Input Config and Output Config buttons on the Channel Configuration line of Audio Preferences. If your audio interface has more than two inputs and/or more than two outputs, and you want to use those additional inputs and outputs in Ableton Live, you'll need to enable them. To do that (using input as an example):
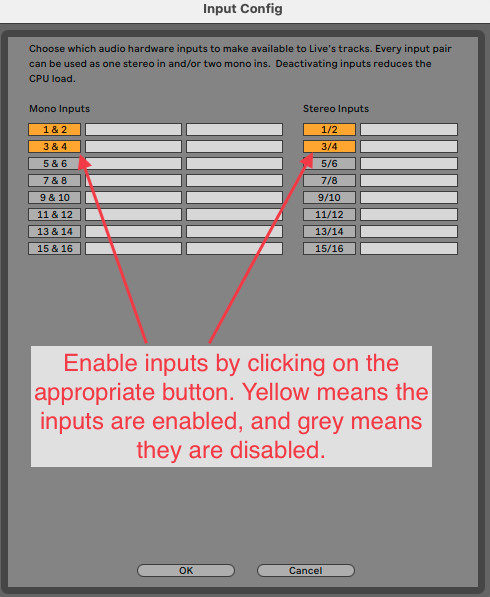
- Click the Input Config button.
- Enable any additional inputs you'd like to use by clicking on the corresponding number so it turns yellow. Repeat the same steps for the outputs as needed.
