Once you have finished a project in Cubase, you may want to export the project as an MP3 file. To export your audio from Cubase, take the following steps:
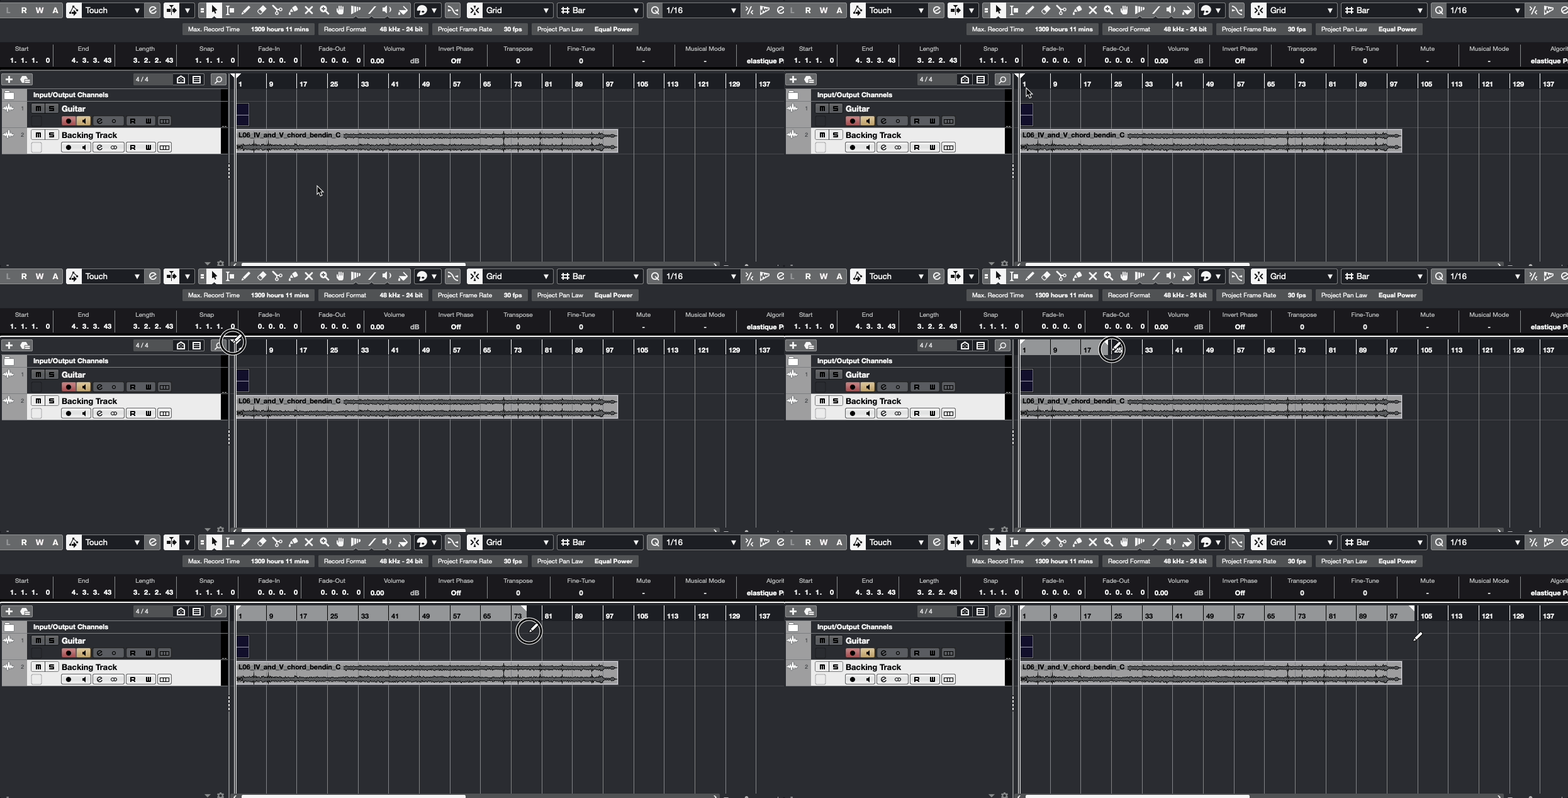
- Select the range you'll be exporting by setting the Left Locator and Right Locator positions in the transport. You'll likely want the Left Locator to be set to the beginning of the project, and the Right Locator to be a value shortly after your last region ends. Alternatively, you can set the range by clicking and dragging the Right Locator to the desired end point, as shown below.

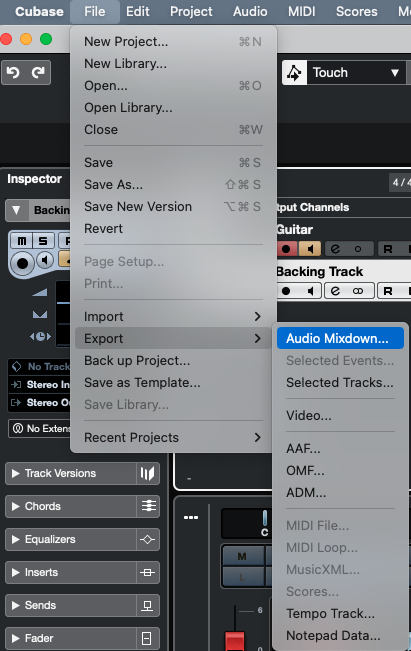
- Click on the File menu, then select Export > Audio Mixdown.

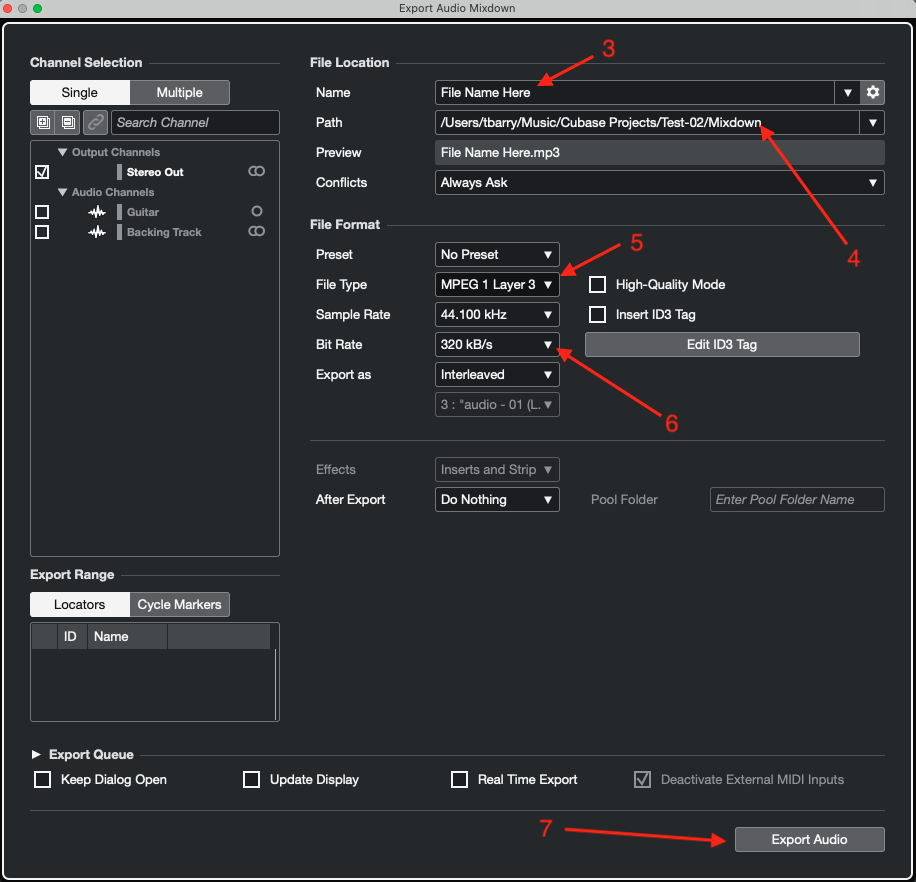
- Name your file by entering the desired name in the Name field.
- If you want to change the location where the file will be saved, click on the Path field, then navigate to and select a new location.
- Make sure the File Type is set to MPEG 1 Layer 3.
- Set the Bit Rate to 320 kB/s.
- You may want to change other settings, but this won't be necessary in most scenarios. Click the Export Audio button when you are happy with your selections.

- Once the file has finished exporting, you can then find the MP3 file by navigating to the location on your machine where you chose to save the file in Step 4.

