Creating a New Project and Setting up I/O
Important Note Regarding Feedback
If you are using a microphone to record your performance, you will need to use headphones in order to avoid feedback.
To begin your project:
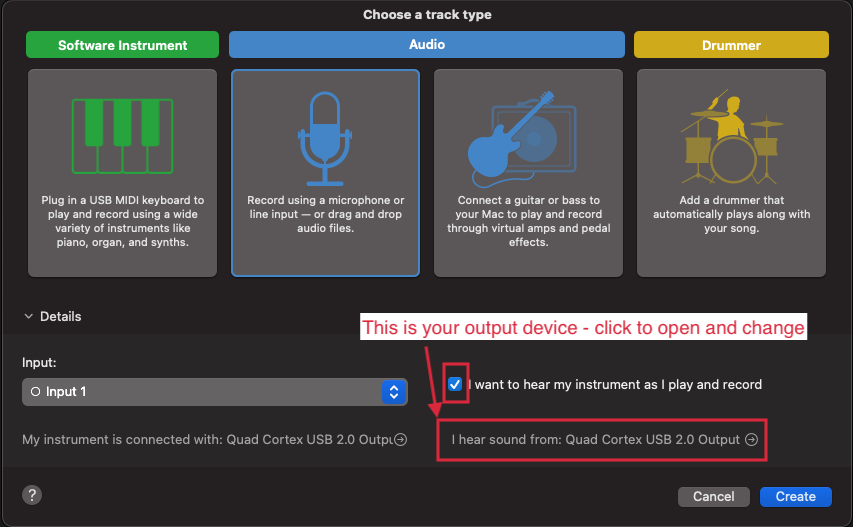
- Open GarageBand and select Empty Project, then click Choose.
- Click the microphone icon if you plan to record from an audio input. Select this even if you are recording a guitar connected directly to your interface with an instrument cable.
- Click on the Details dropdown arrow.
- Check the box beside I want to hear my instrument as I play and record.
- Click Create to create your project.

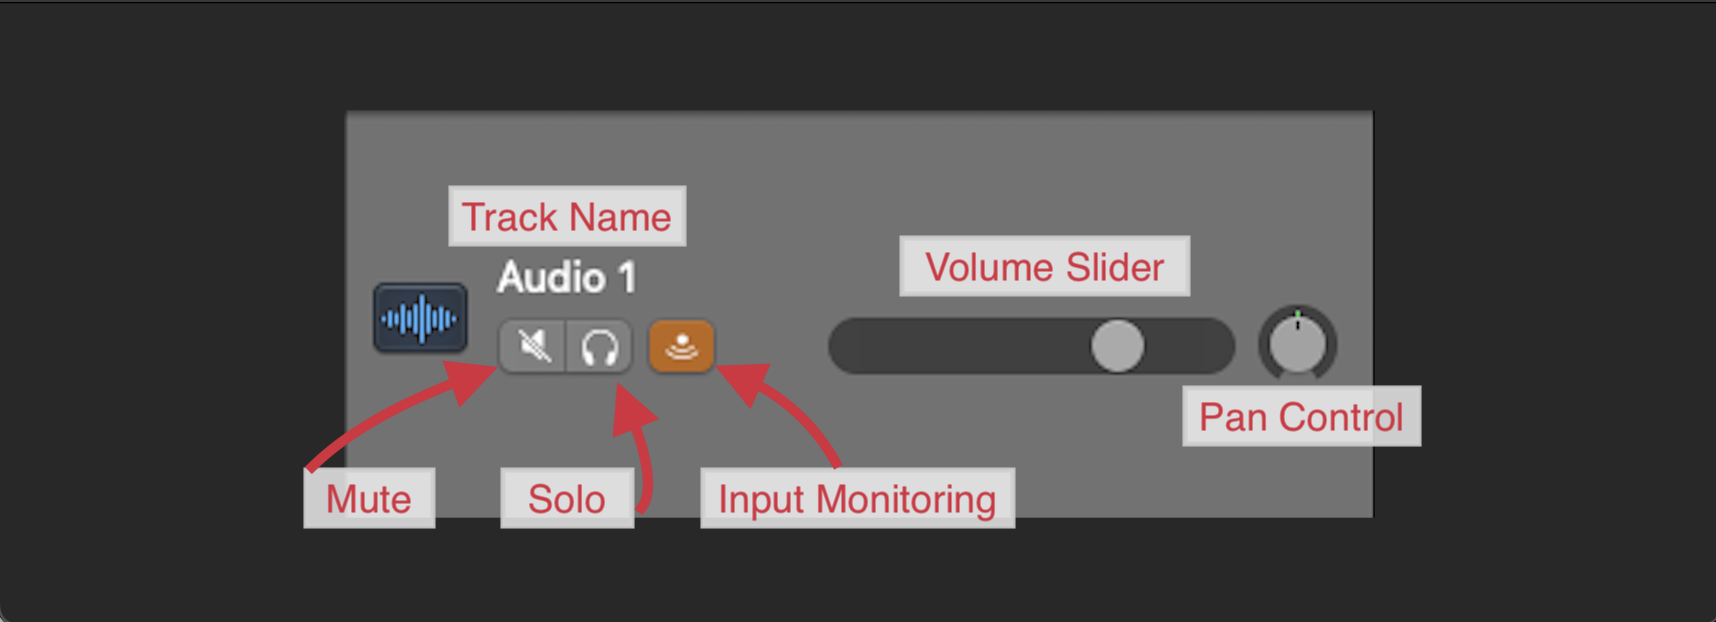
Next, it's important to identify the elements of the track header, which will help to clarify their function.

- Track Name: This is to help identify the track you are working on.
- Mute: Use this button to silence the selected track.
- Solo: This will isolate the selected track so that you hear only its contents.
- Input Monitoring: When enabled, this allows you to hear the track through your headphones as you record. In the vast majority of scenarios, you will want to keep this enabled. This will be enabled already if you selected the I want to hear my instrument as I play and record option earlier.
- Volume Slider: Use this slider to adjust the volume of the track.
- Pan Control: Use this to adjust the your track's position in the stereo image.
Instantiating Plug-ins
If you are recording guitar, and would like to add a plug-in such as AmpliTube to your audio track, take the following steps:
- Click on the track header of the track on which you wish to instantiate a plug-in.
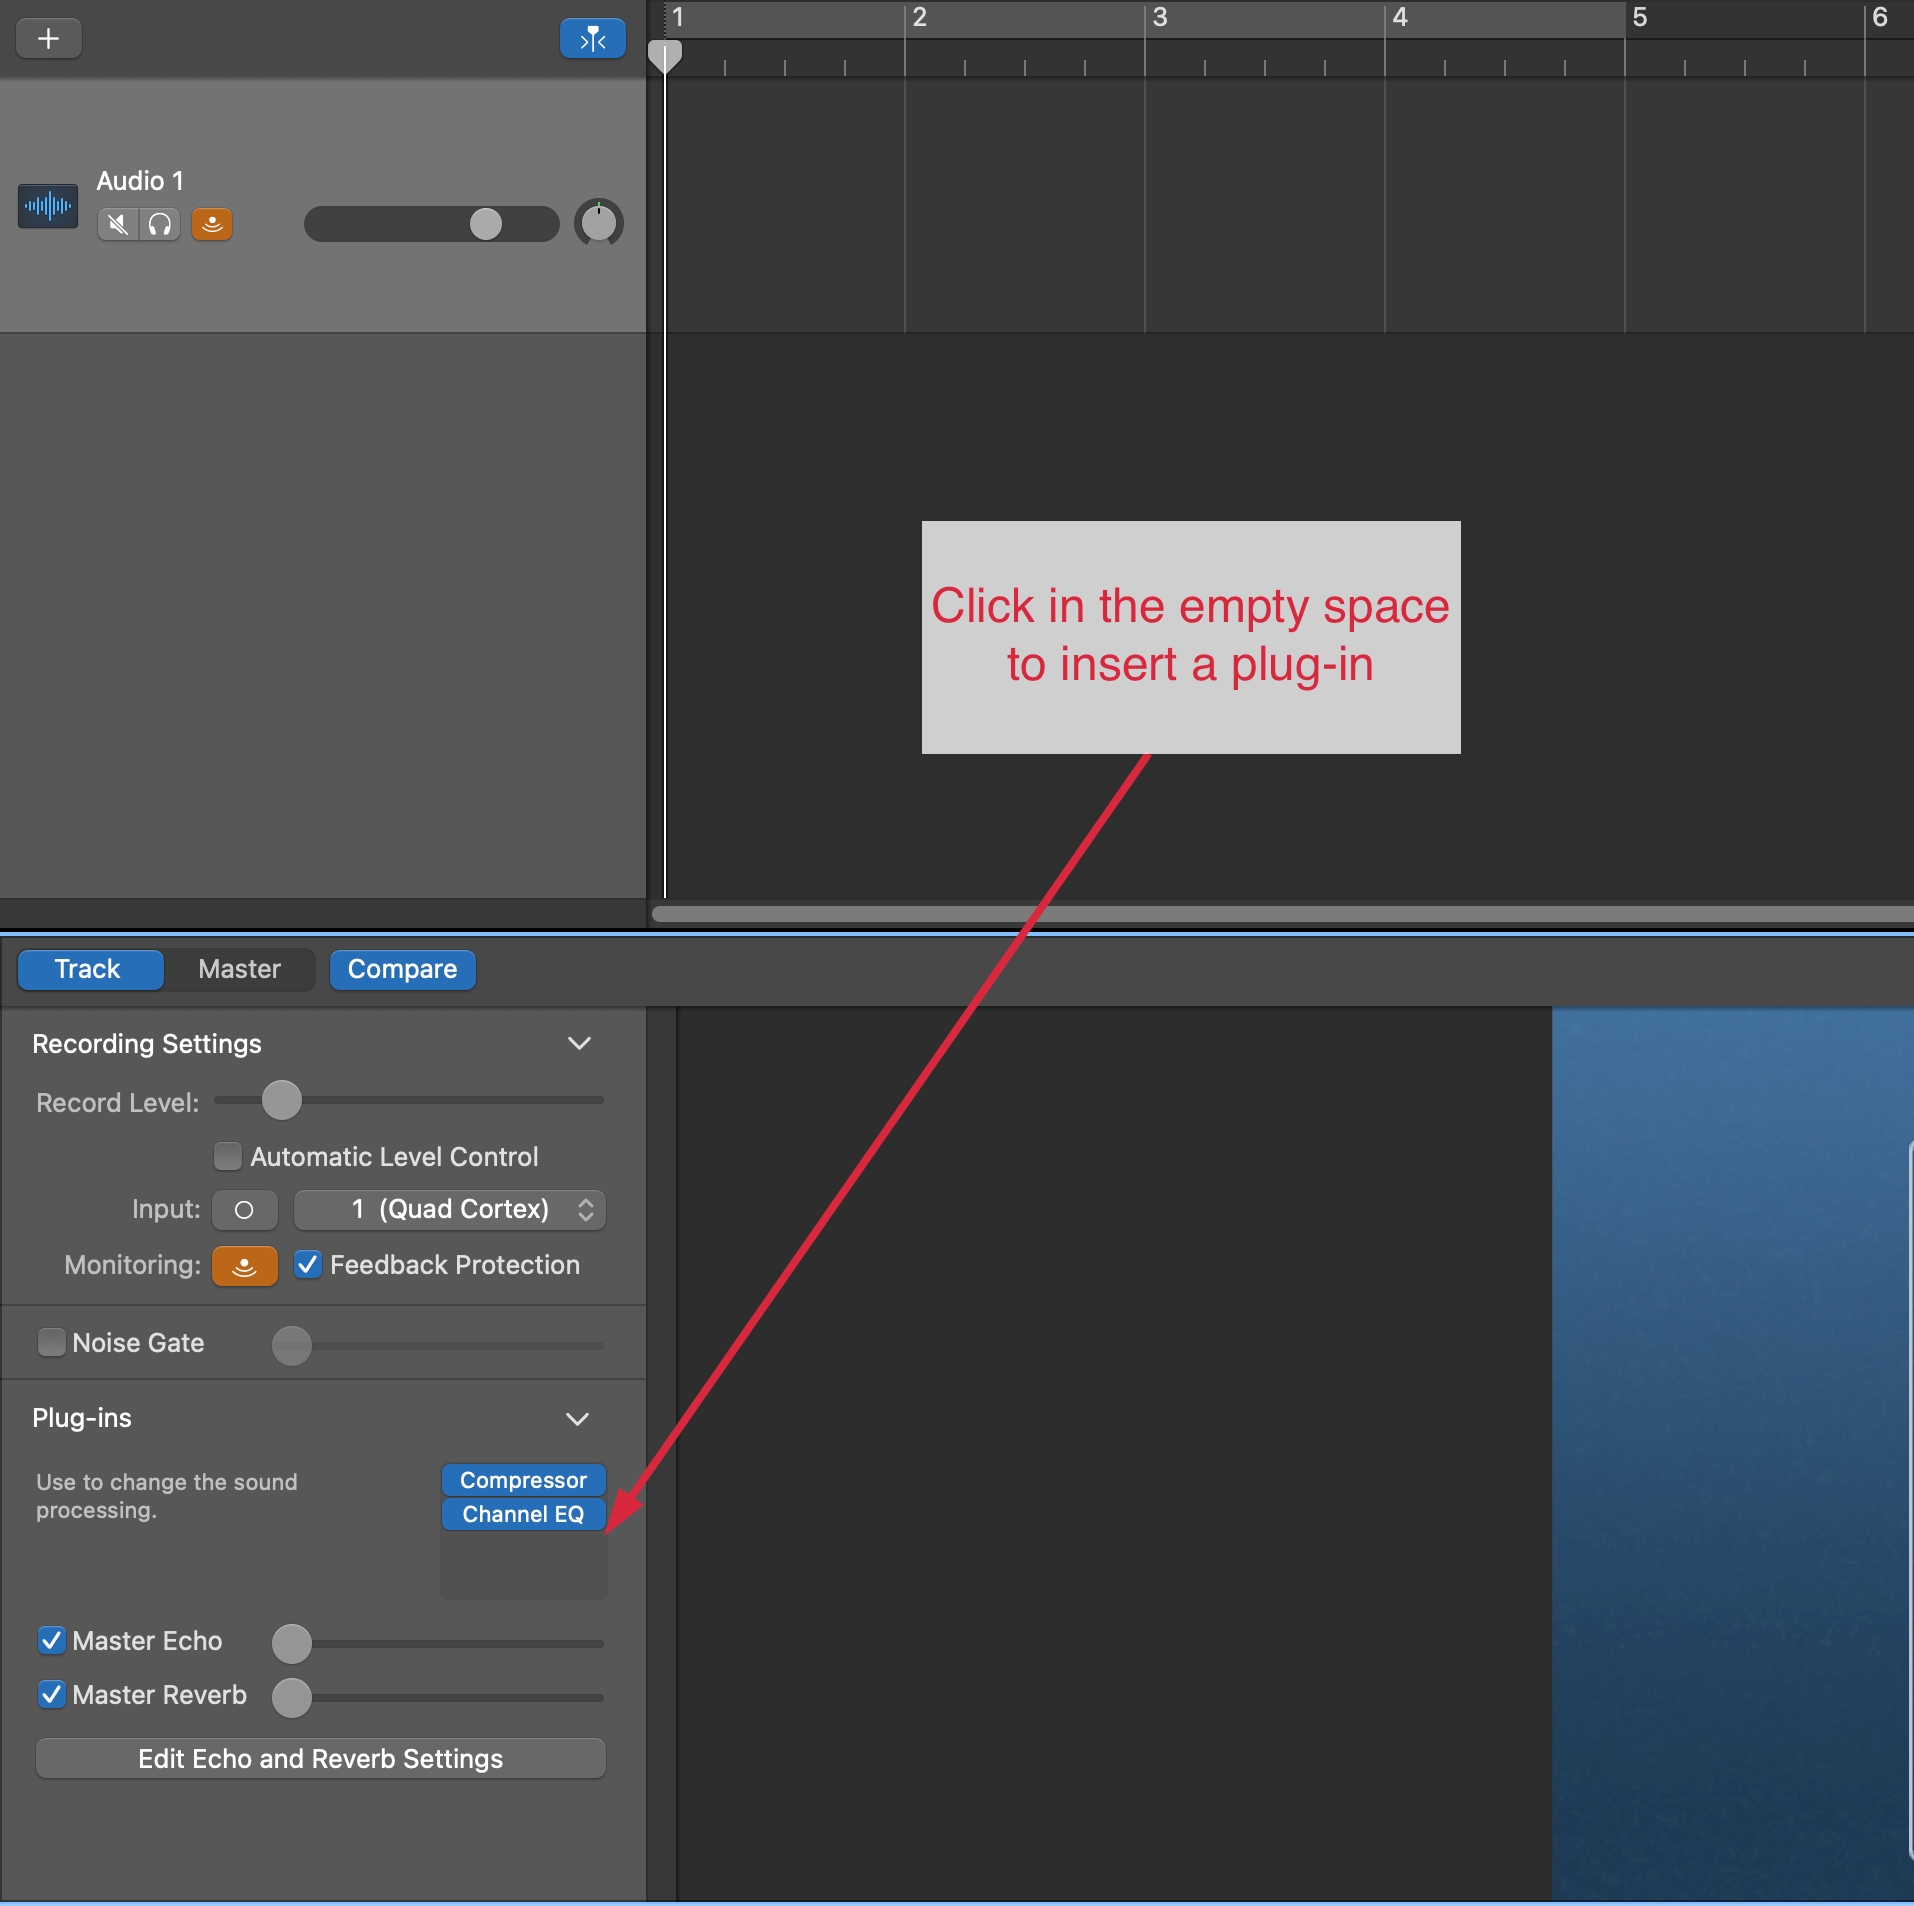
- Under the Recording Settings section, click the arrow to expand the Plug-ins section.
- By default, GarageBand may load a Compressor and Channel EQ plug-in; click in the empty space below them to see the list of plug-ins available to you.
- Click on the desired plug-in to add it into your track—note that clicking on the left side of the plug-in name will either activate (blue) or deactivate (gray) the plug-in on your track.

Importing Audio and Recording
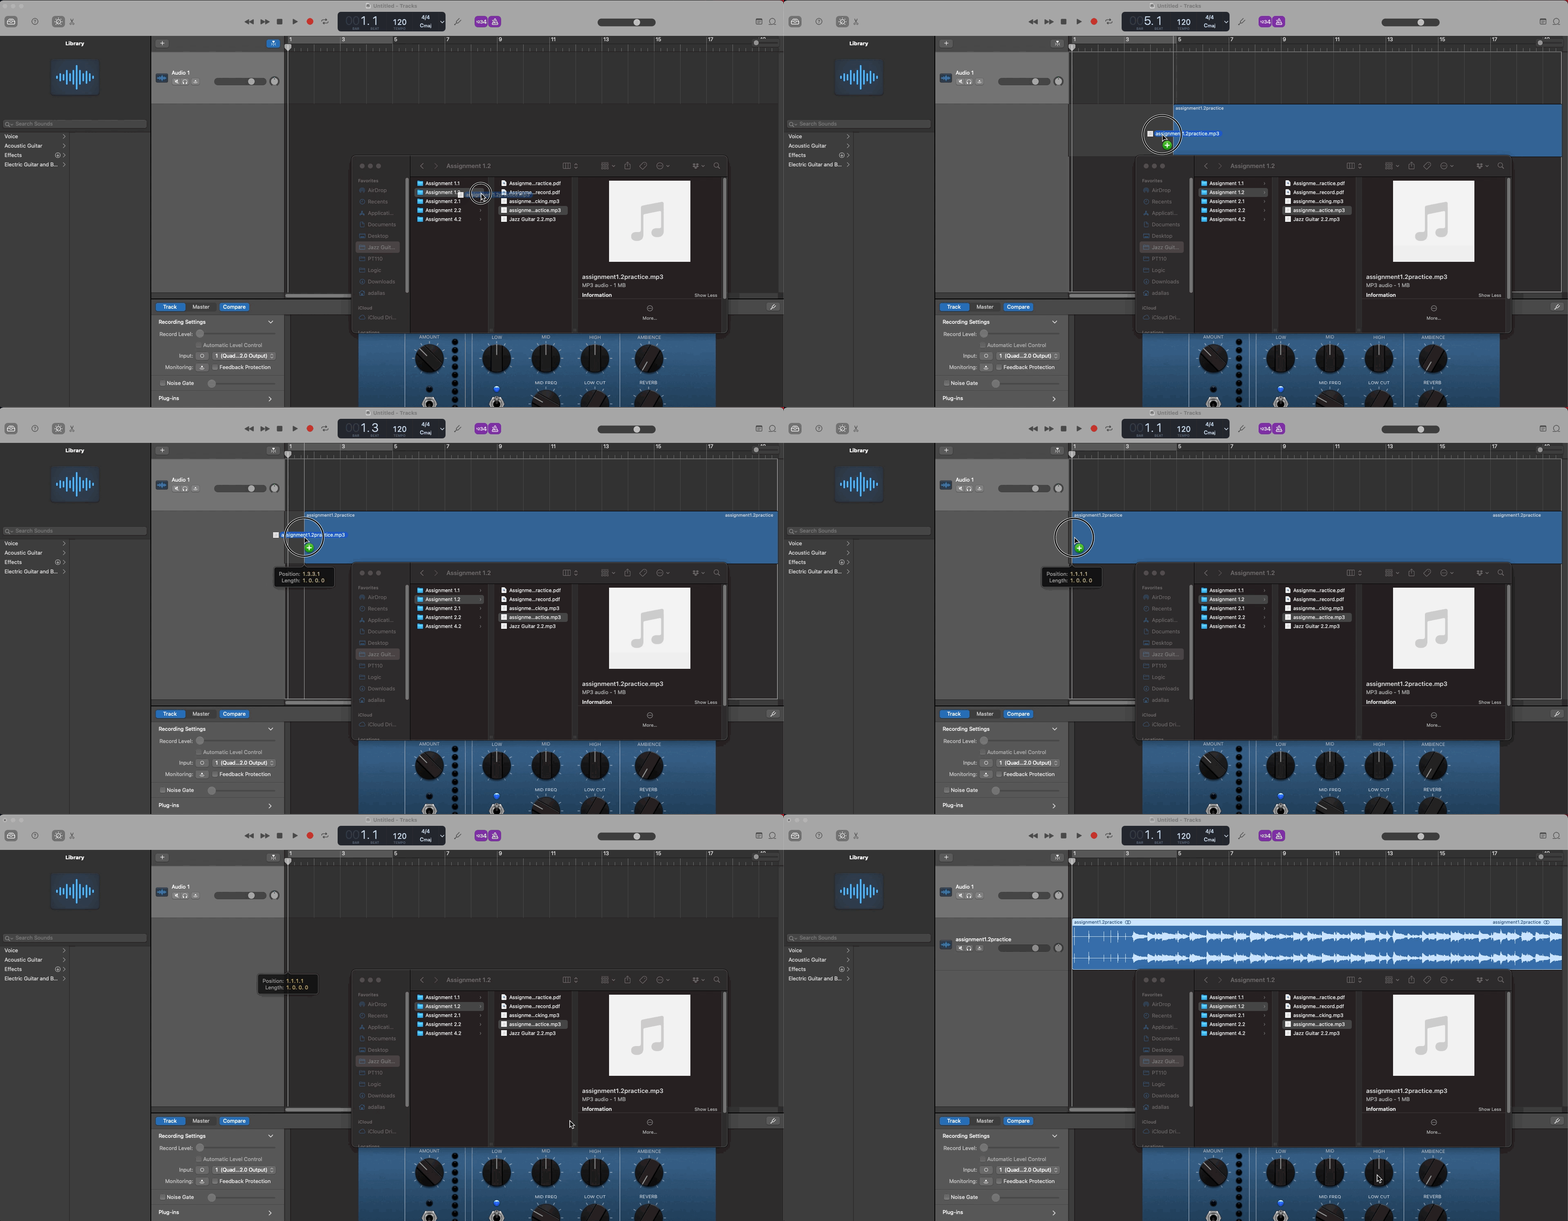
Next, import your backing track into GarageBand. The program will automatically create a new track for any files dragged into the main window. To import your backing track by dragging:
- Open a Finder window on your computer.
- Ensure the window is on top of your GarageBand window.
- Locate the downloaded backing track on your computer.
- Drag and drop the backing track from the Finder window into GarageBand.

To record over the backing track, ensure that the audio track you are recording to is selected by clicking on the track header, then press either the R key on your keyboard (for record) or the red recording circle in the transport bar.
To end your recording, you can press the Space Bar key on your keyboard or click the Stop square icon in the transport bar. You can delete any recordings by clicking on the audio region (the actual recorded waveform) and then using the Delete key on your keyboard.
Exporting Your Recording
Once you are happy with your recording, you can export it by doing the following:
- In the top menu bar, navigate to Share > Export Song to Disk.
- In the subsequent dialogue box, name your track, and choose the save location for the file.
- Within the audio options, selecting the highest quality MP3 option is recommended for most Berklee Online assignment submissions.
- Click Export.
A Note on Exporting and Saving
Please note that when you export your audio, you will still need to save your project, which is the GarageBand file. This is useful in case you need to come back and make any adjustments, such as changing your volume levels, re-recording a section, adding new sections or instruments, and so forth. To save the project, navigate to File > Save, or press Command + S on your keyboard.

