As of Reason 12, you can use Reason as a plug-in in any DAW, allowing you to access all the sounds and instruments included in the standalone version of Reason in your DAW. To do this, you can simply add the Reason Rack plug-in to a software instrument/MIDI track in your DAW. To learn how to instantiate a plug-in in your DAW of choice, follow the instructions for your DAW below.
Pro Tools
How to Instantiate a Plug-in in Pro Tools
Plug-ins can be instantiated from either the Mix or Edit window in Pro Tools. In the example below, the Mix window will be used.
Note
If you do not see the Inserts A-E view on the Mix or Edit window, select View at the top of the window, hover over Mix Window Views or Edit Window Views, then click Inserts A-E.
- Locate the track on which you want to instantiate a plug-in, then click one of the empty slots under Inserts A-E (or Inserts F-J).

- Hover over the plug-in menu item; this will display your available plug-in categories and/or manufacturers (depending on your settings).
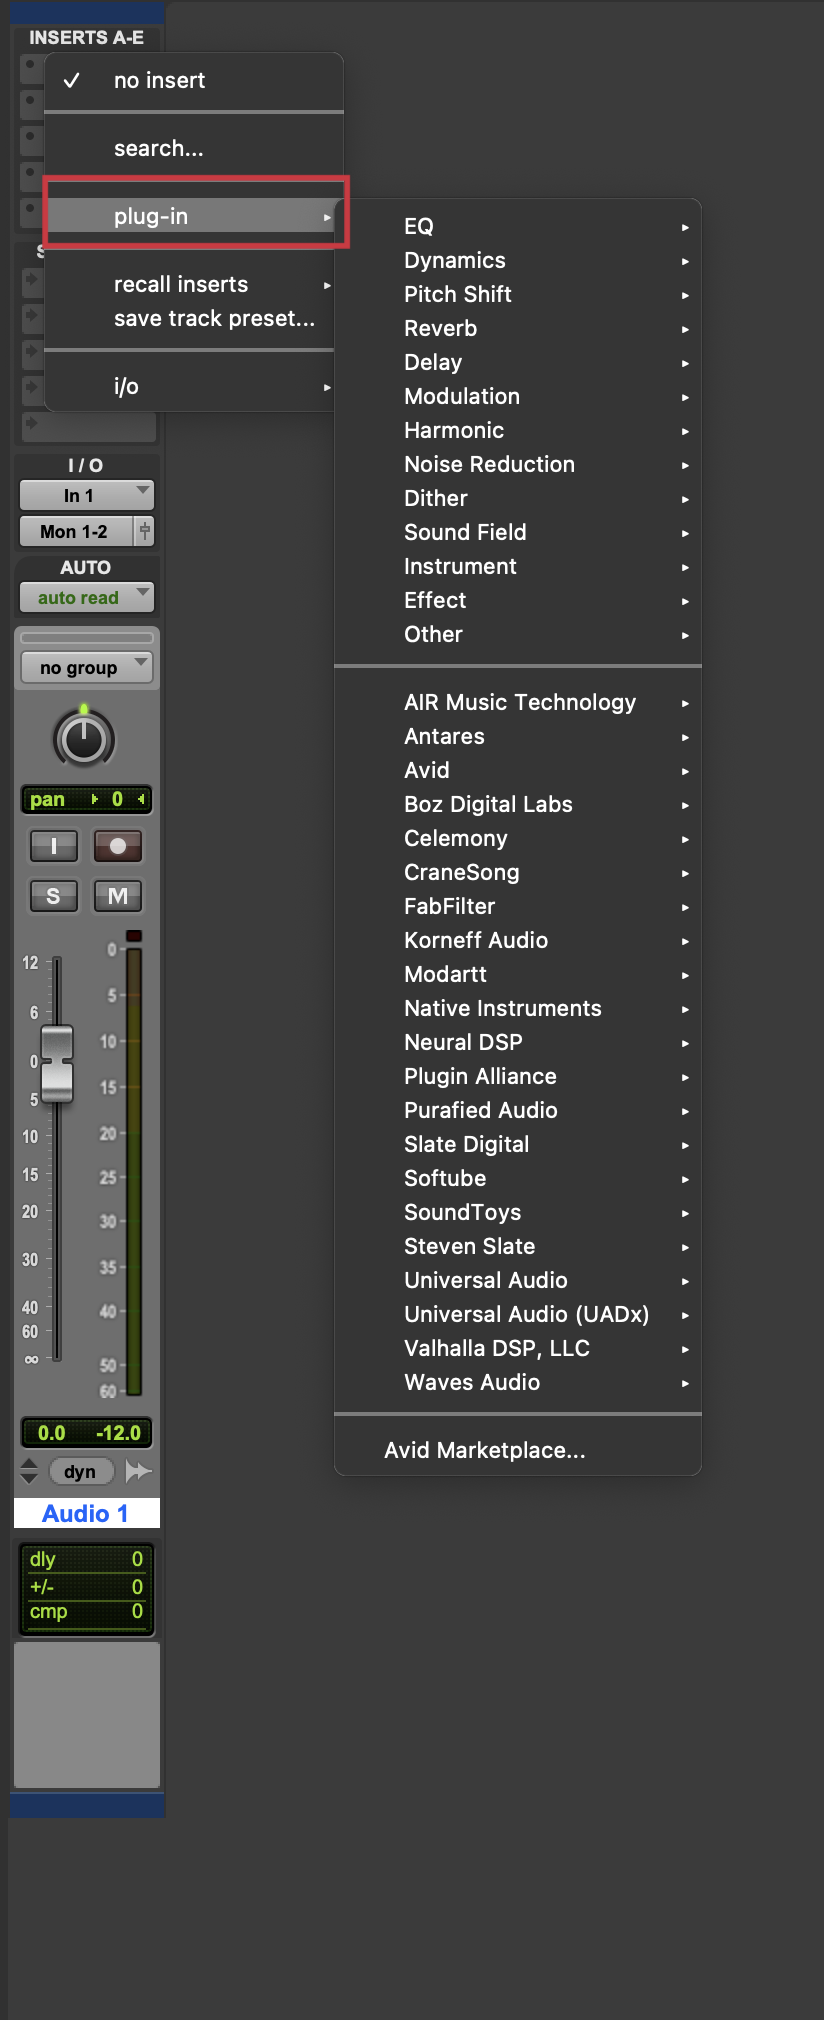
- Hover over a plug-in category or manufacturer to display the plug-ins available in that category. Click on a plug-in to instantiate it on the track, which will open its interface in a new window.
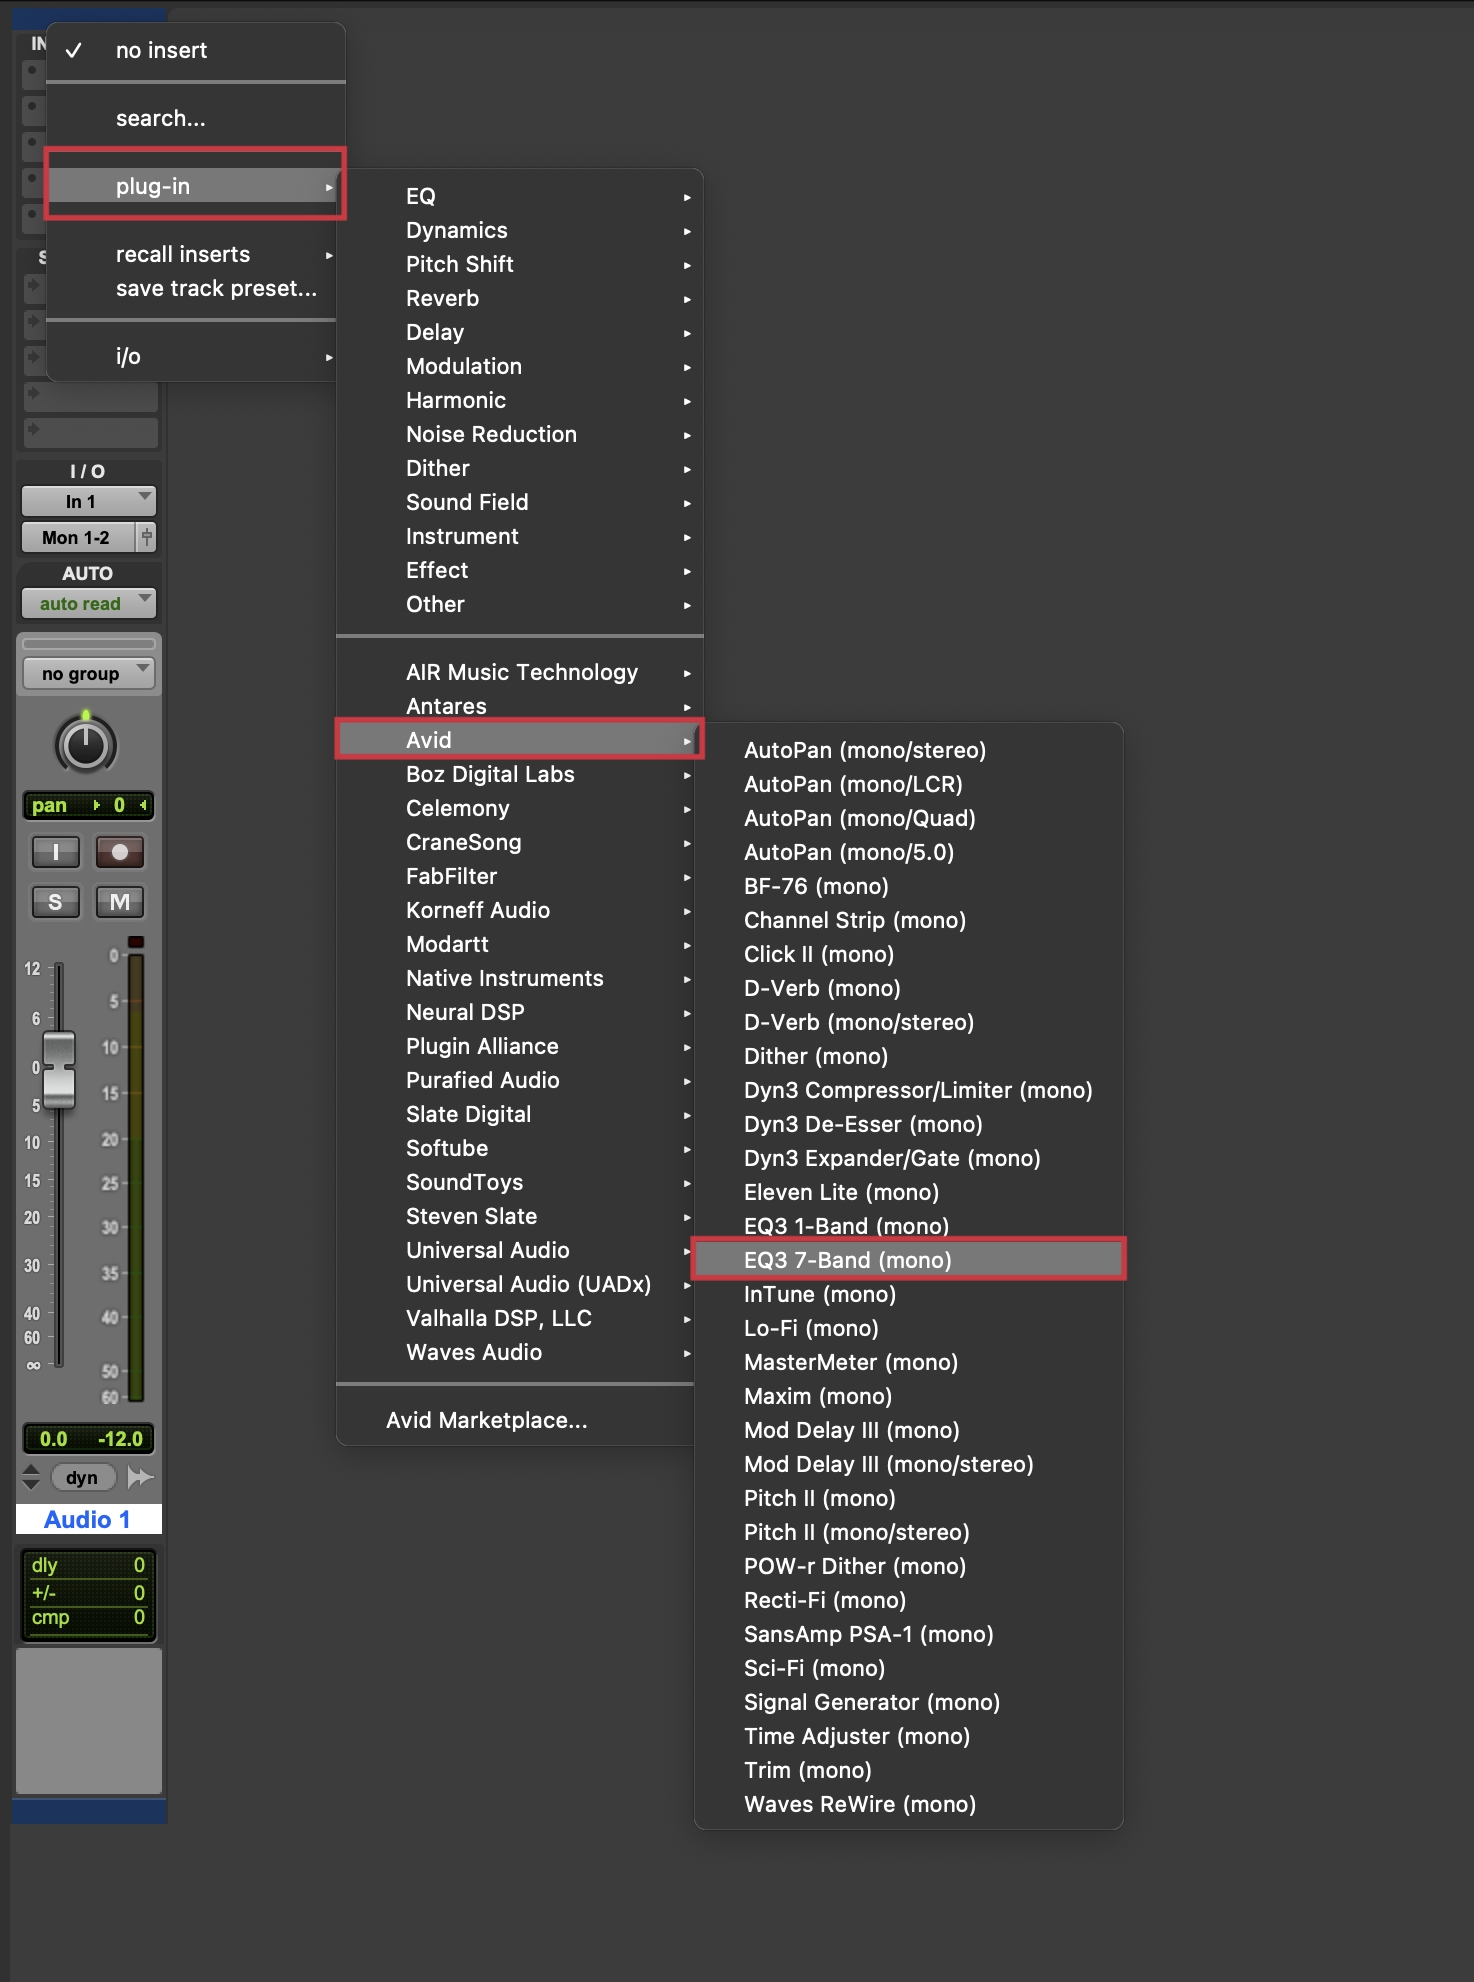
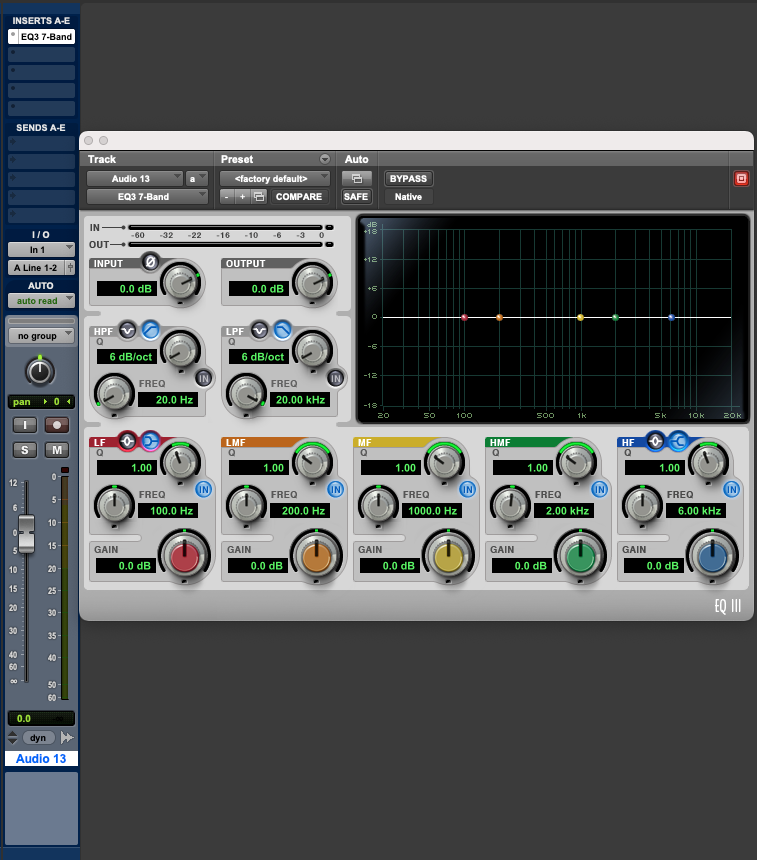
The plug-in has now been instantiated on your track. The plug-in window can be closed by pressing the X at the top left of the window, and re-opened by clicking the plug-in name on the track.
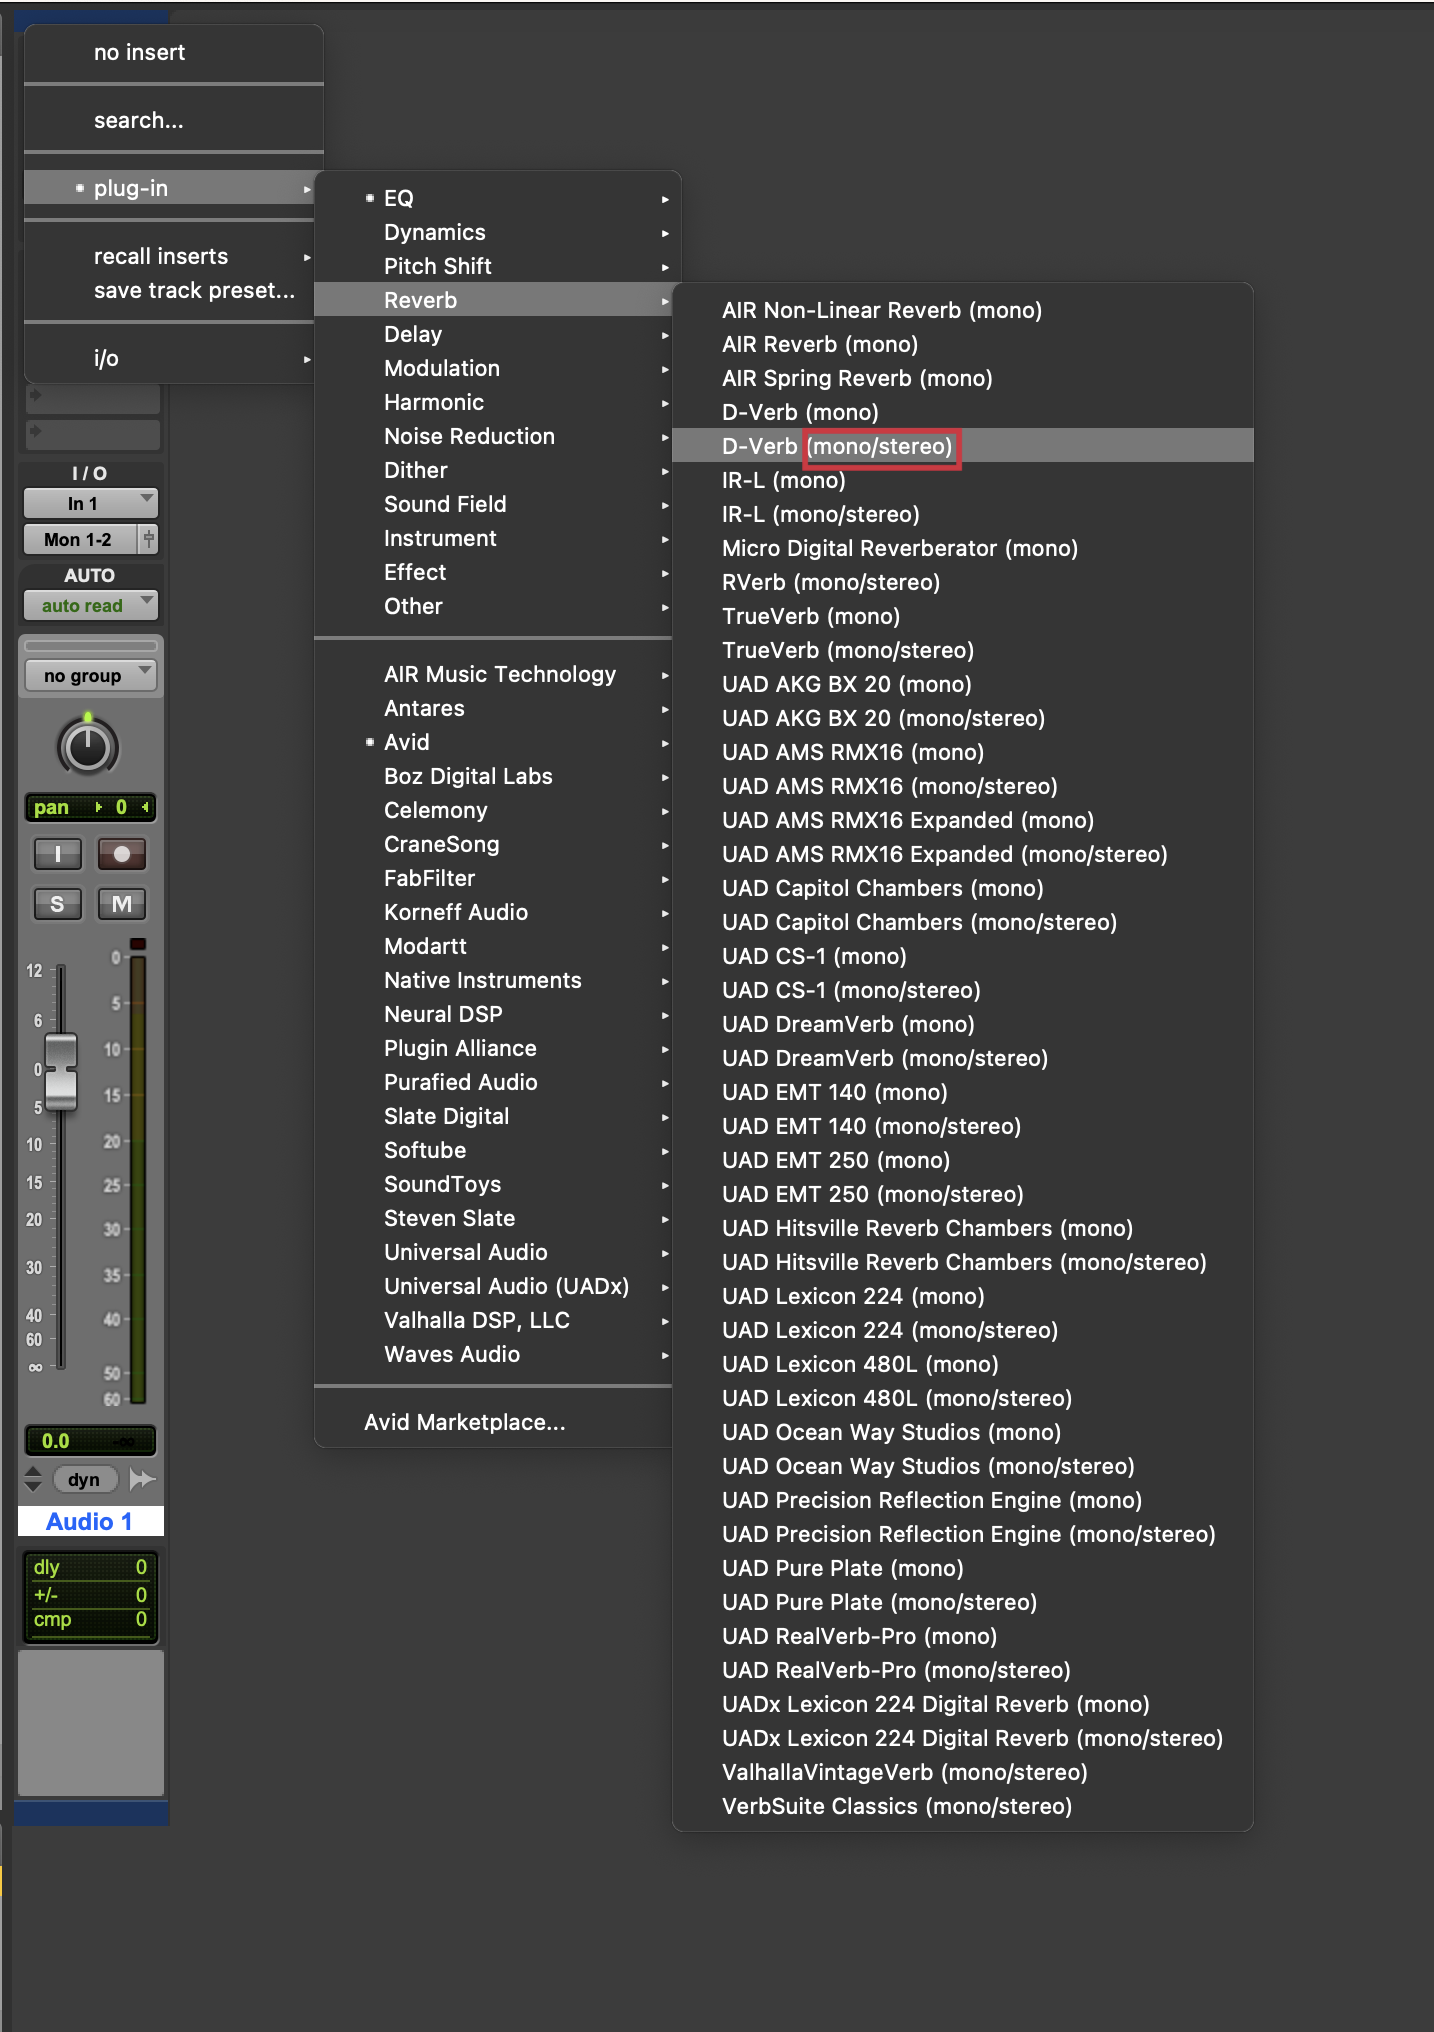
It is worth noting that some plug-ins, when instantiated on a mono track, will give the option to open a stereo version of the plug-in. This is denoted by the (mono/stereo) being present at the end of the plug-in name. Selecting this option on a mono track will convert the track to a stereo track. This option is mainly present on stereo effects, such as reverbs and delays; the example shown below is a stereo reverb.
Logic Pro
How to Instantiate a Plug-in in Logic Pro
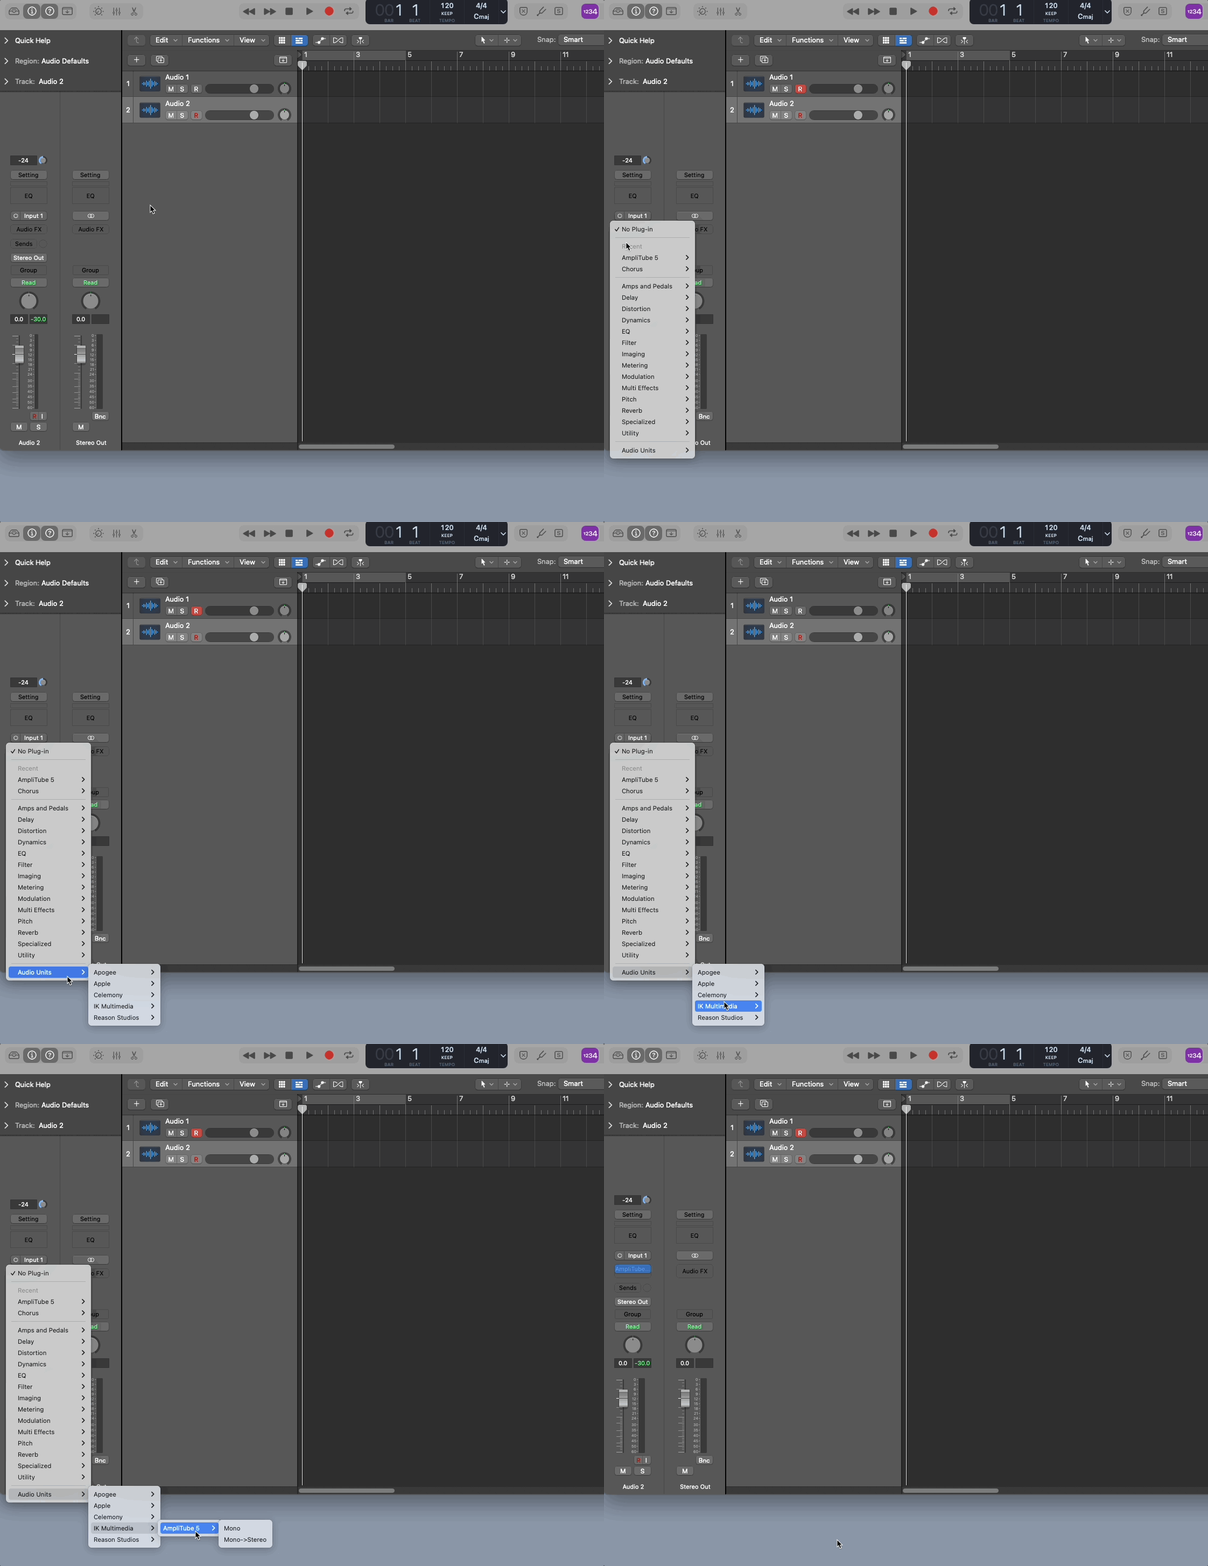
You can instantiate a plug-in on any kind of track (audio, software instrument, aux, or master) or grouped tracks in Logic Pro. In the following steps, we'll use AmpliTube 5 as an example, and instantiate it on an audio track.
- Click on the track name of the track you want to instantiate the plug-in on so the track is displayed in the Left inspector channel strip.
- Click in the Audio FX section of the track in the Left inspector channel strip.
- Select Audio Units, find the plug-in in the appropriate folder, then click either Mono→Stereo (advised if the plug-in utilizes stereo effects) or Mono. For AmpliTube 5, click Audio Units > IK Multimedia > Amplitube 5 > Mono→Stereo.
Ableton Live
How to Instantiate a Plug-in in Ableton Live
You can instantiate a plug-in on any kind of track (audio, MIDI, return, or master) or grouped tracks in Ableton Live. In the following steps, we'll use AmpliTube 5 as an example, and instantiate it on an audio track.
- Click on the Plug-Ins section of the Ableton Browser.
- Locate the plug-in you want to add to your track (AmpliTube 5 in this example). If you don't see the plug-in you are looking for, see the note about plug-ins below.
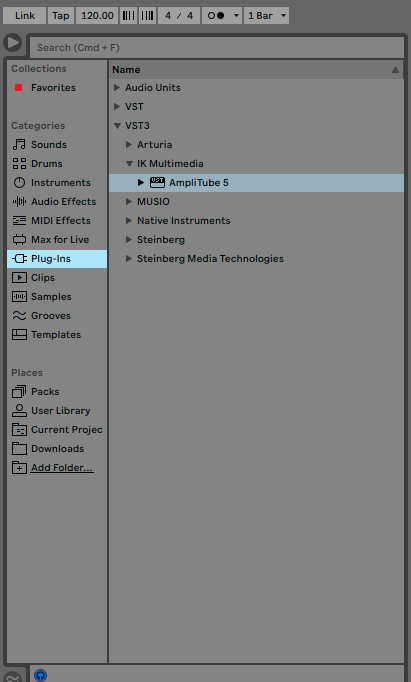
- Either drag and drop the plug-in onto the track, or click the track header once, then double click on the plug-in in the browser.
A Note about Plug-ins
How to Enable Virtual Instruments and Audio Units in Ableton Live
If you aren't seeing all of your installed plug-ins listed in the Plug-Ins section of the Ableton browser, it may be because you don't have all virtual instruments (VSTs) or audio units (AUs) enabled. To ensure you have them all enabled, take the following steps:
- Open the Ableton Preferences menu, and click the Plug-Ins tab
- Ensure the following are set to On:
- Use VST2 Plug-In System Folders
- Use VST3 Plug-In System Folders
- Use Audio Units
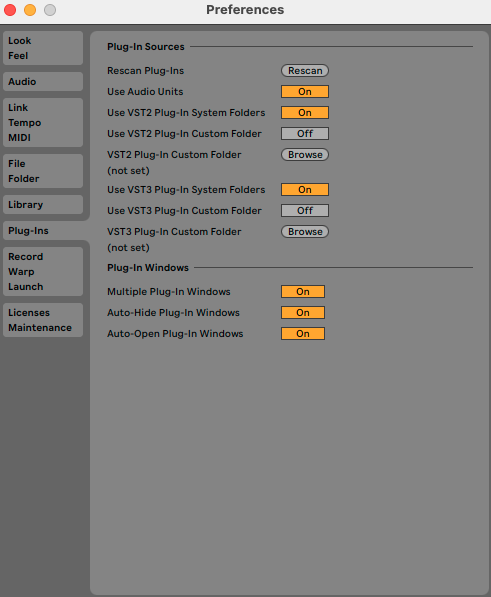
- Click the Rescan button on the Rescan Plug-Ins line
You may also want to enable the VST2 Plug-In Custom Folder and VST3 Plug-In Custom Folder options if you have plug-ins saved in a location other than the default. In that case, click the Browse button to select the appropriate location where those plug-ins are stored, then click the Rescan button again.
Cubase
How to Instantiate a Plug-in in Cubase
You can instantiate a plug-in on any kind of track or grouped tracks in Cubase (audio, instrument, effect, master, etc.). In the following steps, we'll use AmpliTube 5 as an example, and instantiate it on an audio track.
- Make sure you have the Left Zone showing. If it's not already showing, you can hit Command+Option+L to reveal it.
- Select the Inspector tab at the top of the Left Zone, and the Track tab at the bottom of the Left Zone.
- Click the name of the track you wish to instantiate the plug-in on to select the track.
- In the Left Zone, click on Inserts to reveal the available insert slots.
- Click on an empty insert slot, navigate to the plug-in you want, then click on it to instantiate it. You'll find AmpliTube 5 under Distortion.

