Latency correction in Audacity is more of a manual process than in other recording software. Correcting latency is important when overdubbing and you need two or more tracks to synchronize. The general process in Audacity involves measuring a click track with known timing intervals against a recorded version of itself. We can then measure the timing-difference between the two to calculate our offset for latency correction.
It is important to note that you will need to set up latency correction for every audio device that you use, and they may have different parameters. For example, if you are using the built-in microphone on your computer to record, then you will need to perform this test with the built-in microphone and speaker. If you are planning to record using an audio interface, then you will need to perform this calibration with your audio interface as the audio device.
A Note on Apple Silicon Builds of Audacity
For macOS there are currently two versions of Audacity available; Universal and one built for Apple Silicon or M series chips. Currently, the features required to complete the following steps are missing from the Apple Silicon build. It's recommended that students use the Universal build, which is still compatible with M series chips.
To set this up, you will need:
- Audacity software
- Audio interface
- One of the following:
- microphone and speakers/headphones
- cables to route the output of your interface into the input
It's worth noting that the steps below are for macOS. Windows will follow the same principles, but some windows or screens may look slightly different:
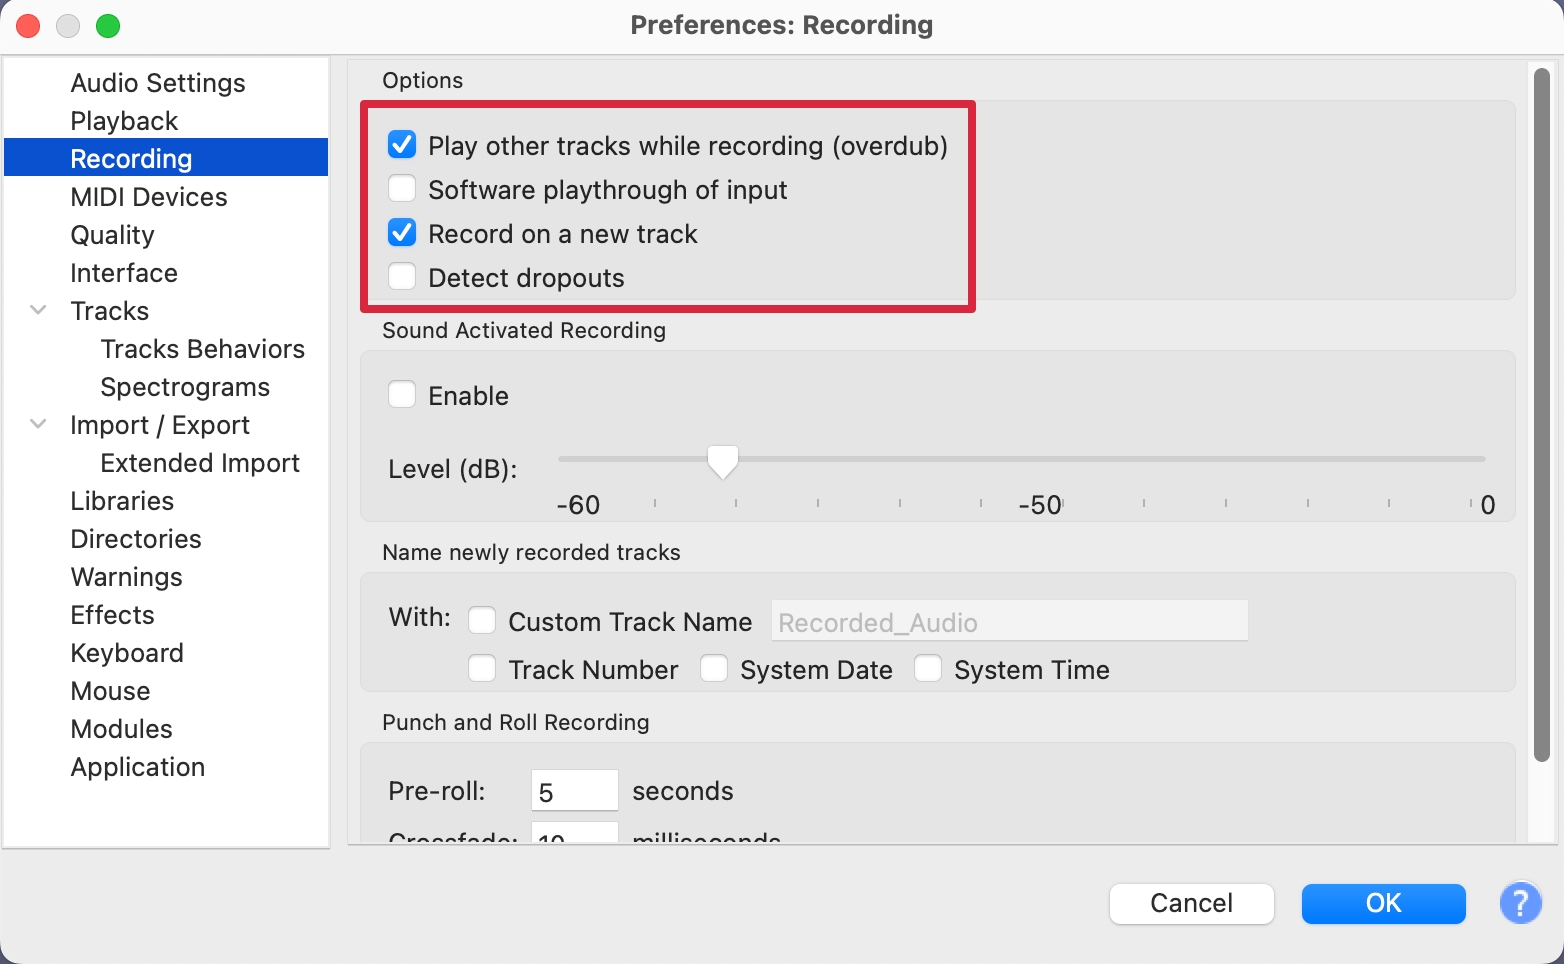
- Navigate to Audacity > Preferences > Recording.
- Ensure that Play other tracks while recording (overdub) is enabled
- Ensure that Software playthrough of input is disabled
- Click on the Audio Settings tab
- Under the Latency section, change Latency Compensation to 0, so that we get an accurate benchmark
- Leave Buffer at its default setting.
Next, we will need to generate our click track to be the constant, known timing track.
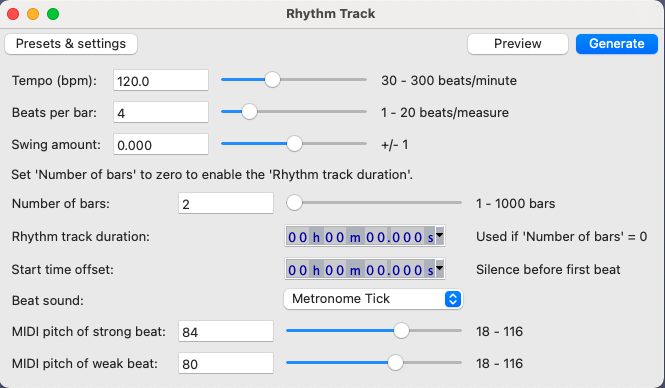
- From the top menu bar, select Generate > Rhythm Track
- Leave everything as default, except change the Number of Bars to 2.
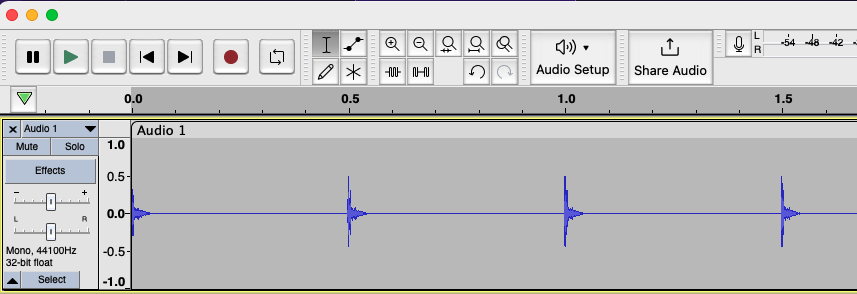
You should now see a click track generated on your first audio track.
Now, we need to record this click track using our audio device. Once we have recorded the click track, we can measure the time difference between the generated track and the recorded track. This will be our latency-compensation time.
If You Are Using a Microphone and Speakers/Headphones
- Click on the Audio Setup button located on the main screen in Audacity.
- Ensure Playback Device is set to the output of your audio interface. This corresponds to where you will hear the sound from.
- Recording Device corresponds to your input, where Audacity will capture your recording from: ensure this is set to your interface's input.
- Next, you will need to point your microphone at either your speakers, or up close to your headphones connected to the interface's output. You may want to check your gain levels to ensure a healthy signal is coming into the microphone. Do not worry about feedback, as we have disabled this within the recording settings.
- Once your levels look healthy (around -12 on Audacity's input meter), you can begin recording by pressing the R key on your keyboard, clicking the red recording circle on the screen, or by navigating to Transport > Recording > Record from the top menu bar.
- Allow the recording to capture the full length of the generated click track.
If You Are Routing Cables in Your Audio Interface
- You will need to take a cable from the output of your audio interface and then run it into the one of the inputs of your interface.
- Click on the Audio Setup button located on the main screen in Audacity
- Ensure Playback Device is set to the output of your audio interface. This corresponds to where you will hear the sound from.
- Ensure Recording Device is set to the input of your audio interface: this is where Audacity will capture your recording from.
- Check your volume levels to ensure a healthy signal. Note that you will need to balance using both the output volume control, and the input gain control.
- Once your levels are correct, you can begin recording by pressing the R key on your keyboard, clicking the red recording circle on the screen, or navigating to Transport > Recording > Record from the top menu bar.
- Allow the recording to capture the full length of the generated click track.
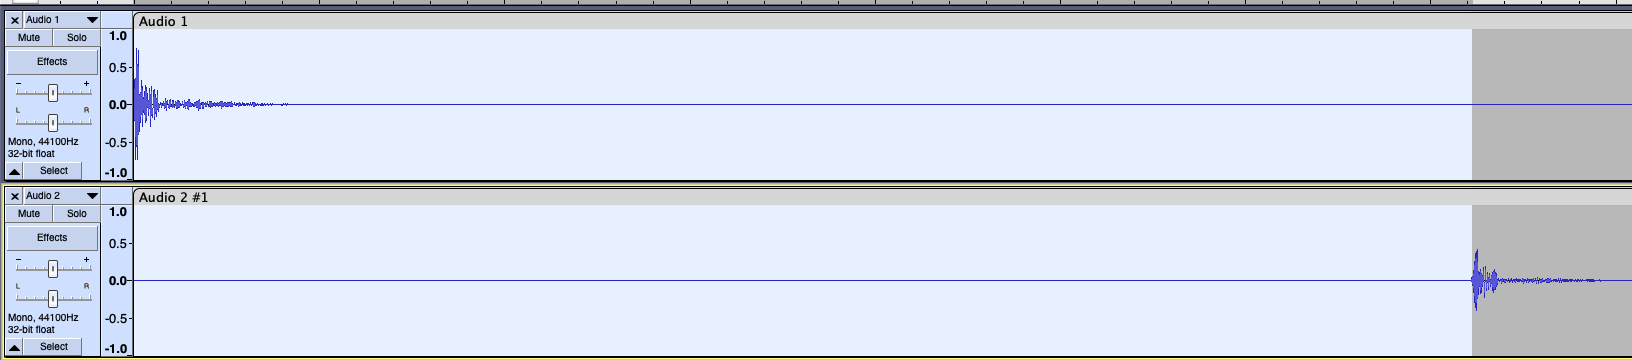
Once completed, you should now have two audio tracks with the second slightly delayed compared to the first.

The difference in time between these two audio tracks represents the latency of your system. Next you need to measure this difference between them.
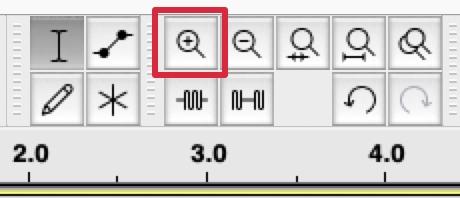
- Use the Zoom In button to zoom in to the point where you are able to clearly see the start of the audio on both tracks.
- Once you have sufficiently zoomed in, click and drag from the start of the first track's audio up until the start of the second track's audio.
- Take note of the number in the bottom of your window. This is the amount in milliseconds that we need to compensate for.
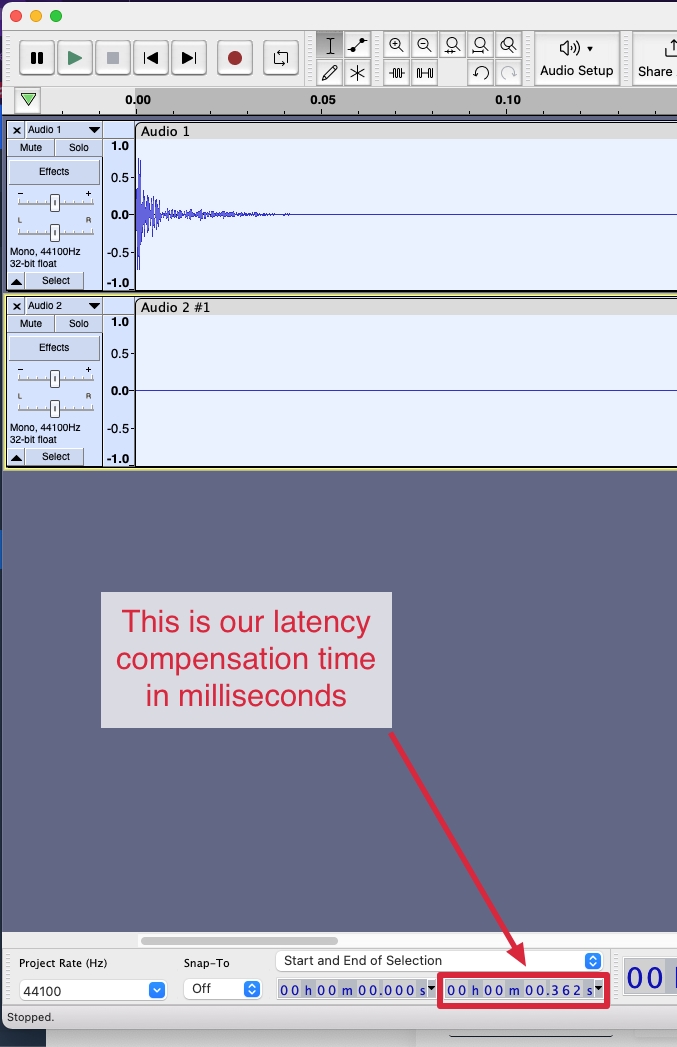
- We can see here in our example that we need to use 362ms of delay compensation. Finally, navigate back to Audacity > Preferences > Devices, and under the Latency Compensation section, put in the number of milliseconds that we have determined we should use.
Now, when we record using the overdub feature, Audacity will take the compensation time into consideration. This will be used to offset the recording from the backing track in order to have your audio line up with what you are hearing as you perform.
