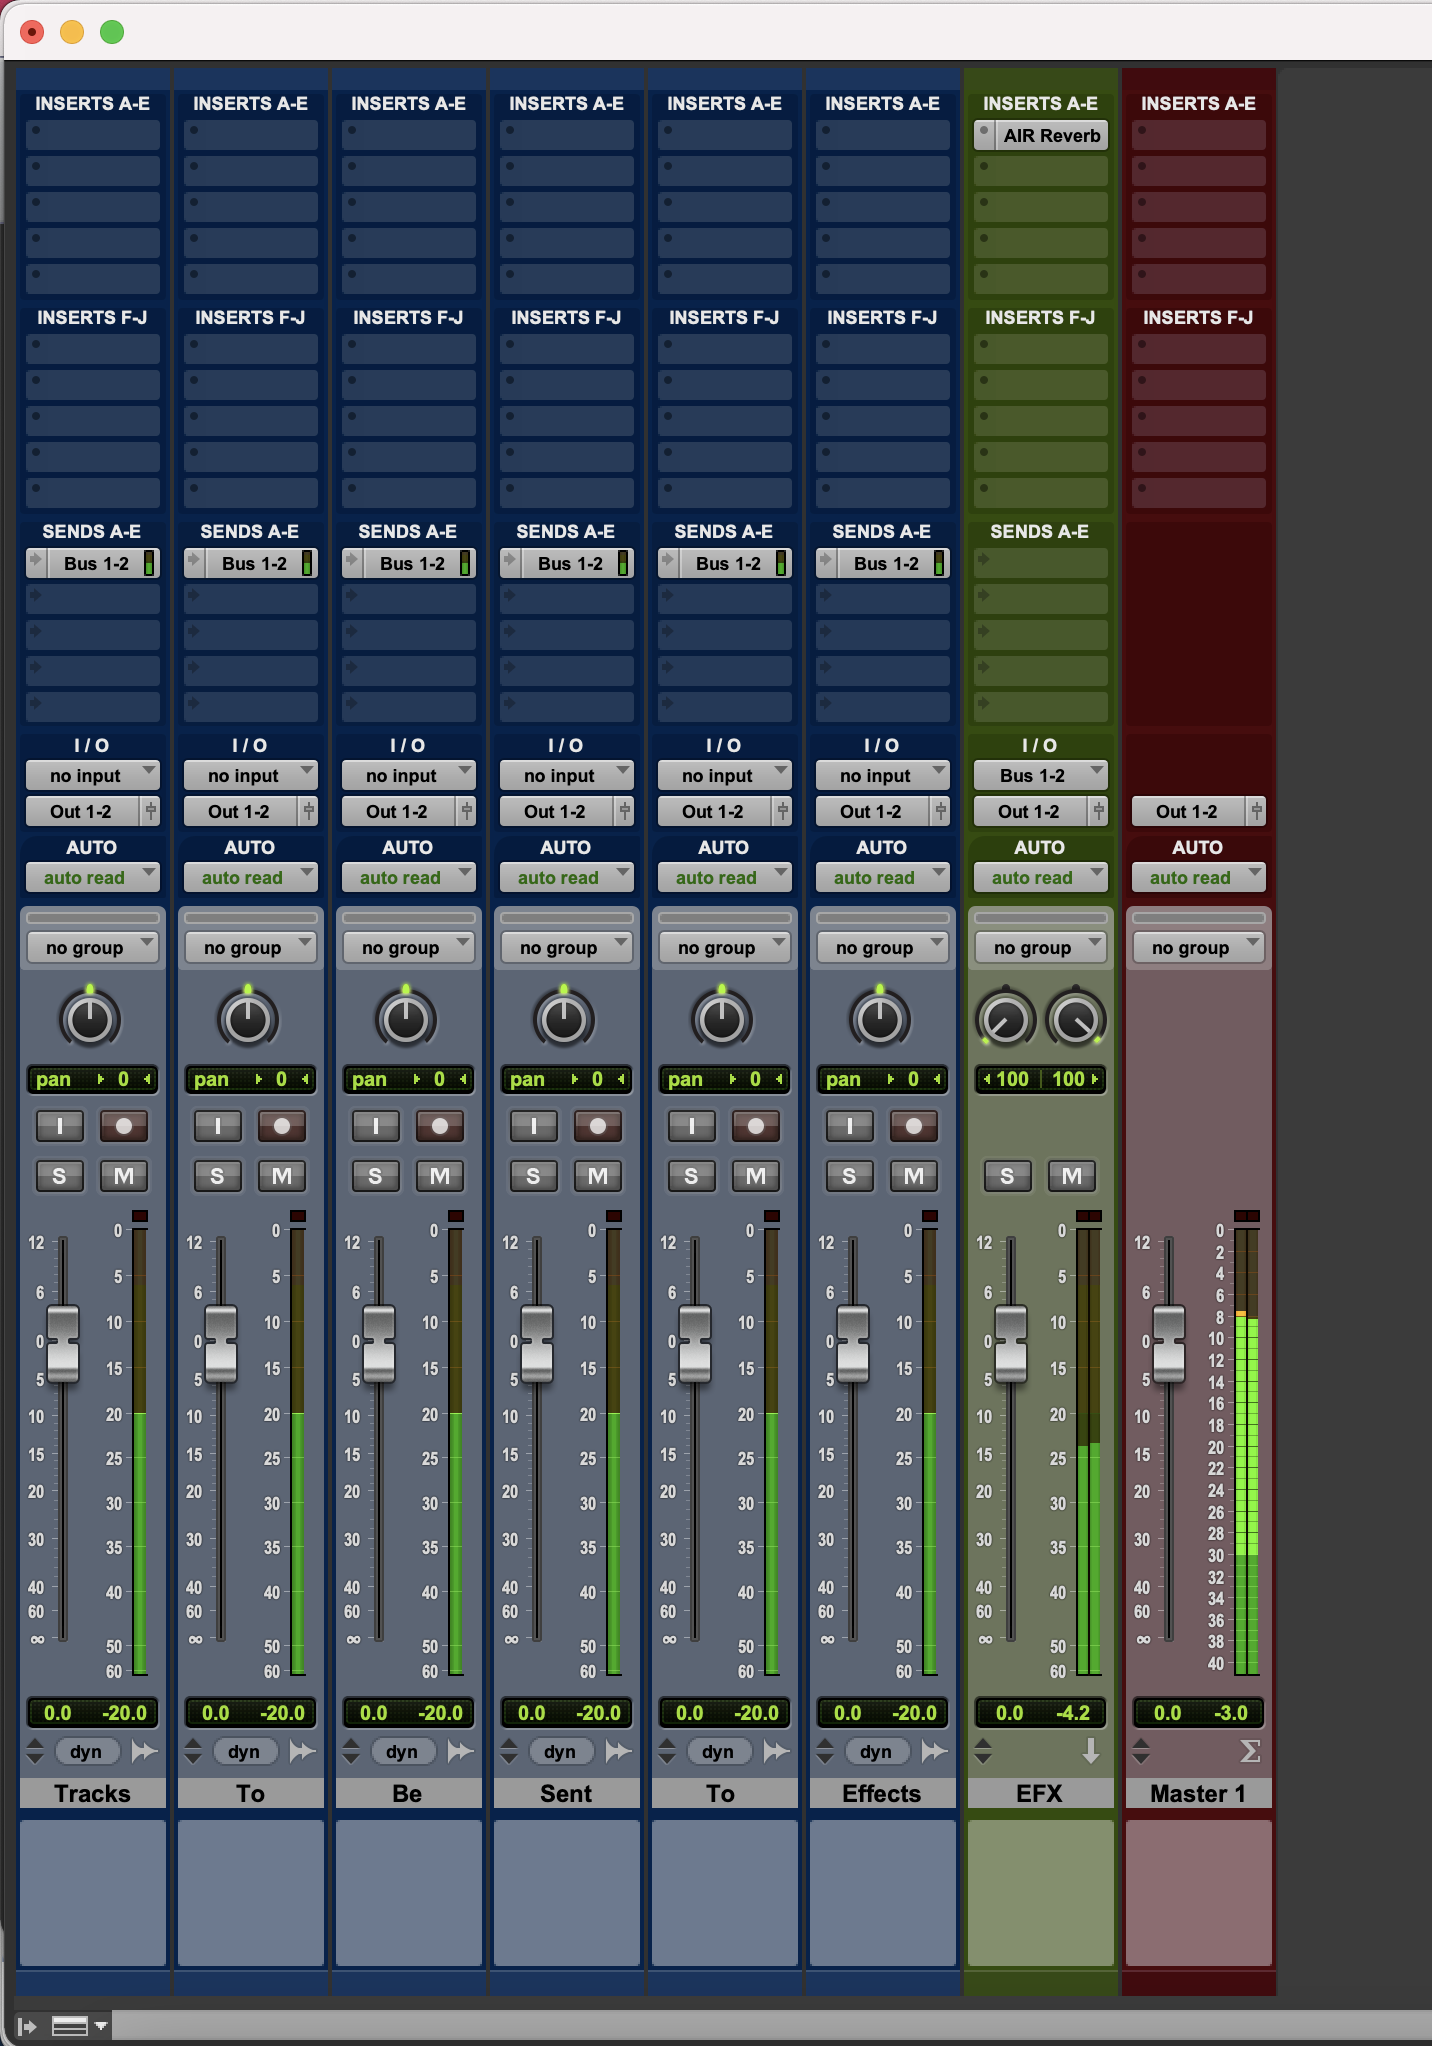
Setting up I/O in Pro Tools, while simple, can be daunting for someone unfamiliar with the software. You can take the following steps in most cases to ensure Pro Tools' I/O and routing is properly set up, as well as to troubleshoot any issues.
1. Select the Correct Playback Engine
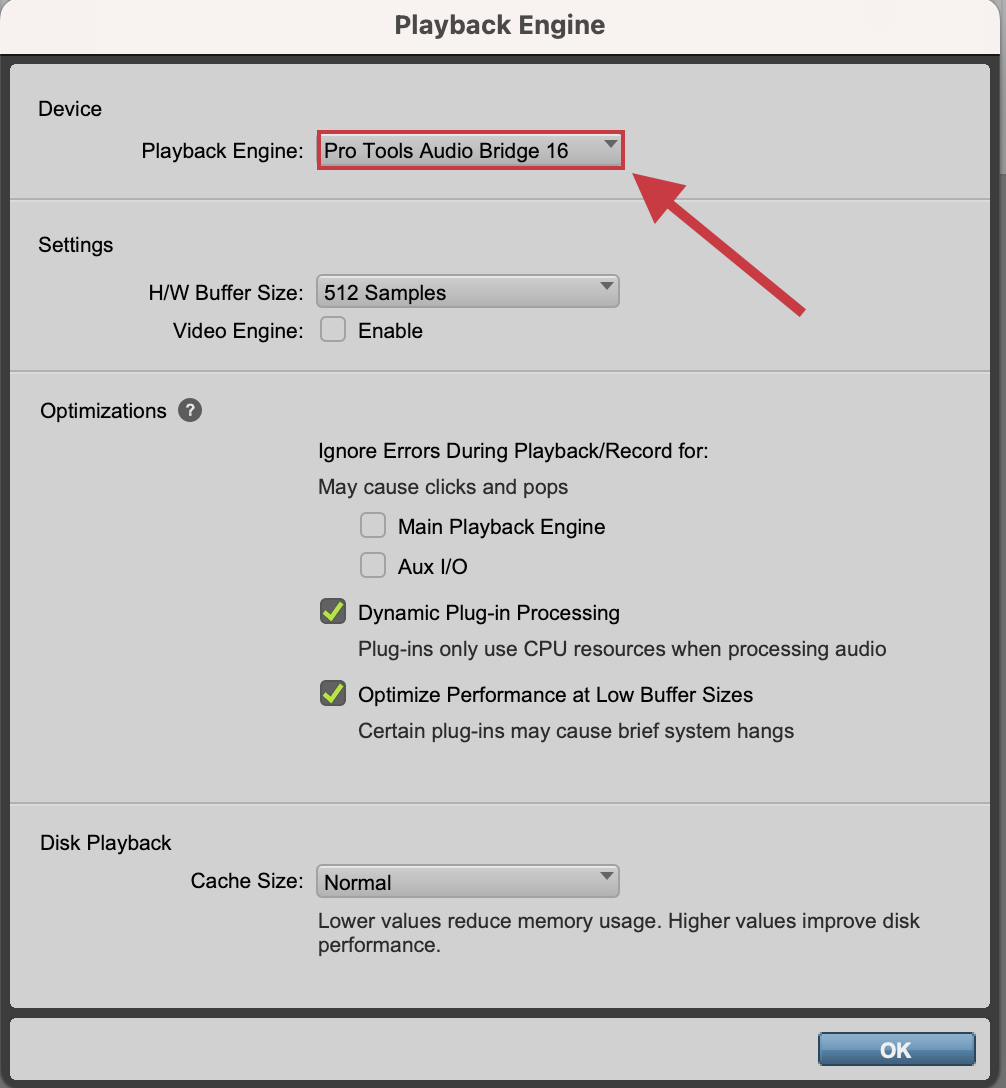
Whether you are using your built-in computer speakers, audio interface, or another audio device, you will need to ensure Pro Tools is communicating with your desired playback device. To do this, navigate to Setup > Playback Engine after starting Pro Tools and opening a session. In the resulting window, select your desired playback engine from the dropdown menu next to the Playback Engine field, then click OK. If the playback engine has changed, Pro Tools will close and reopen the current session.
You can also perform this action by holding down the N key on your keyboard while Pro Tools is starting up.
2. Set Inputs and Outputs
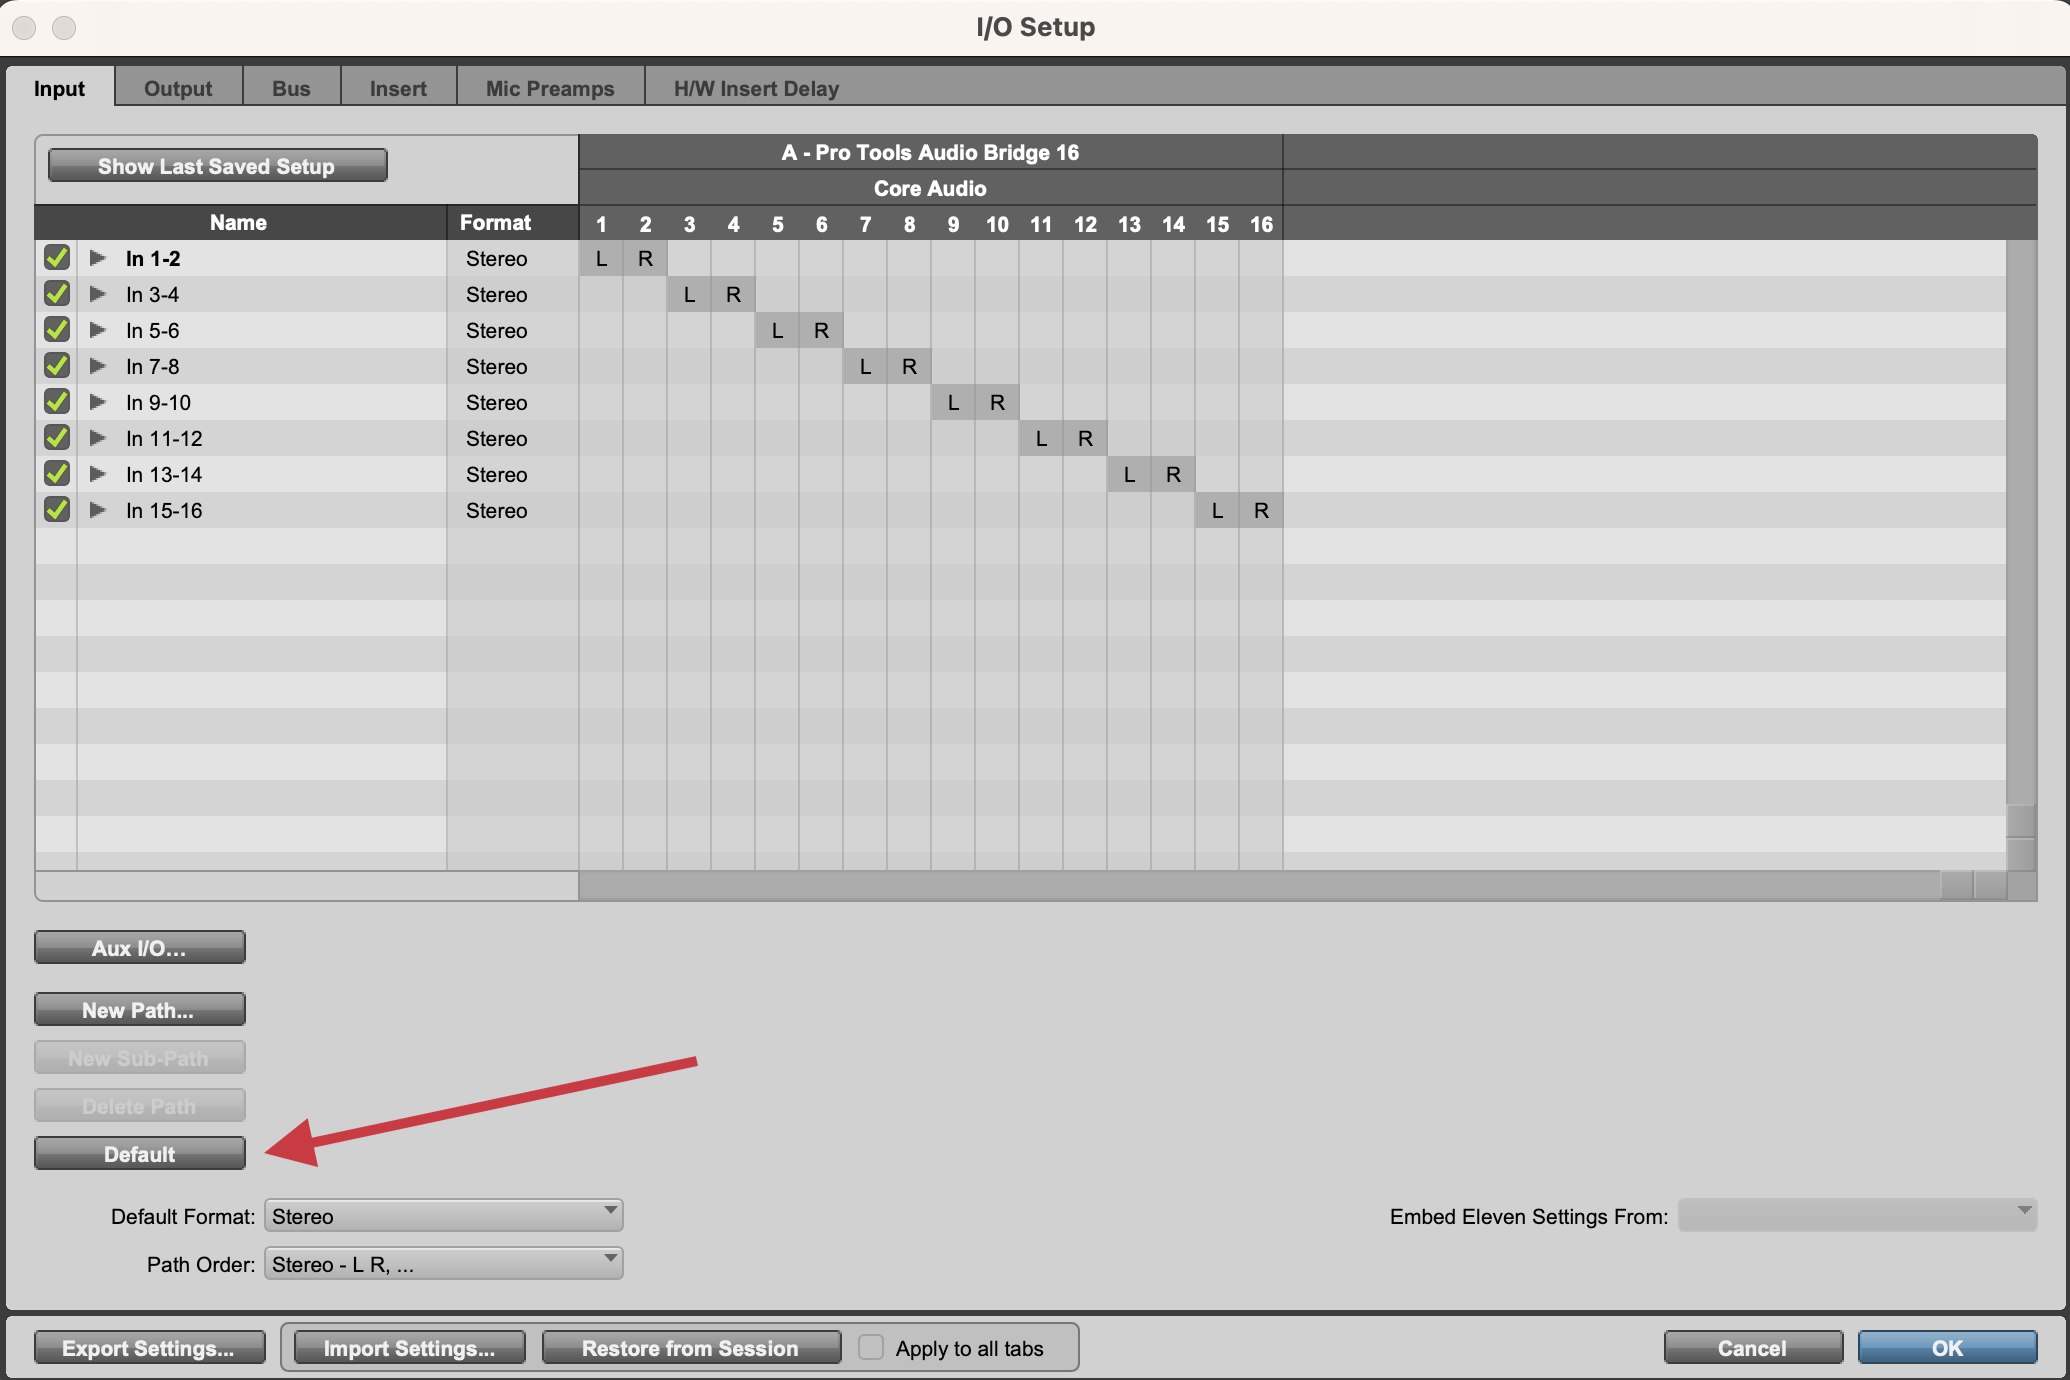
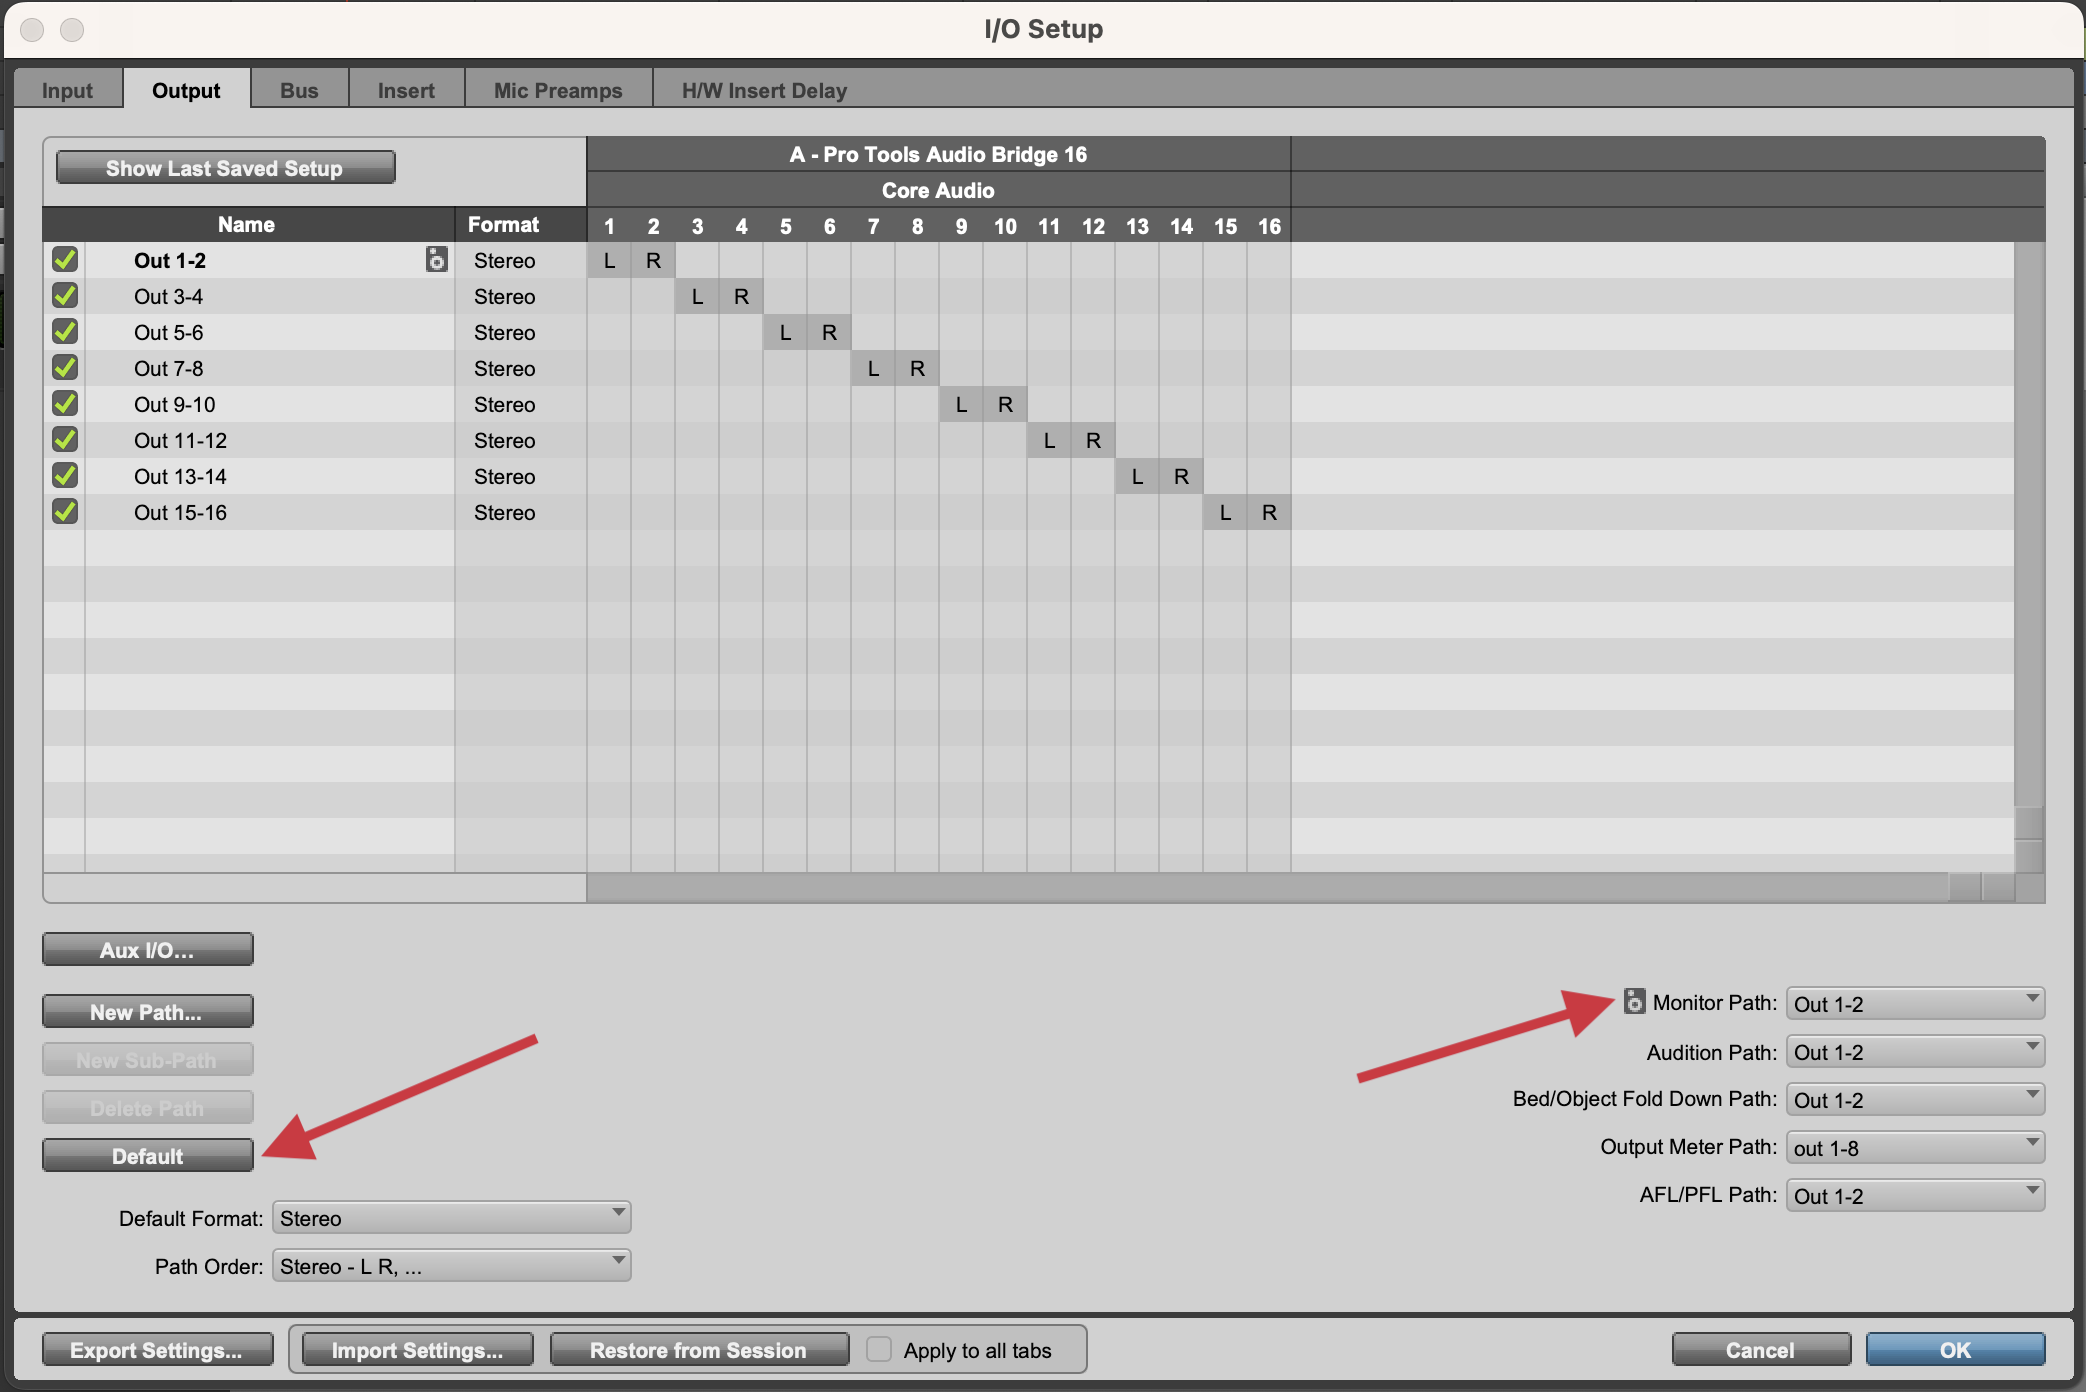
After selecting the new playback engine, navigate to the I/O Setup window by going to Setup > I/O. In general, the input and output tabs of the resulting window shouldn't need to changed after selecting a new playback engine. However, if you previously made changes to the inputs and outputs, or would like to set them to their default value for good measure, you can press the Default button under both the Input and Output tabs.
Alternatively, you can create your own I/O setup using the New Path button. In most scenarios this is unnecessary, but may be useful for troubleshooting purposes. To create a new input or output path, click the New Path button on the respective tab. You will then have several options, including number of paths, format, name, etc. Most workflows use stereo paths with automatically-created subpaths. You can create the new path by selecting your desired options, then clicking the Create button.
After the path(s) are created, you can move the gray box(es) to the desired input or output number listed at the top of the screen to map the paths to your audio device. If you have created a stereo path, you will need to click-and-drag both the left and right channels to their desired input or output.
You can also set the monitor path (or main output) of your session by selecting it from the dropdown menu on the bottom right of the Output tab. By default, this is usually set to Output 1 and Output 2, and this is typical for most sessions.
3. Set Busses
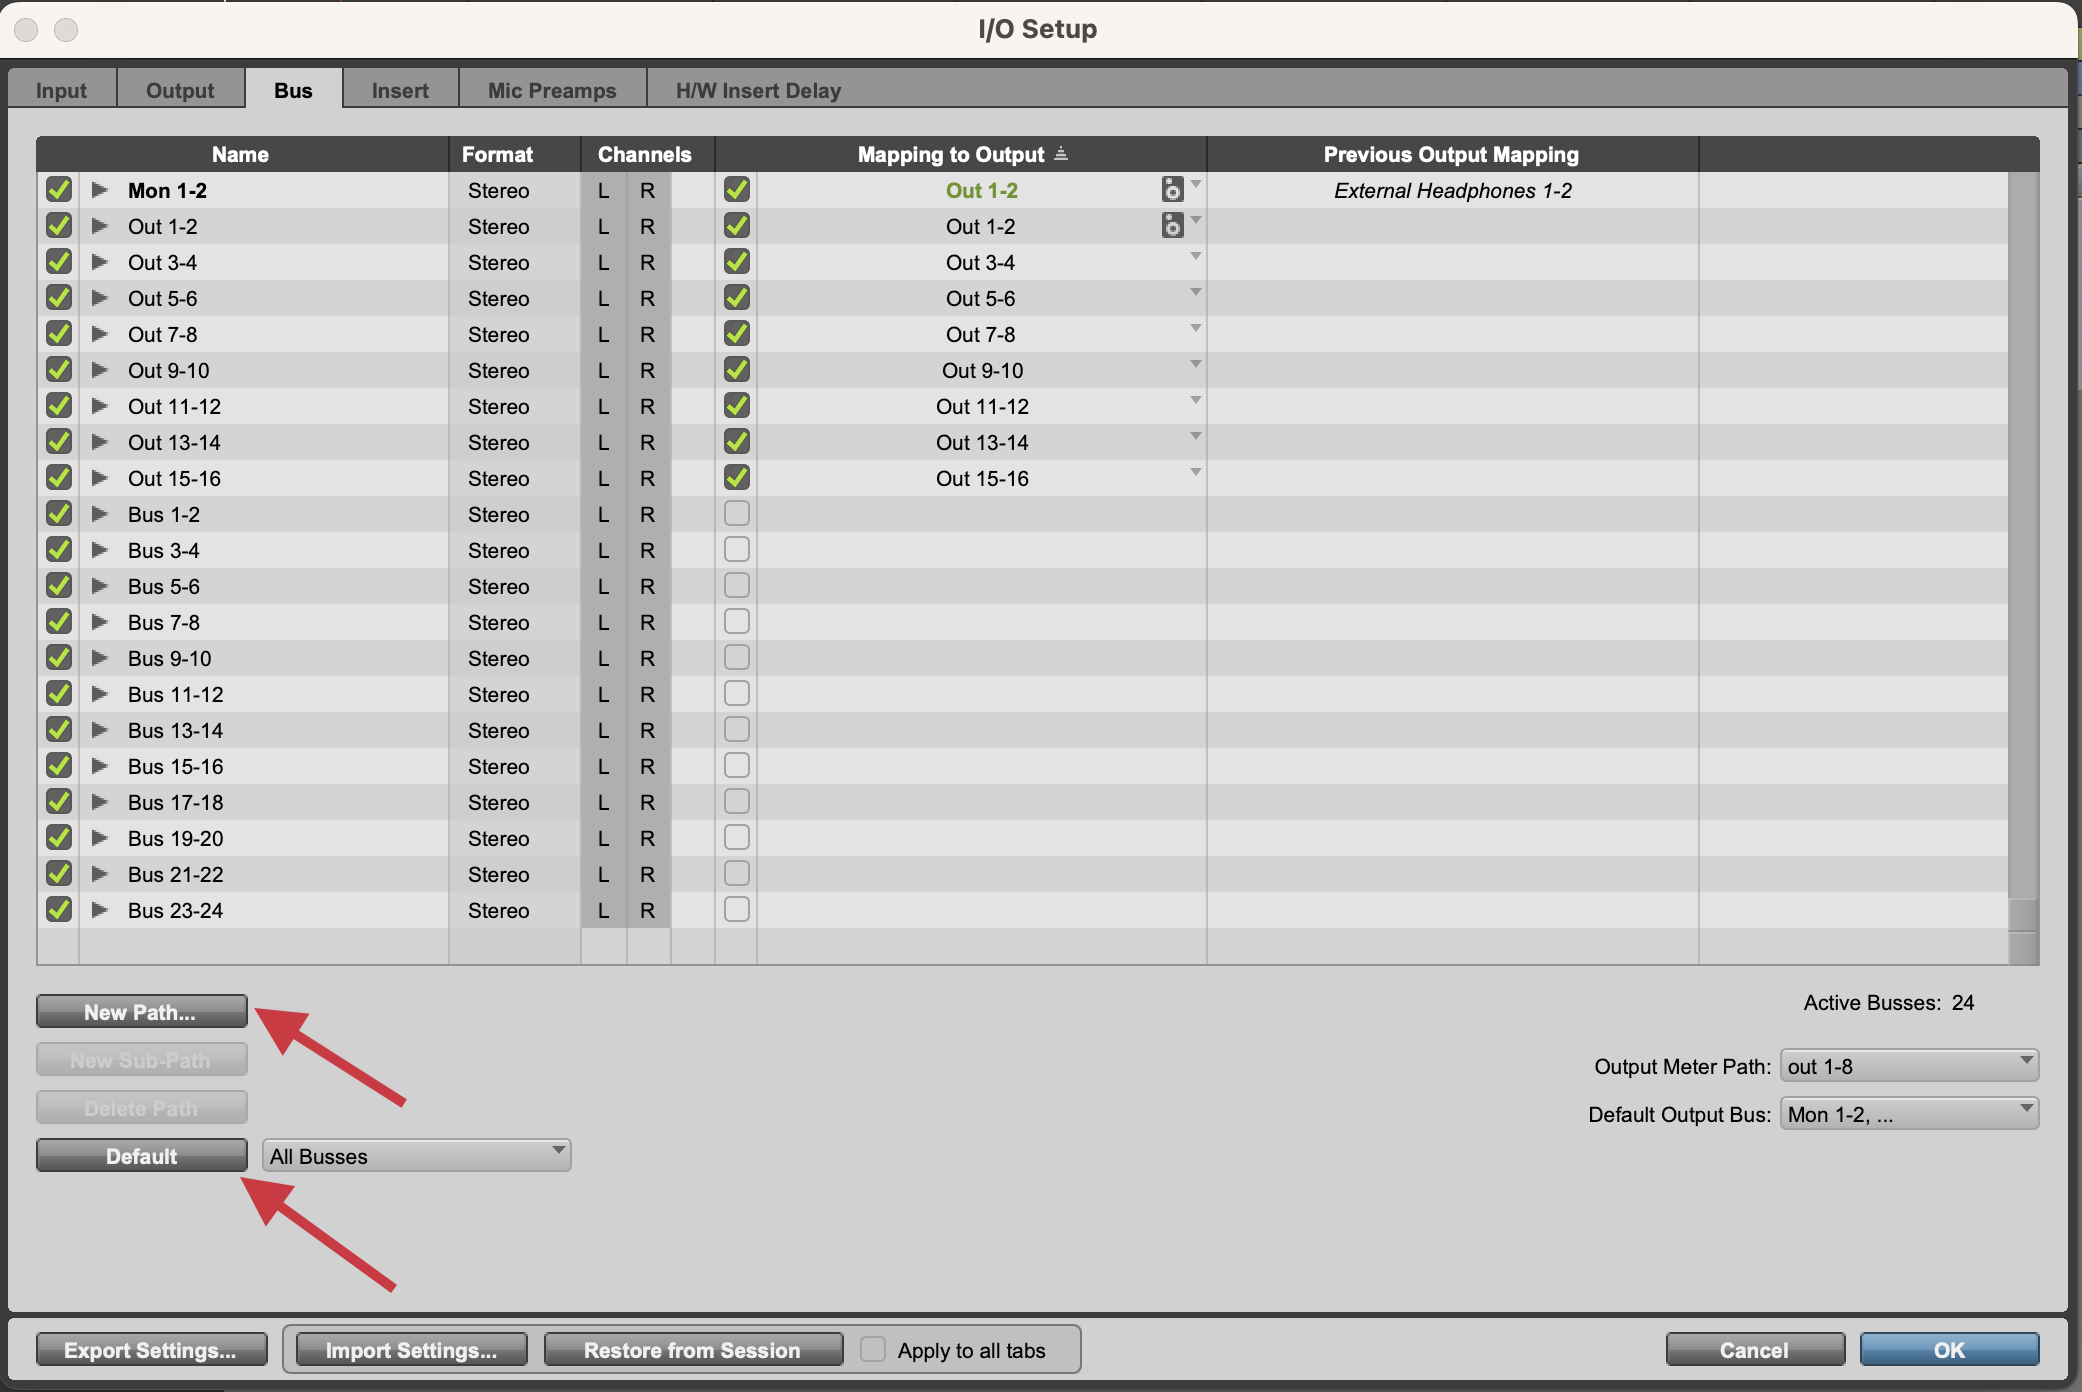
The Bus tab in the I/O Setup window handles all busses in Pro Tools, including internal busses and busses that are mapped to hardware outputs. Unlike the Input and Output tabs of the I/O Setup window, the Bus tab can easily become a mess when switching between sessions and playback engines, as the busses mapped to outputs are not automatically deleted by default. Thankfully, like the Input and Output tabs, this can be easily reset by using the Default button.
The Bus tab is one area where it is often necessary to create more internal busses using the New Path button. You can create an infinite amount of internal busses for routing inside Pro Tools, and it's not uncommon for sessions with complex routing to require the creation of more busses.
Busses that are mapped to outputs are often a point of confusion; essentially, these are busses that are intermediary busses between the output paths created in the Output tab and the physical outputs of your audio device. If there is not a bus mapped to an output for a specific output path, it will not be a selectable output for any tracks. For this reason, every output you have created in the Output tab needs a corresponding bus that is mapped to a physical output.
Once your I/O is set up, you can begin routing audio in your Pro Tools session. There are many ways to route audio within, into, and out of Pro Tools. Below are some examples of these scenarios with descriptions of how you would route them.
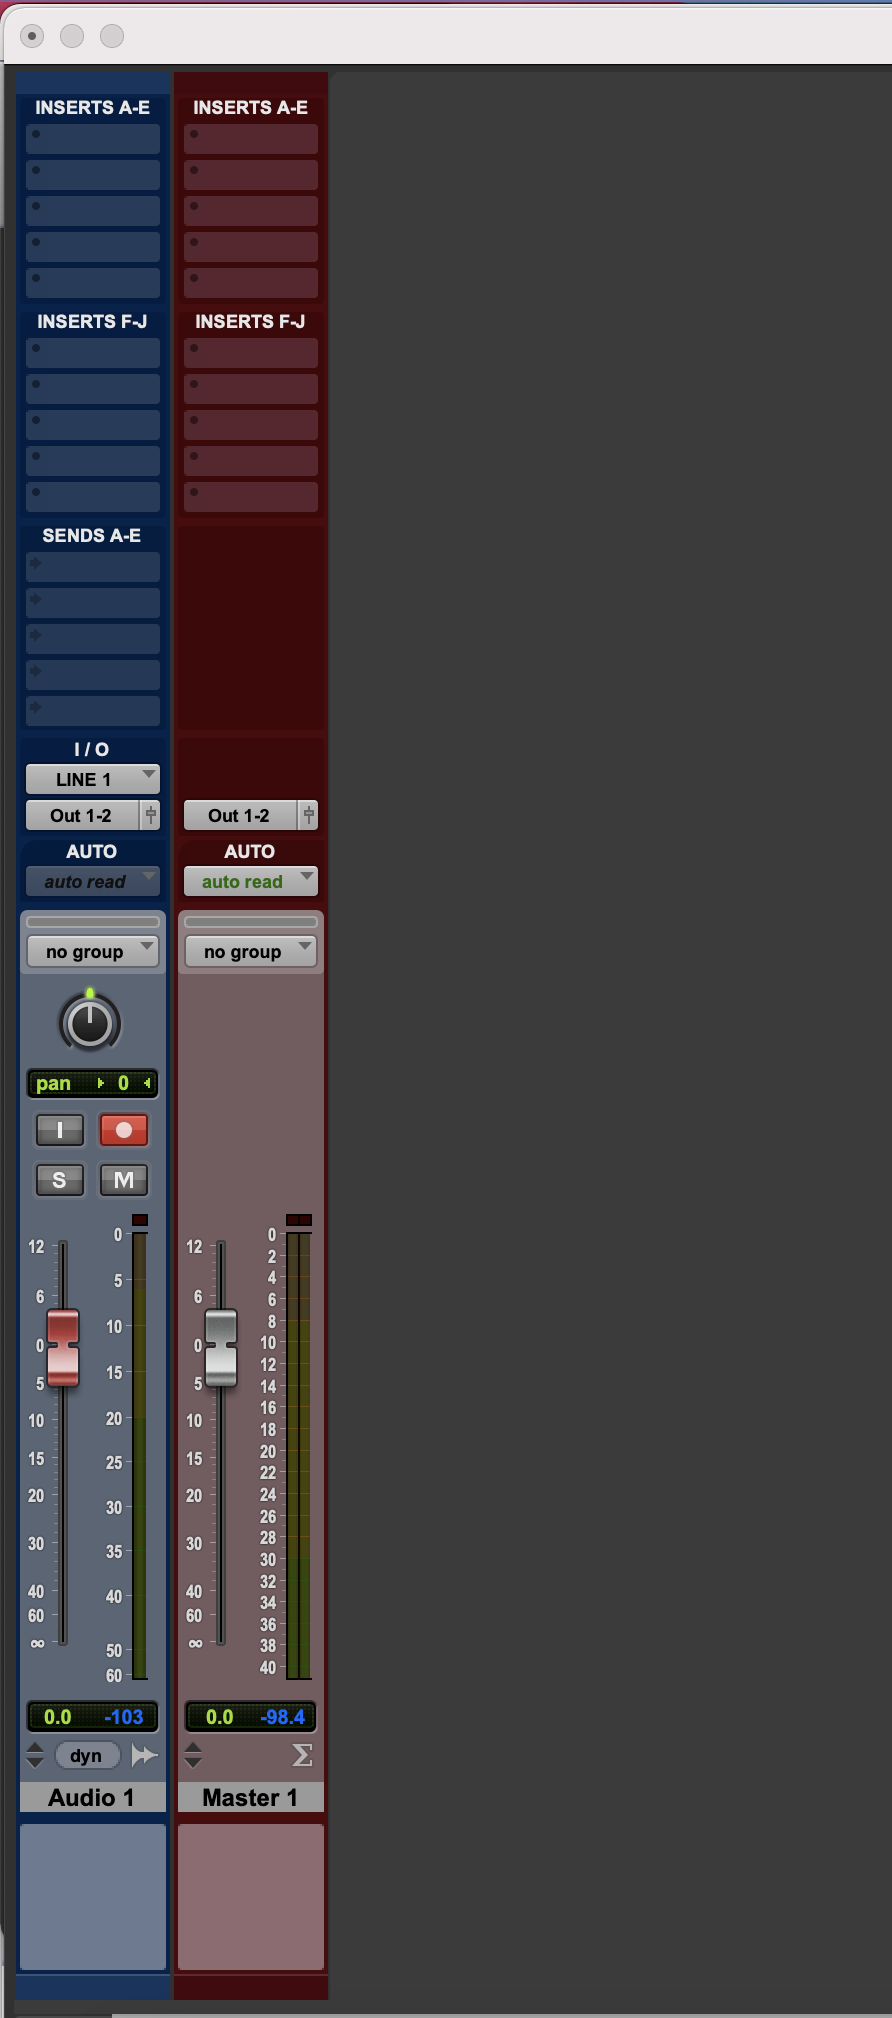
Single Track Basic Recording
In this scenario, you would use:
- Single Audio Track
- Input: The input that the mic/instrument is connected to
- For example, if your microphone is connected to Channel 1 on your audio interface, you would select Input 1. For Channel 2, you would select Input 2, etc.
- Output: Main Output path (for example, Output 1-2 on most interfaces)
- Input: The input that the mic/instrument is connected to
- Master Fader (Optional)
- Output: Main Output path
With this routing configuration, the audio goes into the audio track, through the Master Fader, and out your main output path.
Multi-Track Basic Recording
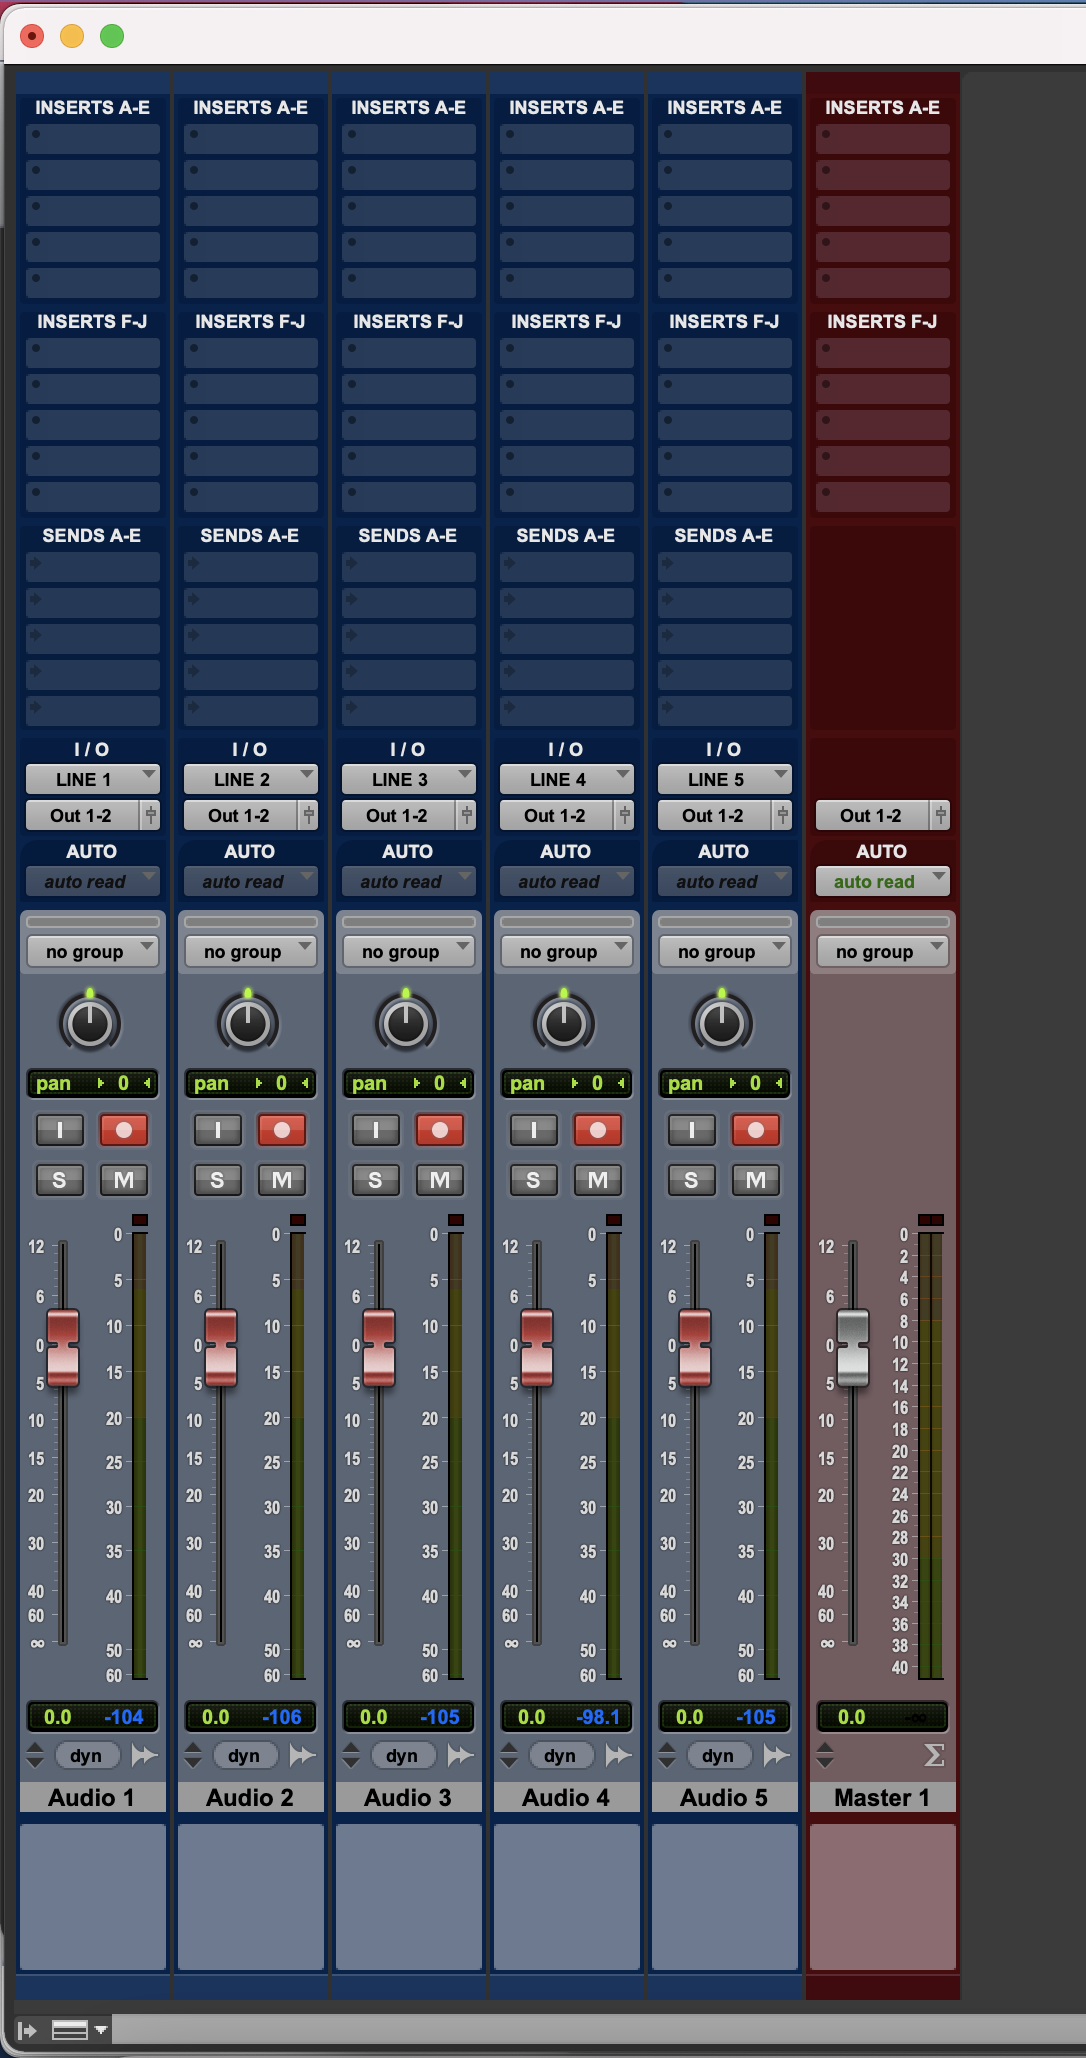
In this scenario, you would use:
- Multiple Audio Tracks
- Inputs: Cascaded inputs that the microphones are connected to
- For example, select Input 1 for the microphone connected to Channel 1 on your audio interface; for Channel 2, select Input 2, etc.
- Output: Main output path (for example, Output 1-2 on most interfaces)
- Inputs: Cascaded inputs that the microphones are connected to
- Master Fader (Optional)
- Output: Main Output path
With this routing configuration, each individual signal goes through its own audio track, then every track is combined into and sent through the master fader. This combined signal is then sent out of your main output path.
Sub-Grouping
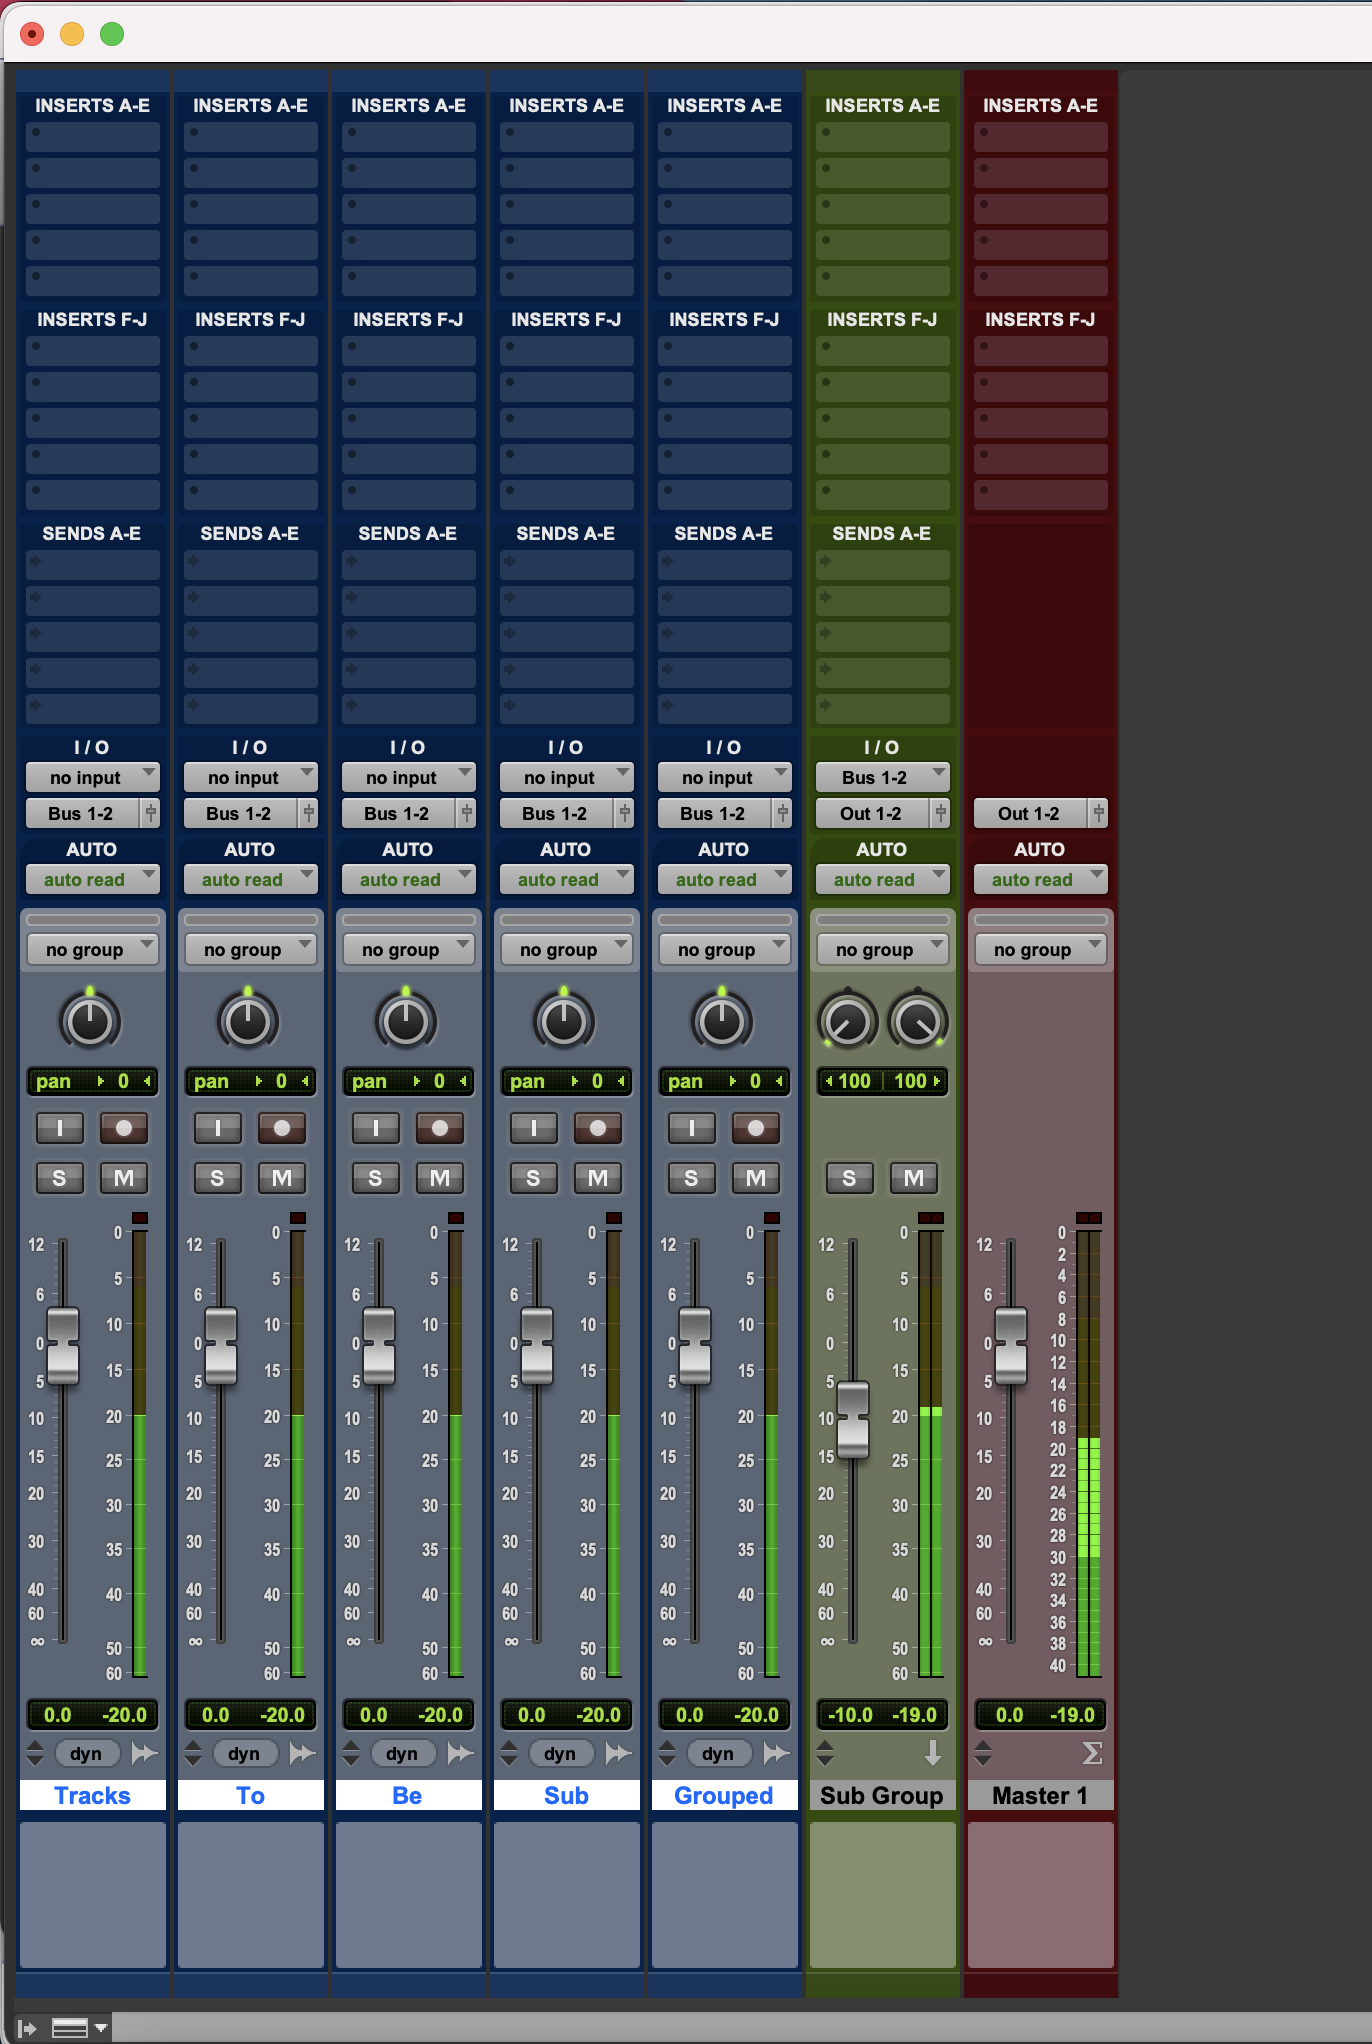
You can use auxiliary tracks (called Aux tracks in Pro Tools) and internal busses to create sub-groups of tracks that can be controlled on a single fader. To do this, you would use:
- Multiple Audio Tracks
- Inputs: Any
- Output: Internal Bus Output (for example, Bus 1-2)
- Sub-group (Aux Track)
- Input: Internal Bus Input used by audio tracks (for example, Bus 1-2)
- Output: Main Output path (for example, Output 1-2 on most interfaces
- Master Fader (Optional)
- Output: Main Output path
With this routing, each audio track is sent through and combined into its assigned sub-group, which is then fed to the Master Fader. The signal from the Master Fader is then sent out your main output path.
Effects Sends
You can use Aux tracks, internal busses, and track sends to create effects tracks that operate independently from the track feeding them. To do this, you would use:
- Audio Track
- Inputs: Any
- Send: Internal Bus
- Output: Any
- Effect Track (Aux Track)
- Input: Internal Bus Input used by audio tracks (for example, Bus 1-2)
- Output: Main Output path (for example, Output 1-2 on most interfaces
- Master Fader (Optional)
- Output: Main Output path
With this routing, each audio track is combined and sent into its assigned subgroup, which is then fed to the Master Fader. The signal from the Master Fader is then sent out your main output path.
