Plug-ins can be instantiated from either the Mix or Edit window in Pro Tools. In the example below, the Mix window will be used.
Note
If you do not see the Inserts A-E view on the Mix or Edit window, select View at the top of the window, hover over Mix Window Views or Edit Window Views, then click Inserts A-E.
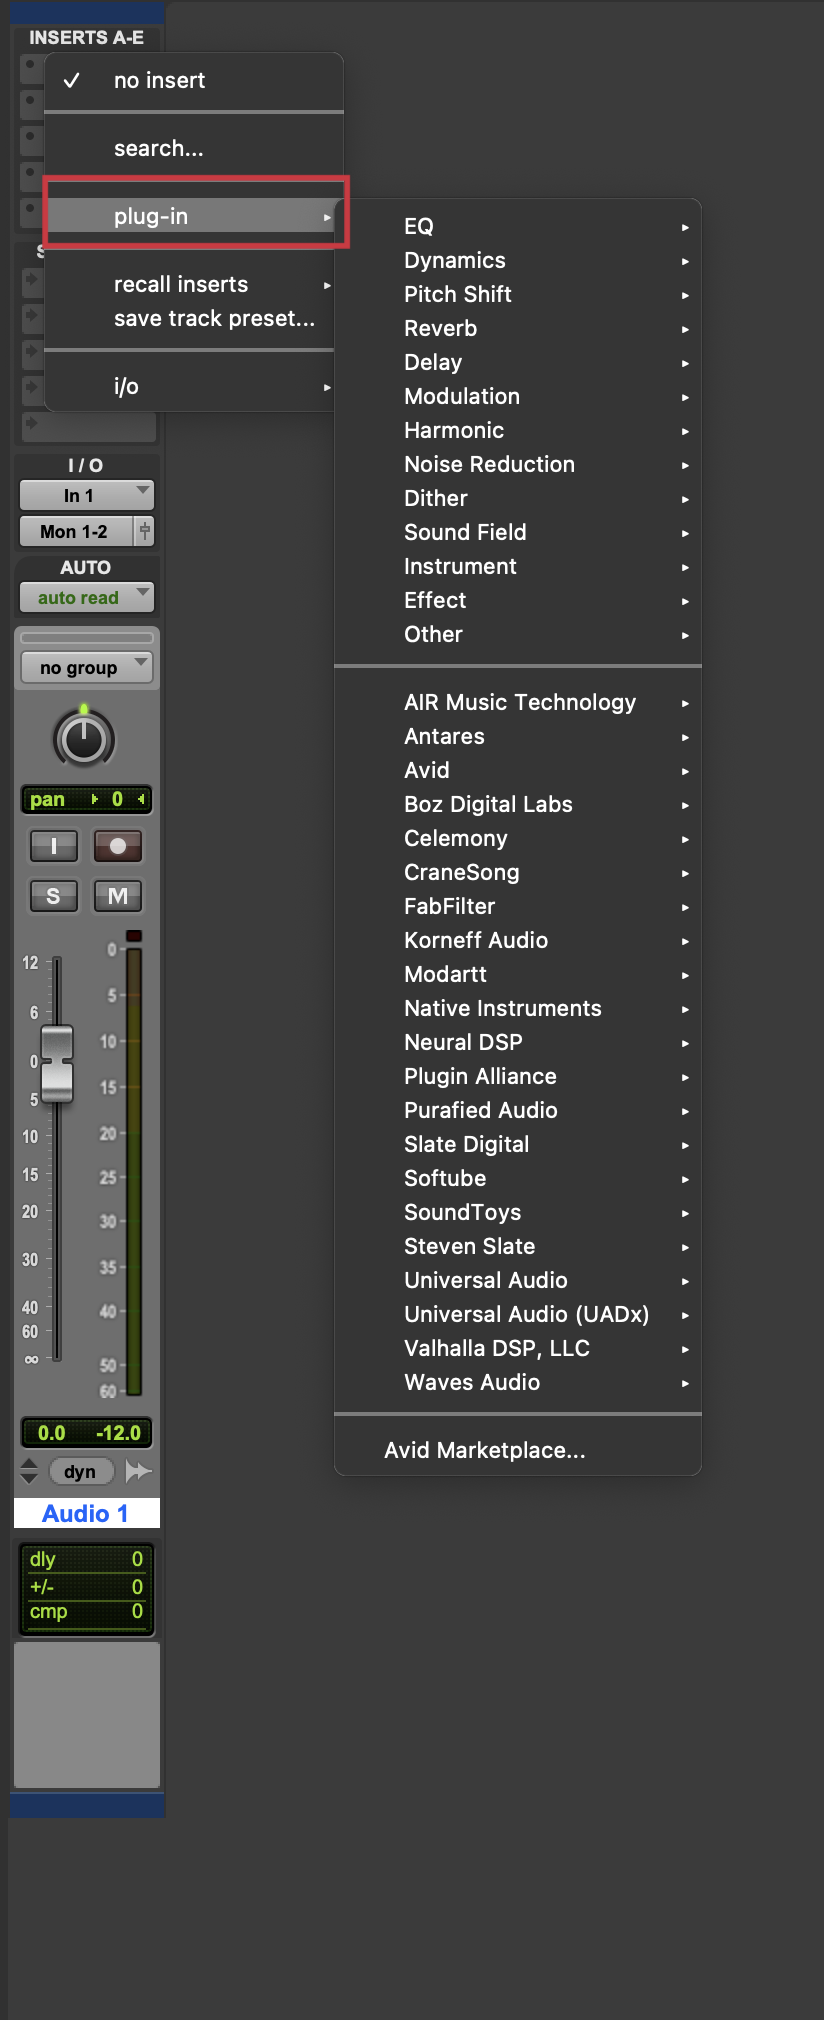
- Locate the track on which you want to instantiate a plug-in, then click one of the empty slots under Inserts A-E (or Inserts F-J).

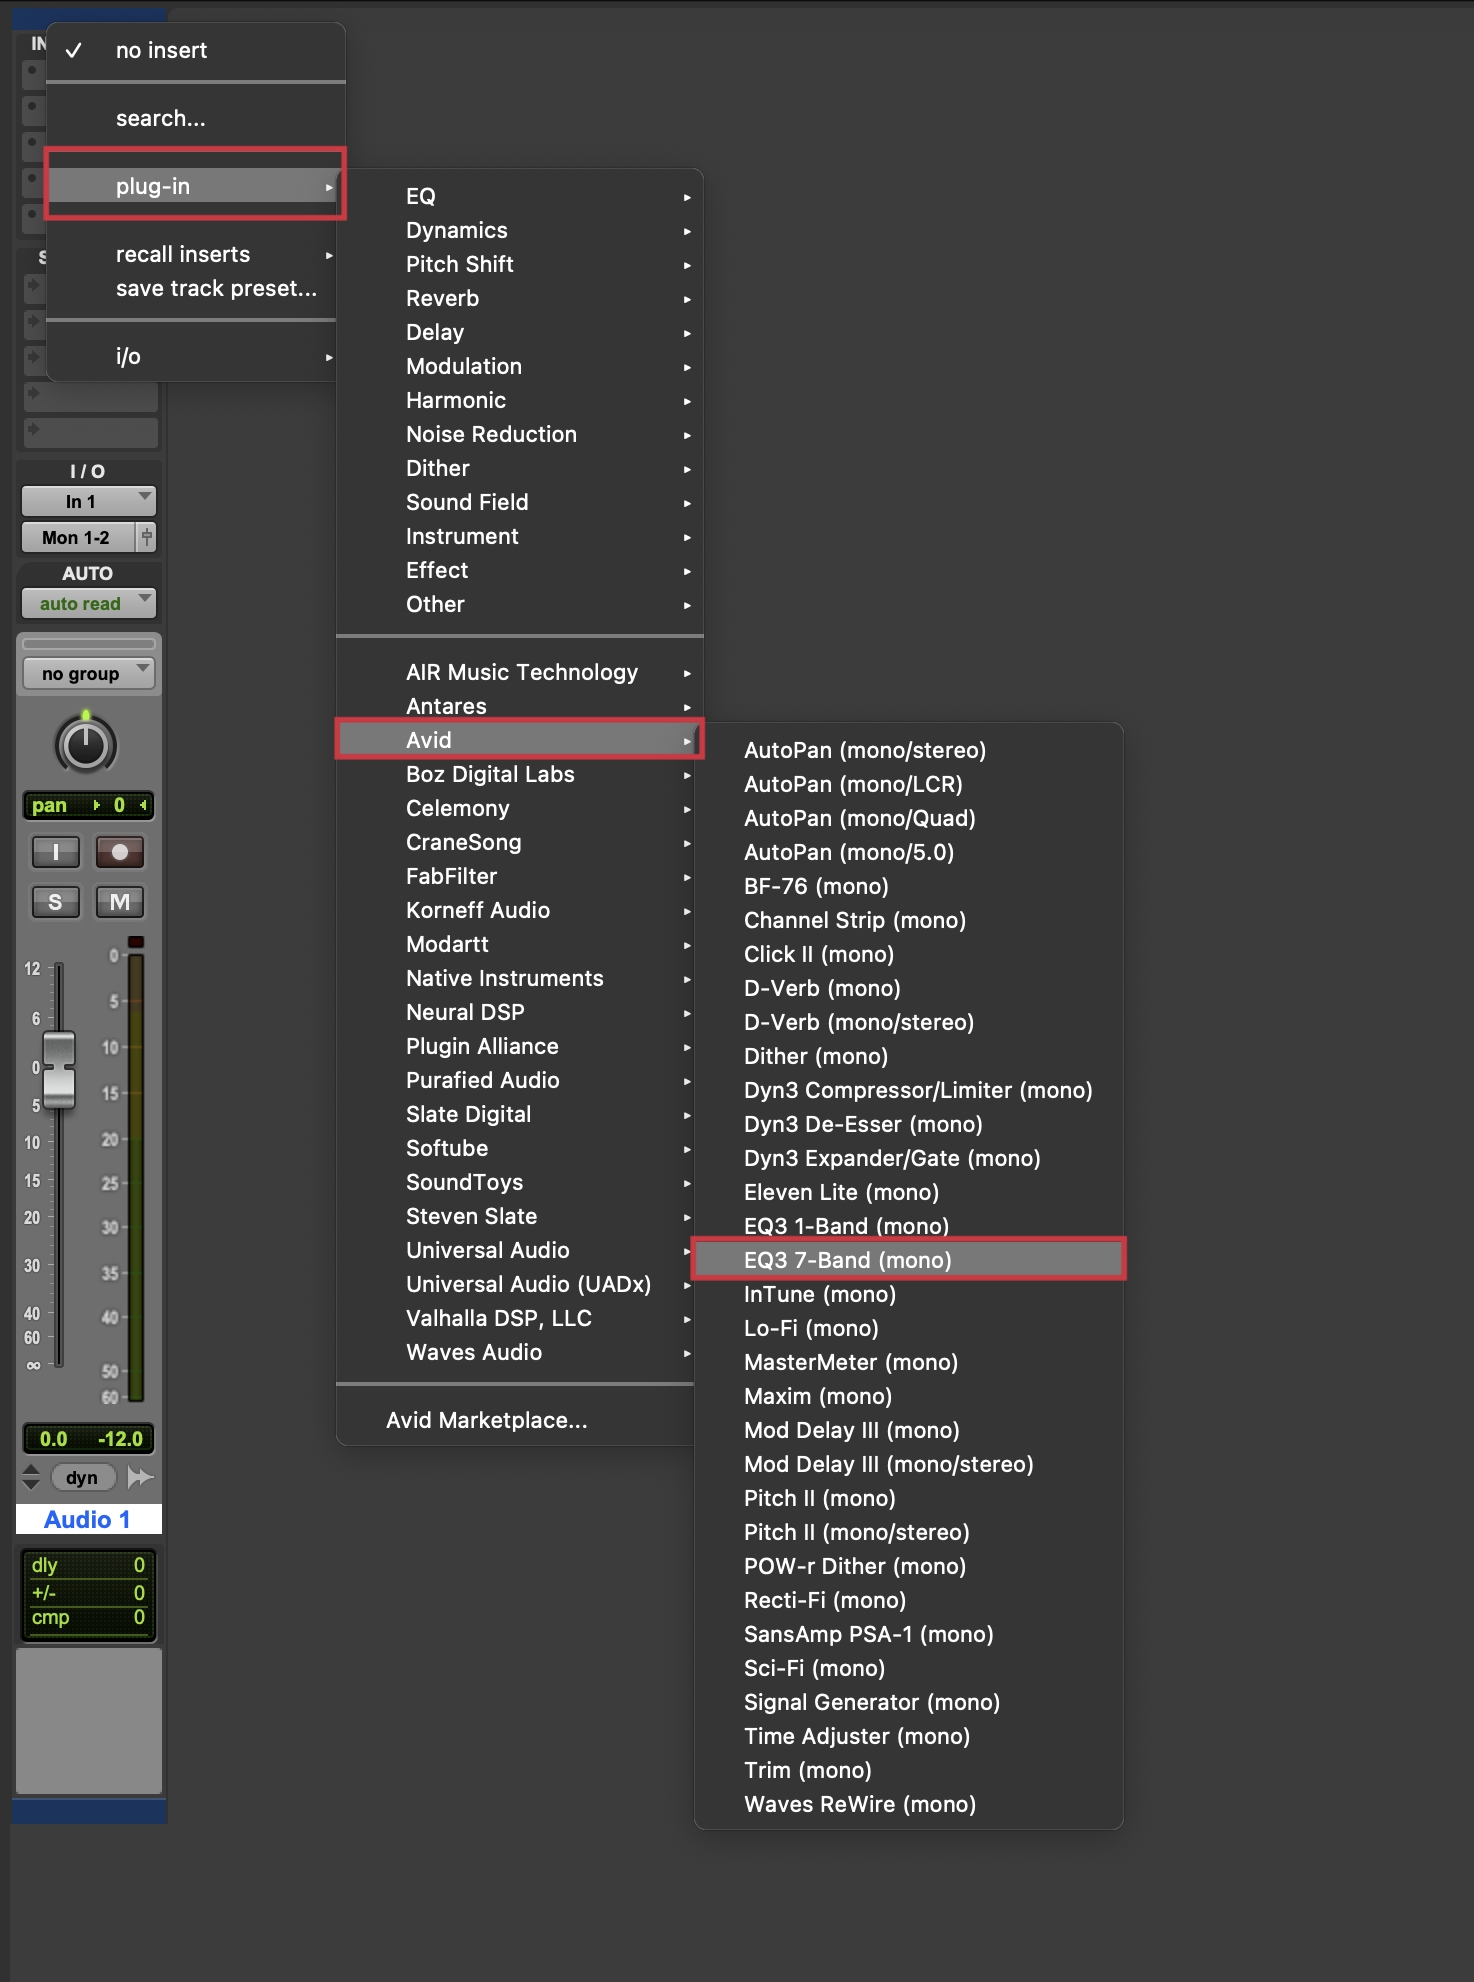
- Hover over the plug-in menu item; this will display your available plug-in categories and/or manufacturers (depending on your settings).

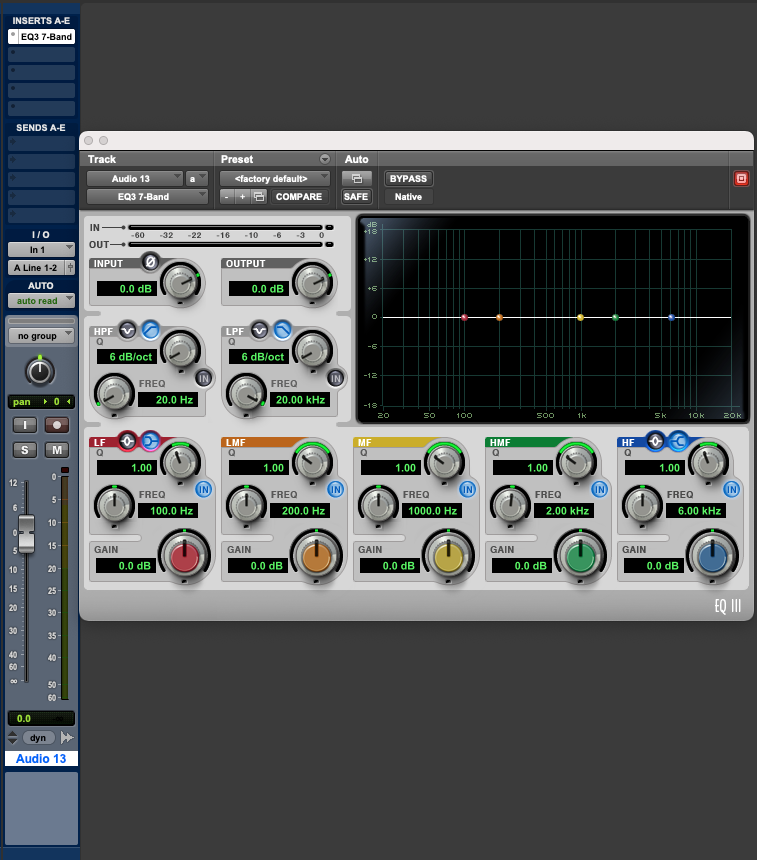
- Hover over a plug-in category or manufacturer to display the plug-ins available in that category. Click on a plug-in to instantiate it on the track, which will open its interface in a new window.


The plug-in has now been instantiated on your track. The plug-in window can be closed by pressing the X at the top left of the window, and re-opened by clicking the plug-in name on the track.
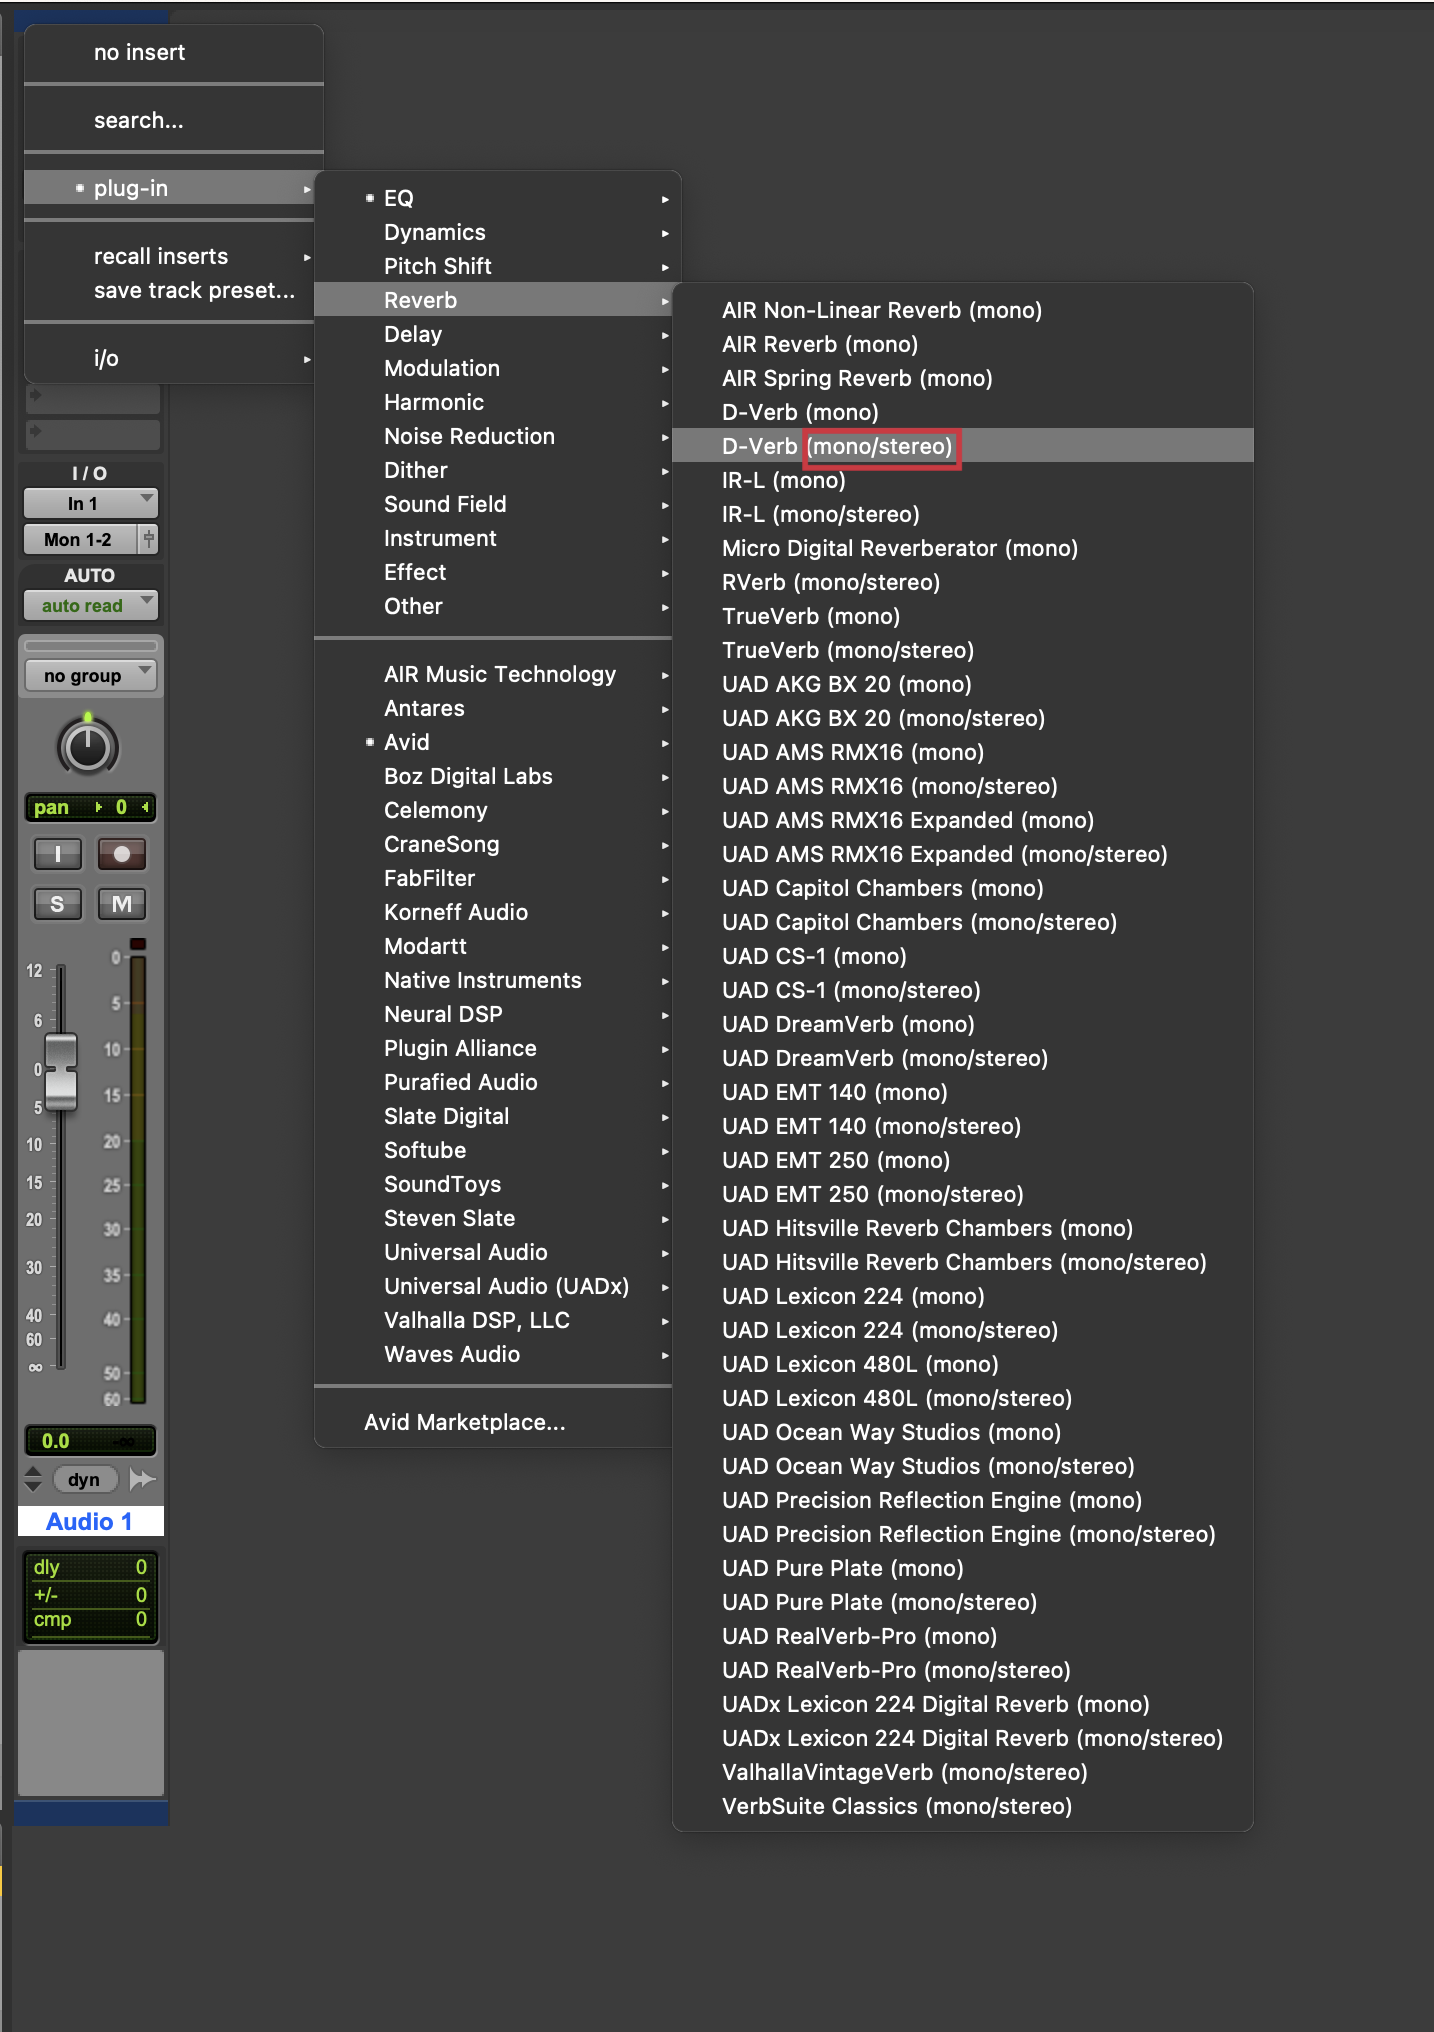
It is worth noting that some plug-ins, when instantiated on a mono track, will give the option to open a stereo version of the plug-in. This is denoted by the (mono/stereo) being present at the end of the plug-in name. Selecting this option on a mono track will convert the track to a stereo track. This option is mainly present on stereo effects, such as reverbs and delays; the example shown below is a stereo reverb.


