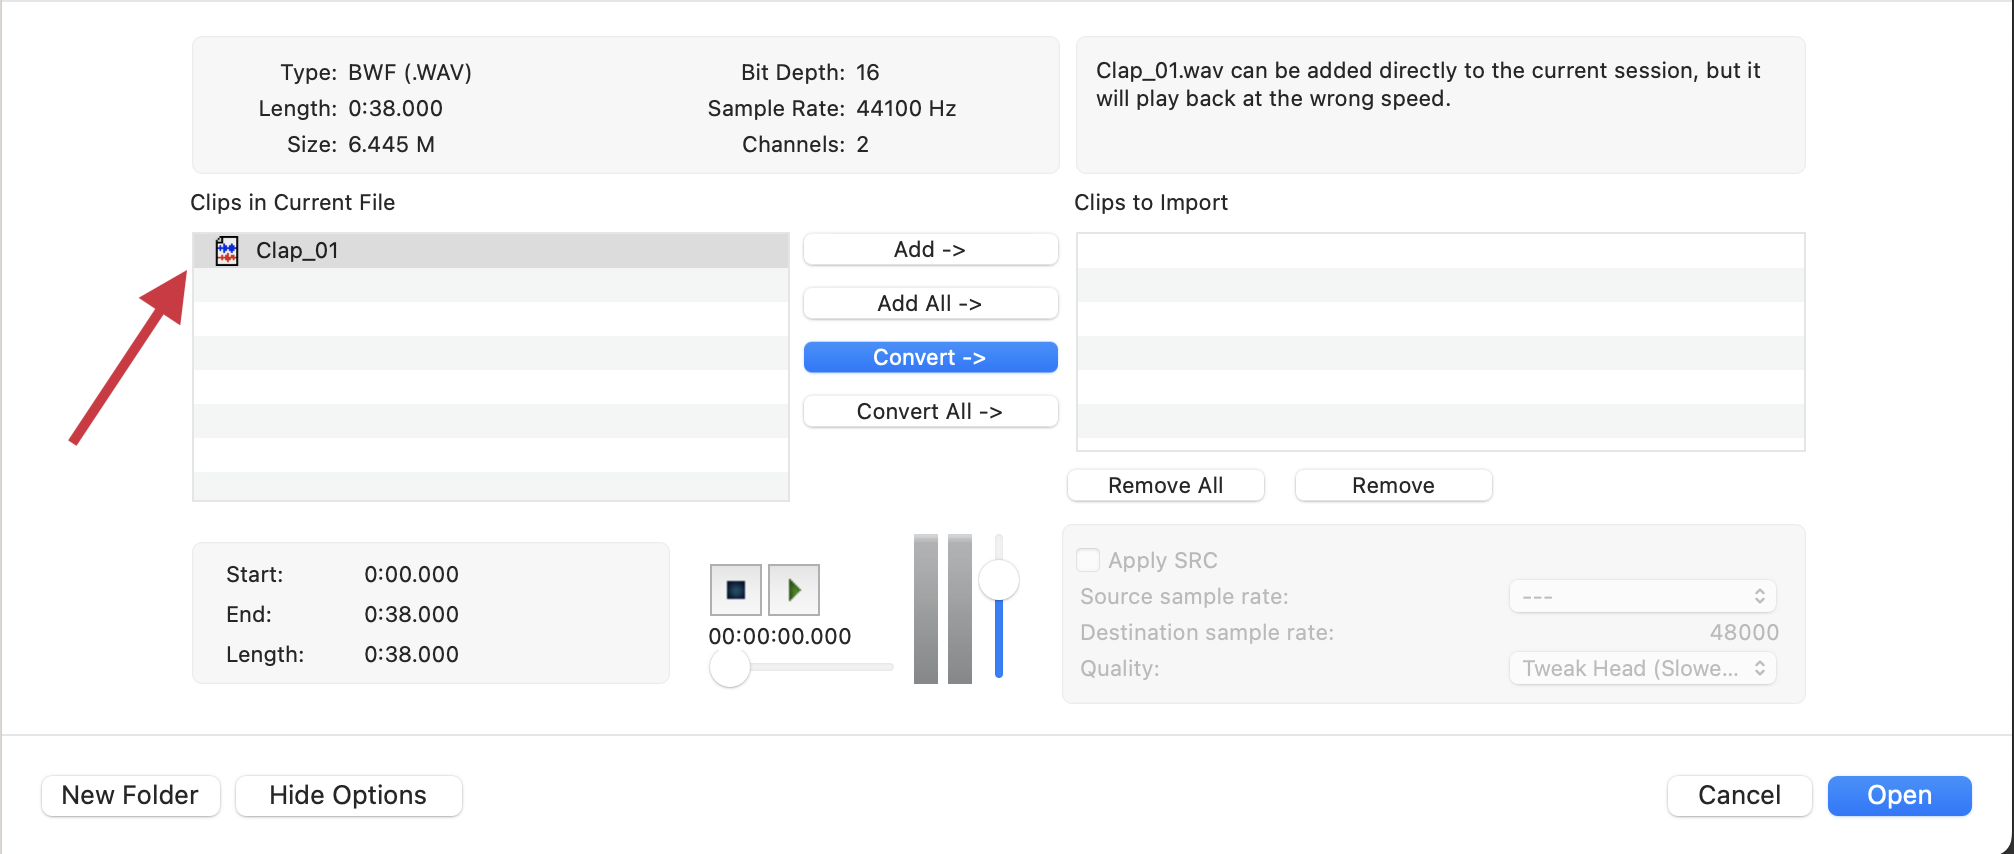
- Open the Import Audio dialogue by clicking File > Import > Audio. Alternatively, press Command + Shift + I (Mac) or Ctrl + Shift + I (Windows).
- In the dialogue, navigate to and click the file you wish to import; it should appear in the Clips in Current File box.

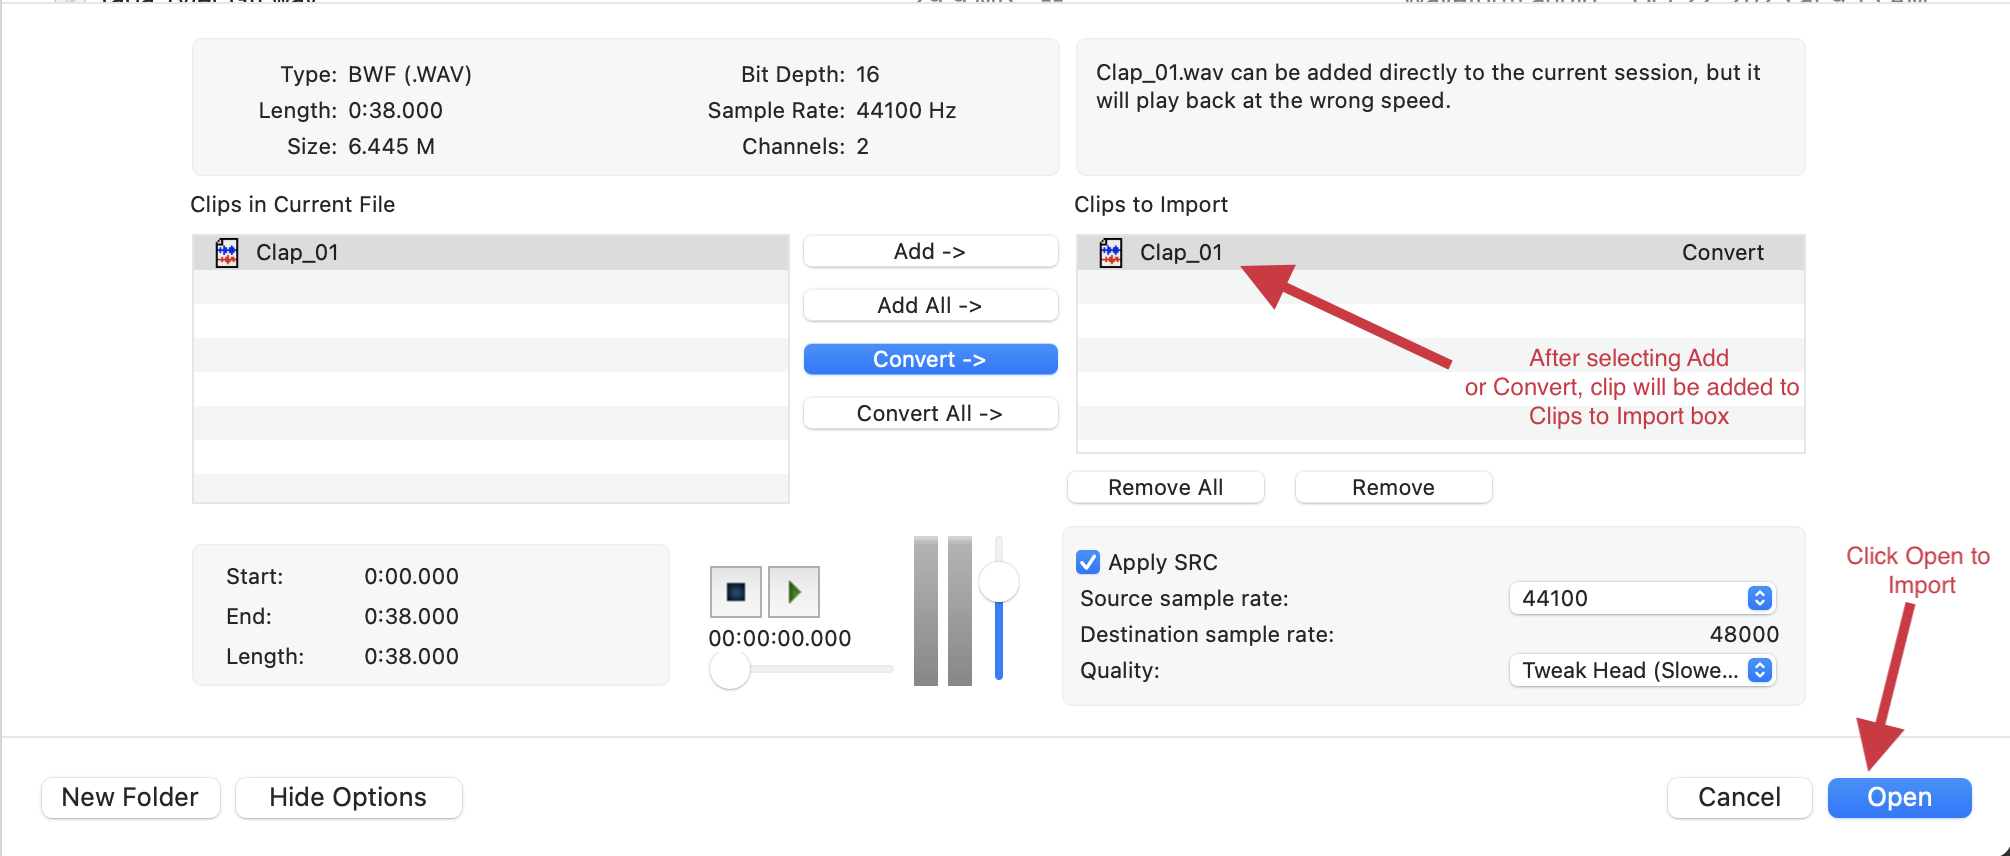
Depending on the type of file selected, you will be presented with different import options: Add, Copy or Convert, as well as each option with All added to it. In most cases, you will want to select Copy or Convert; both of these options will create a copy of the audio file and place it in the audio files folder of your Pro Tools session. If you select Add, the file will remain in its original location, which may present issues if you move your Pro Tools session to another machine.
- Select your desired import option; the file will then move to the Clips to Import box.

- Select Open; if you selected Convert or Copy, you will be prompted to choose a destination for the copied or converted file. In most cases, you will to add it to the session's Audio Files folder.
- You will then be prompted to either add the file to a new track or to the clip list, as well as the file's location in the session. In most instances, you will want to select New Track and Session Start.

