


How Ears, Speakers, and Room Acoustics Shape the Accuracy of Your Audio Mastering
The following information on music mastering is excerpted from the Berklee Online course Audio Mastering Techniques, written by Marc-Dieter Einstmann and Jonathan Wyner, and currently enrolling.
Before we embark on an exciting journey into the world of music mastering, we need to get an overview of our current workplace, learn about the tools available to us, and discover ways to optimize our environment. As any setup is only as good as its weakest links we should always know how to identify these links.
Spending some time optimizing these links is time well spent. This is something that top mastering houses all agree on, and it’s also what sets them apart from others. If you adopt this philosophy, you are paving a path to a great career, and not just in music mastering.
Weak Links in Music Mastering
There are five particular weak links in audio (including microphones for recording). In music mastering we are dealing with four of them:
- Our ears. The way sound is perceived changes with listening levels.
- Loudspeakers. The way sound is perceived can change significantly with poor speakers.
- Room acoustics. The way sound is perceived can change significantly with poor acoustics.
- A-to-D and D-to-A converters. Digital audio artifacts can significantly change the fidelity of sound.
In this article we will optimize the first three of these links. We cover converters in the 12-week version of our Audio Mastering Techniques course, where we will tie all of these links together, just like a LACE: Loudspeakers, Acoustics, Converters, and Ears.
The Ears
Let’s start by taking a brief look at the main device in audio: our ears!
How we evaluate what we hear and what we call good or bad is highly subjective. This is not the place for good or bad, but rather “how well,” objectively.
The human ear is anything but linear. Linearity is, simply put, “what goes in, comes out.” Since the two dimensions we as audio engineers are most interested in are frequency (a function of time) and level (a function of pressure when we listen, and voltage in our equipment) we need to realize how well our ears respond to an input we call sound.
Humans can hear anything in a frequency range of 20 Hz to 20 kHz, and a level range between the threshold of hearing, 0 dB SPL, and the threshold of pain at about 130 dB SPL. Beyond this point, sound becomes unbearable for humans.
When producing or mastering audio, we listen to audio at a fairly constant level: the suggested level is between about 74 and 85 dB SPL (within the green to yellow region above), for reasons we will look at shortly.
Perceived vs. Actual Loudness
You might argue that the ability to perceive sounds depends highly on an individual’s hearing abilities, making it a weak link in the art of music mastering.
In fact our hearing ability declines with age, and the upper hearing limit decreases. Frequencies above 16 kHz are affected relatively early in life. However, much more important to the audio engineer is the fact that the human ear is close to a sound pressure sensitive detector that does not have a flat spectral response. That is, it is nonlinear.
Various studies by Fletcher-Munson, Robinson-Dadson, and others conducted using large numbers of people have shown that the ears’ frequency response varies with level, as demonstrated by the measurements of equal-loudness contours: perceived loudness levels (measured in phon) are drawn as lines against actual sound pressure levels (in dB SPL) across the audible range of frequencies.
A note about phon: Phon is a unit of perceived loudness level. Though not very useful in everyday sound engineering, and therefore not used, it was proposed to come up with a unit that took the non-linear frequency response of the ears into account, as represented by the equal-loudness contours, each contour representing a certain amount of phons mapped against actual dB SPL. By definition, 1 phon is equal to 1 dB SPL at a frequency of 1 kHz.
Sound Sensitivity
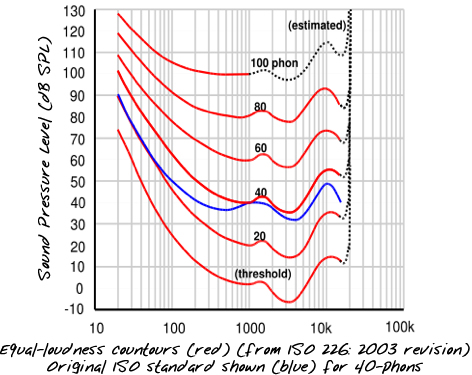
You can see from the chart above that the human ear is most sensitive between 1 kHz and 5 kHz. Its sensitivity decreases below and above this range depending on level.
Simply put, our ears are most sensitive to upper mid-range frequencies, and our sensitivity towards higher and lower frequencies decreases as the sound pressure level decreases. The louder we listen, the flatter the ears’ frequency response becomes.
83 dB SPL is the SMPTE recommended level for mixing and mastering in larger rooms, like movie theaters. At levels around 83 dB SPL, our hearing becomes flat enough to make proper judgments about low and high frequencies in our music, and low enough not to be hazardous for up to eight hours on average. 83 dB SPL may seem loud in smaller rooms, however. Find your comfort level and stick to it.
Monitoring at the Recommended Level
It is best to keep the level consistent while mixing and mastering. It allows for more reliable judgment of low and high frequencies, without causing damage to your ears.
Constantly changing listening levels during mixing or mastering is counterproductive, as you lose focus and the ability to make proper music mastering judgments.
If you have an SPL meter (some SPL-apps like SPLnFFT may suffice here), set it to dBC or flat if possible, and use the volume control until the meter at your listening position reads some 83 dB SPL. Then adjust the volume control until you feel most comfortable hearing everything loud and clear. Now look at your SPL meter again. It should ideally be no less than 70dB SPL.
Having said that, it is a good idea to listen to the end result (when you are done sweetening) at very low levels to check if you can still hear everything. If you can clearly hear the vocals, bass, and drums you have done a good job.
With experience and intimate knowledge of your monitoring environment, you will need to do this less often.
By this we mean having to check at low levels for overall clarity and intelligibility of all elements. We don’t mean monitoring levels in general. You should always set the monitoring level to the same comfort level up to some 83 dB SPL, for most music.
74-83 dB SPL is a recommended average listening level. The main point is: Choose a level you feel comfortable working at and stick to it!
Decibels in Music Mastering
As we have seen, the human ear functions quite similarly to a sound pressure detector.
In analog equipment, sound pressure has been converted to electrical pressure, which is better known as voltage.
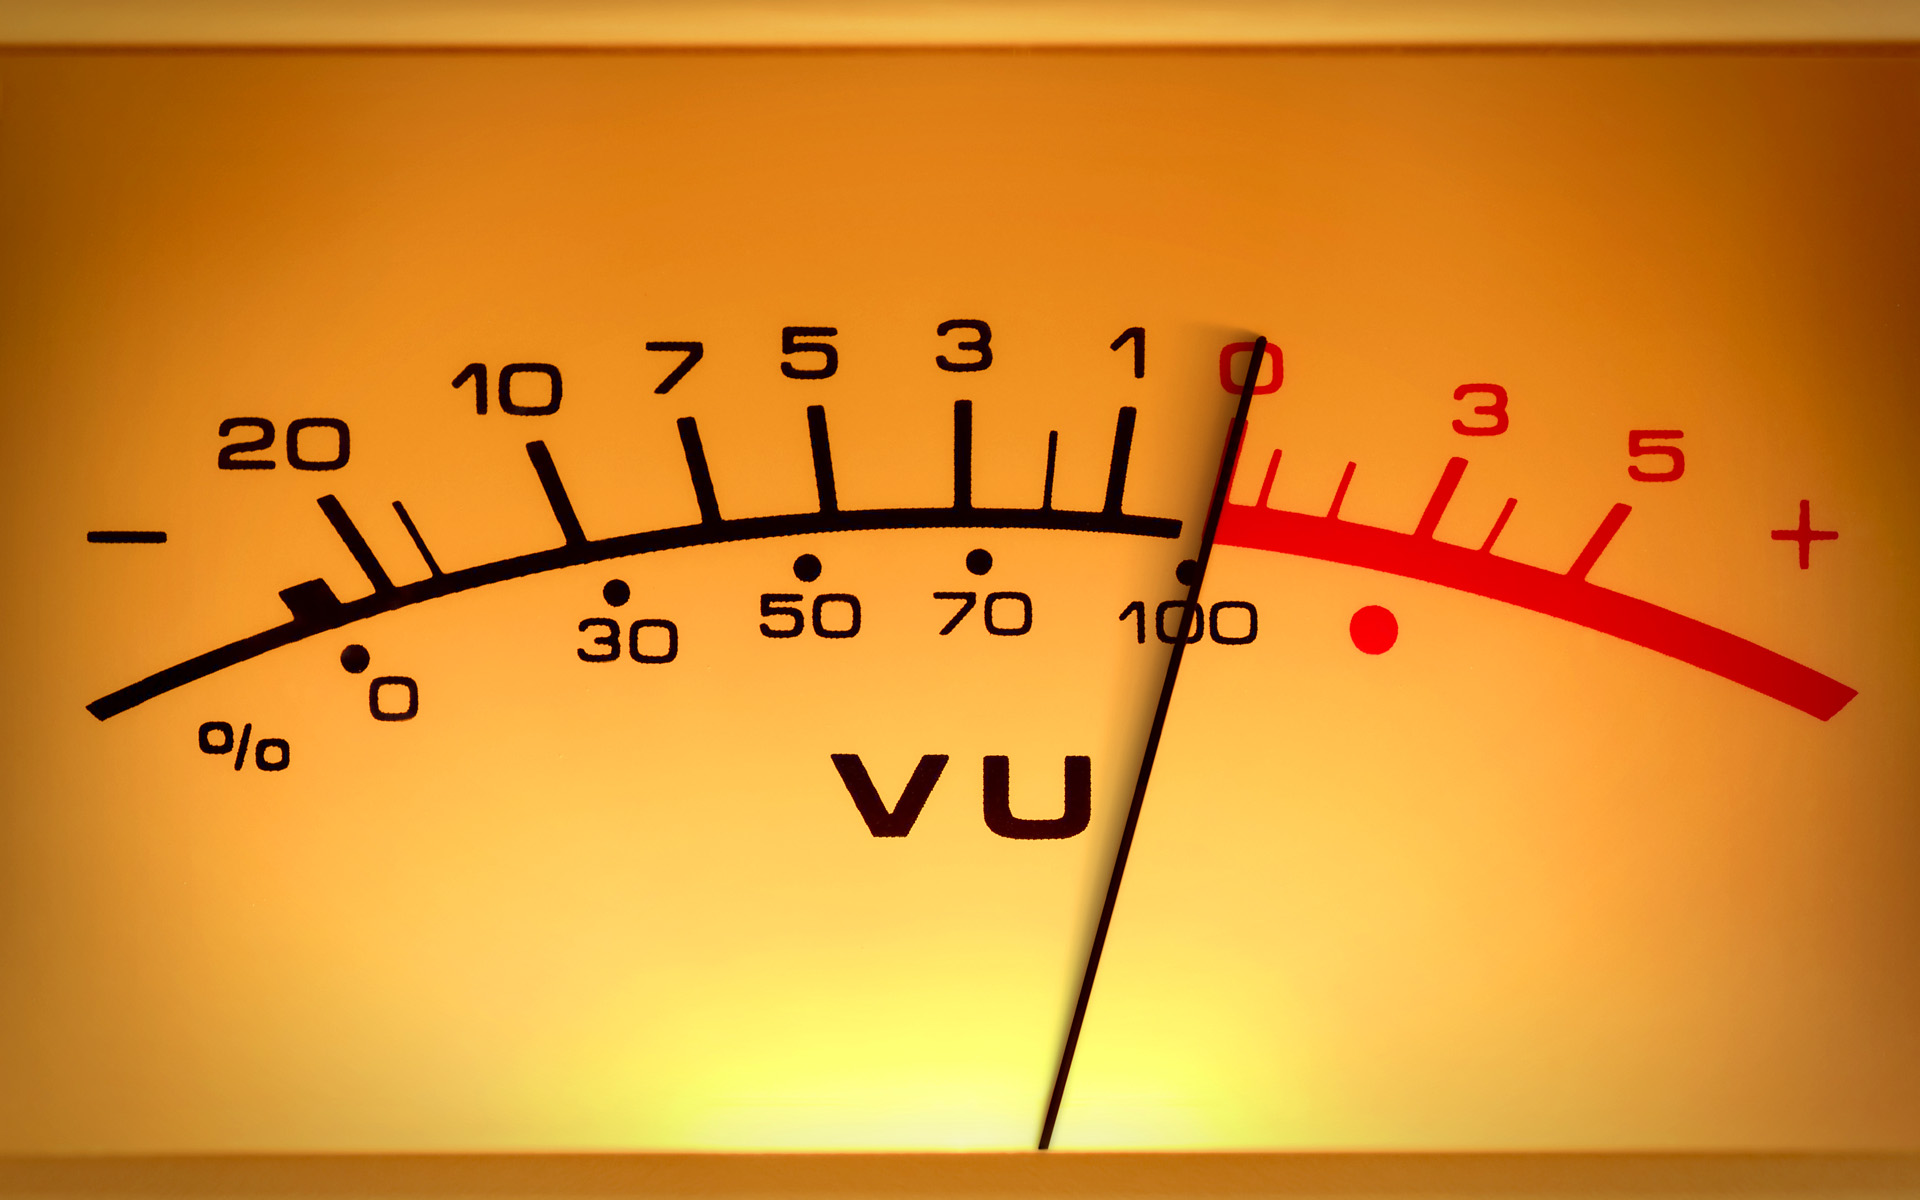
All level meters used in audio show voltage levels in dB, as almost all equipment used in recording and sound reproduction is voltage-sensitive, except for the final amplifier that drives a speaker.
Speakers are power-sensitive, thus driven by power amps.
One dB is roughly the smallest volume change noticeable if listened for carefully. One dB represents a change in pressure (in Pascal or Pa) or voltage (in Volts or V) of about 12 percent.
Three dB is a small yet noticeable change in volume (twice or half the power in Watts or W).
Six dB changes the level to twice (or half) as much pressure, or voltage, or four times the power. Generally we say +6 dB to be twice as loud, +12 dB to be four times as loud, +18 dB to be eight times as loud, etc.
10 dB changes the level to 10 times (or 1/10) the power.
20 dB represents a change in level of 10 times (or 1/10) the pressure or voltage, or 100 times the power. Generally we say +20 dB to be 10 times as loud.
Relative vs. Absolute dB Levels
0 dB is a reference point when comparing levels. Relative decibels don’t have a suffix of additional letters attached (e.g. 3 dB, dBr being the exception, where the “r” stands for “relative”). All absolute decibel levels should have a suffix attached, because that is how you can tell them apart (e.g. +4 dBu). It does not mean no level; it is a relative level. For example, “Turn it up by 3 dB!” means 3 dB up relative to whatever the current level is.
0 dB SPL, however, is an absolute level describing the threshold of hearing. Notice the suffix “SPL,” referring to 0.00002 Pa. Other absolute levels (suffixes) used for analog audio are 0 dBu, referring to 0.775 V and 0 dBm referring to 1 mW.
0 dBFS is an absolute level for digital audio describing full scale PCM, the maximum level we can encode.
Note: Depending on the A/D and D/A converters’ calibration, the standard operating level of +4 dBu may be anywhere from -20 dBFS to -12 dBFS. In other words, a D/A converter may output levels of 0 dBFS anywhere from +16 dBu (+4 dBu +12 dB) to + 24 dBu (+4 dBu +20 dB), depending on its calibration.
Threshold of Hearing
The threshold of hearing is defined as the minimum pressure difference from the surrounding atmosphere (roughly 100,000 Pa or Pascal) of about 0.00002 Pa at 1 kHz and equivalent to a sound pressure level of 0 dB SPL. The threshold of discomfort starts at a pressure of 20 Pa or 120 dB SPL.
Threshold of Pain
The threshold of pain, beyond which sound becomes unbearable for humans, is at a sound-pressure-level of 130 dB SPL. This illustrates one of the main reasons we like to use decibels.
As our ears respond logarithmically, rather than linearly, to changes in sound pressure, it is sensible to shrink the rather large spectrum of audible sound pressure (from 0.00002 Pa to 20 Pa) to a range from 0 dB SPL to 120 dB SPL!
Hearing Test Resources
You can take a hearing test online at: Online Audiogram Hearing Test
Here is an alternative: UNSW Hearing Test
Loudspeakers
The frequency response of our ears is level-dependent, as we have seen. Our ability to localize sound, however, is frequency dependent: the higher the frequency, the better our ability to tell where it is coming from.
Correct speaker placement will facilitate hearing details in our mix with proper imaging (i.e,. the spatial locations of the performers), as we shall examine next.
Does this sound familiar? You’ve been working on a mix; you are quite satisfied and excited. Maybe you even have others come listen to the mix on your system, sharing your excitement.
You make a copy of your work. As you listen to this copy on other systems, your excitement slowly turns into disappointment. It just doesn’t sound that good anymore: too much bass, undefined mids, and lack of clarity in the highs: What sounded big during the mix now sounds small.
Granted, the other speakers may seem inferior to the ones you mixed on. The way you perceive sound can change significantly with poor speakers. Remember, room acoustics and speaker systems and their placement go hand-in-hand when optimizing the monitoring environment.
Imagine you now have the opportunity to listen to your copy at a reputable mastering facility and the deficiencies of your mix are still there, probably even exaggerated.
To ensure your mix will sound good on all systems, you must optimize your listening environment. To do this we shall calibrate our speaker system, optimize the way our power amps feed our speakers and find out how and where our speakers interact with our room more reliably for music mastering.
Read: Acoustics in Music: Outdoor, Indoor, and Isolated Spaces
Graphic EQs and Monitor Types
Let’s take a brief look at graphic EQs connected to your power amps or powered monitors for correction of poor acoustics.
It is unusual to find these types of speakers in mastering rooms, as we try to keep unnecessary electronics out of our signal and monitoring paths for an uncolored sound. If a certain piece of music needs color we’ll add it; if it doesn’t, we don’t. It’s that simple. We spend more time on actually improving room acoustics than electronically compensating for poor acoustics. There are many room-corrective plug-ins, self-EQing speakers, and room-correction software products on the market. While these aren’t ideal solutions, some products like Sonarworks have become rather sophisticated, and may be used where large acoustic installations aren’t feasible.
A good approach to mastering is: use as much as necessary, but as little as possible.
What Are the Best Monitors?
Although this is a loaded question and impossible to specify a certain brand and type, we will answer this question as it pertains to the mastering studio. In music mastering studios, unlike most recording and mixing facilities, you will usually find just one set of high-resolution mid-field monitors, and mastering engineers work out of one room only, unlike most recording and mix engineers. Mastering engineers thus know their monitoring environment very well, allowing them to make proper judgments.
The final choice of speakers should never be made in a store, but ultimately in the room you work out of. It is the only place where you can properly judge what is best for you and the music you will be mastering. High resolution in this context means a ruthlessly revealing set of monitors that doesn’t color the sound. That is, the frequency levels coming out of the monitors are the same as the levels fed into them from the power amps. We call this behavior “flat frequency response.”
In reality, however, it is rather challenging and costly trying to achieve true flat frequency response across the entire audio bandwidth from 20 Hz to 20 kHz with monitors. Most speakers’ frequency responses vary around ± 2 dB. Measuring a frequency response of ±3 dB across the audible spectrum at the listening position from 20 Hz to 20 kHz is considered good.
Read: How to Set Up Multiple Studio Monitors
Subwoofers
The frequency range of most medium-size monitors with 6.5” woofers only extends down to about 60 Hz. In this case it is advised to add a subwoofer covering the lowest 1.5 to 2 octaves of the audio range down to 20 Hz. Take special care to calibrate the cut-off frequency and level of the subwoofer to best complement the medium size monitors.
Placement of the subwoofer is critical for best performance: positioning it in the middle between your monitors is often not the best place. A good place to start is closer to one of the corners. Move it around a bit, especially back and forth from the wall, until you find the best spot using your ears, if you don’t have any acoustic measurement tools. Play music you are familiar with— music where you know how it should sound—to find the right place for your subwoofer.
Subwoofer Crawl
As an alternative you could try what we call the “subwoofer crawl”: Place the subwoofer in the listening position, then loop familiar music with a repeating bass line on all speakers. Now crawl along the front wall, and find the place where you hear the most accurate and balanced bass. This is a good position to then place your subwoofer. If you are highly familiar with the sound of pink noise, use that for improved results.
In larger rooms (>3,000 ft3/85 m3) you should consider using two or more subwoofers.
Impedance
Pro-audio power amps and speakers usually have an impedance rating of 8 Ω (Ohms) or 4 Ω and should match, unless you really know what you are doing. Working with active monitors greatly simplifies matters, especially for the novice, as most of the components have been optimized to work well together, and don’t need extra speaker cables or space for the amps.
Listening Levels and Headroom
We already know that it is recommended to work at a consistent monitoring level you feel comfortable at for consistency: an average of about 83 dB SPL is suggested (Equal Loudness Contours). The monitors and power amps should have plenty of headroom, so that operating at your comfort level will only use some 10 percent of their maximum RMS or average output power, thus providing more faithful response to transients and minimizing overall distortion.
Acoustic Measurement Tools
We quantify this and say “total harmonic distortion (THD) should be less than 1 percent at 103 dB SPL” for best performance. You may find this information in the manuals that came with your monitors and power amps. Let’s just say that if your speakers produce 83 dB SPL at the listening position, and you turn your volume knob up halfway or less, you should be okay. Some mastering houses have their systems calibrated, so that an analog signal level of +4 dBu fed into their power amps produces 83dB SPL at the listener when their volume knob is set at the 1 o’clock position. They will have their power amps turned down to limit speaker strain.
If you would like to invest in some low-cost acoustic measurement tools, there are many software-based solutions available. Please note, that you will also need a calibration mic and pre-amp to use them.
Here are options for Mac and Windows:
- Mac: FuzzMeasure
- Mac and Windows for free: Carma or Room EQ Wizzard
Speakers vs. Headphones
First off, we need to emphasize that there is no “perfect” room out there. “Then why not just use headphones?” You may ask. Well …
Pros
Headphones do have a place in our daily work. They are useful:
- for final QC or quality control
- for evaluating low-frequency content if you don’t have full-range speakers
- when working in a noisy environment
- when checking and removing unwanted artifacts like clicks and pops and noise
- in particular to hear edit points more clearly
Cons
But for day-to-day mastering work headphones have a few distinct disadvantages over a proper speaker system:
- Panning and imaging is a lot harder to judge on headphones than on speakers.
- There is no real phantom image: With speakers, part of the sound coming from the left speaker is picked up by the right ear and vice versa. These interaural timing differences are what give the music depth and a more realistic sound stage. Our brains use a combination of intensity, spectral (the “shadow effect” of the head prevents higher frequencies to reach the other ear), and timing cues to determine the location of various sounds.
- Most headphones color the sound and don’t cover the entire range of audio frequencies.
- Listening to headphones for many hours is more tiring than listening to speakers
It might be the case that these days, more people are listening to music on headphones and AirPods than a set of speakers, but if the music translates well on a proper set of monitors, it is likely to sound good on headphones, not the other way round. However, if the acoustics of your room are very poor, a set of headphones may just be the answer.
Conclusion
In music mastering, the pursuit of excellence hinges upon understanding and optimizing the core elements of our craft. Our journey begins by recognizing the fragility of certain links within the audio chain and realizing that our ears, loudspeakers, and room acoustics play pivotal roles in shaping what we perceive as quality sound. Mastering this foundational trio demands adherence to recommended listening levels, appreciation of frequency response nuances, and discernment of the impact of level changes on perceived sound.
Now that you know about the weak links in audio when it comes to music mastering, and how our ears can perceive loudness differently, as well as the different kinds of speakers and monitoring options, you can start to embark on your journey through the exciting world of music mastering.
STUDY MUSIC PRODUCTION WITH BERKLEE ONLINE